• Menu
  • Skip to left header navigation
  • Skip to right header navigation
  • Skip to primary navigation
  • Skip to content
  • Skip to primary sidebar
  • Skip to footer

knotions

craft smarter

  • knitting abbreviations
  • Crochet Abbreviations
  • knitting abbreviations
  • Crochet Abbreviations
  • issues
    • current issue
      • [video] All Patterns
      • December Giveaway
      • Healthfulness: Sustain Your Knitting and Crochet
      • Designer Focus: Janine Le Cras
    • back issues
  • tutorials
    • Top Knitting Tutorials
    • Top Crochet Tutorials
    • all tutorials
    • All Knit Tutorials
    • All Crochet Tutorials
  • patterns
    • All Patterns
    • All Knit Patterns
    • All Crochet Patterns
    • shawls
    • socks
  • giveaways
  • eBooks
  • reviews
  • about us
    • knit or crochet for us!
    • our best features
    • about us
    • submissions
    • contact us
    • media kit
  • search
You are here: Home / Issues / april 2018 / tutorials / Tutorial: Sliding Stitches to Create Another Row

Tutorial: Sliding Stitches to Create Another Row

Print Friendly, PDF & Email

April 2018 //  by knotions//  Leave a Comment

Sliding stitches is a great way to add a single row of knitting in another color. It’s super-easy and the results can look more complicated than they are.

For this tutorial, you’ll need work that’s already on the needles (OTN), and a second color of yarn. The work will need to be on a circular needle or double-pointed needles (for smaller projects).

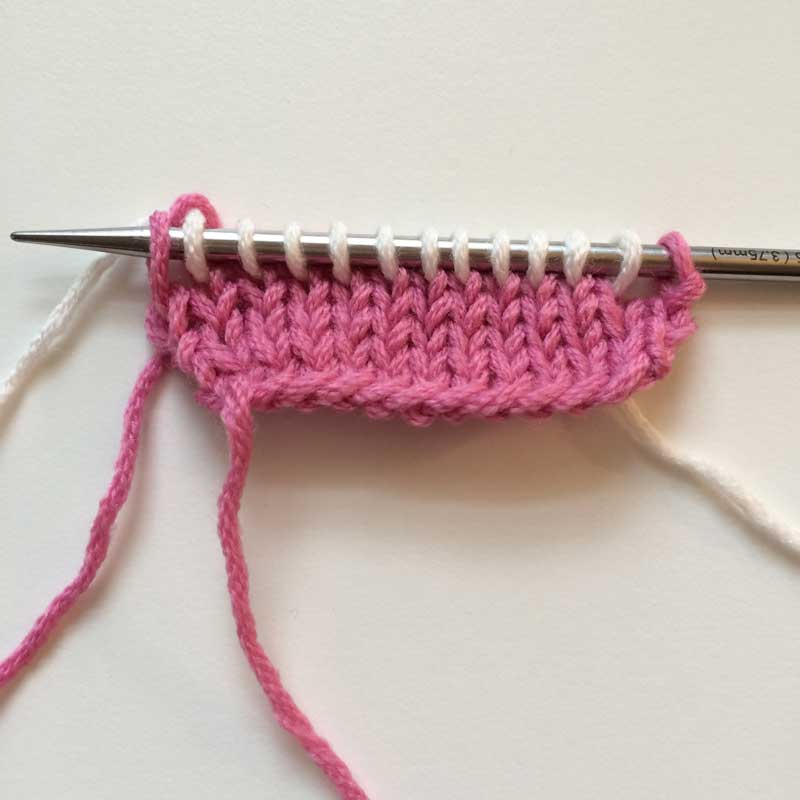
Step 1: Slide the work to the other end of the needle.

The sides that were on the right/left have now switched.

Step 2: Using the CC, work a row as instructed.

Step 3: Both yarns will now be on the same side. Turn the work.

Step 4: Work the next row as instructed in the pattern.

You’re done!

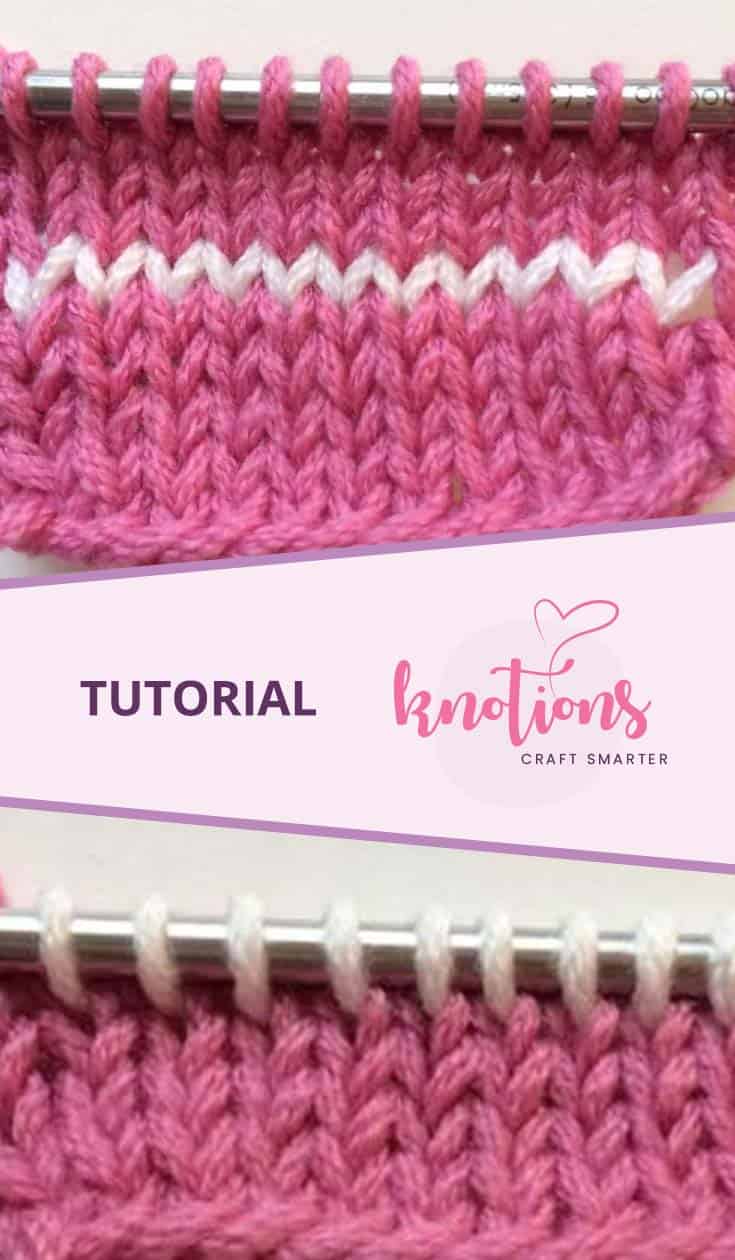
Here’s a pic after a few rows have been worked with the main color:

Related

Category: tutorials, tutorials - learn and expand your skillsTag: knit

Print Friendly, PDF & Email
Previous Post: « Tutorial: Wrapping Stitches Decoratively
Next Post: Meerjungfrau am Strand Tuch »

Reader Interactions

Leave a Reply Cancel reply

Your email address will not be published. Required fields are marked *

wp-puzzle.com logo

Primary Sidebar

please support our advertisers


Knitting Magazines

Pattern Key

Fall
Spring
Summer
Winter
Baby
Child
Men
Women
Laceweight Yarn
Fingering Yarn
Sport Yarn
DK Yarn
Worsted Yarn
Aran Yarn
Bulky Yarn
Cuff-Down
Toe-Up
Crochet
Knit

Daily Pattern Inspiration!


How To’s

[tutorial] Pick up then Knit in Garter CO or BO edge

[tutorial] Pick up then Knit in Garter on a side

[tutorial] 5 Joining Techniques (crochet)

Footer

About Knotions

Knotions is a monthly knitting and crochet magazine with knitting and crochet patterns, tutorials and monthly giveaways too!

Get Your eBook!

Site Footer

blog

Copyright © 2019 knotions · All Rights Reserved | Privacy Policy