


These socks are named after the Greek mythological character Achilles. The main focal points of this design are the chunky cables down the front and back of the leg. This is reminiscent of Achilles’ alluded only weak point; his heel…Achillea is also a flower, whose clusters of tiny blossoms remind me of the honeycomb stitch. I have always been interested in human anatomy and the way the cable follows the contours of the wearer’s ankle celebrates the amazing biological marvel that is the human foot.
These socks are knit top down with a short rib cuff, traditional slip stitch heel flap and gusset. The design features bold cables, graphic lace down the arch of the foot and a honeycomb slip stitch pattern along the leg instead of the reverse stockinette traditionally used as a background for the cable.

Tutorials
Yarn
Cascade Heritage 75% Superwash Merino Wool, 25% Nylon 437 yards/100g (400m/100g): 1 (1, 1) skein
Needles
US 1.5/2.5 mm, or needle size required to obtain gauge. Your choice of dpns, two circulars, or one long circular to work in the rnd.
Gauge
32 sts, 44 rnds = 4 inches (10 cm) over stockinette stitch in the rnd.
Size
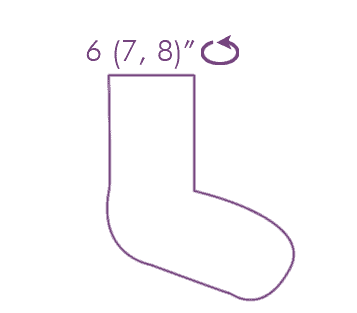
Women’s small (medium, large), 6 (7, 8) inches/15 (18, 20) cm circumference and shoe size 6 (8, 10). Choose a size with approximately 10% negative ease.
Notions
Two cable needles or additional dpns, stitchmarkers (optional)
Charts
1 Rib set up
![]()
2 First 10 rnds of leg
![]()
3 Cable/honeycomb stitch leg

4 Shaping cable into lace before heel

5 Instep

Socks Instructions
Setup
CO 58 (62, 66) sts and begin working in the rnd using magic loop method (or preferred method of small diameter knitting).
The slip stitch pattern is very stretchy, if I added more stitches for the grading the leg would be too loose, so I’ve made up for it when picking up stitches for heel.
Cuff
Work cuff according to Rib Set Up Chart for 10 rnds.
Leg
Distribute stitches on the needles as follows: 16/13/16/13 ([16/15/16/15], [16/17/16/17]) This distribution makes working the cable easier.
Work Chart 2 twice per rnd for 10 rnds
Honeycomb stitch in the round instructions:
Row 1 (Setup): P1, *yo, sl1p, p1, rep from * until 1 st rem, p1.
Row 2: YO, sl1p, *purl the yo and the slipped stitch from last rnd together, yo, sl1p, rep from * to end.
Row 3: *Purl the yo and the slipped stitch from last rnd together, yo, sl1p, rep from * until 2 sts rem, purl the yo and slipped stitch from the last rnd together.
Repeat rnds 2 and 3
Work Chart 3 twice per rnd, 6 times or until desired length.
Work Chart 4 twice per rnd. Repeat once.
Heel Flap
The heel flap is worked back and forth just on the heel sts (the back half of the sock plus one extra stitch on both the right and left side). Slip heel sts onto needle shaft; 30 (32, 34) sts. The remaining sts will not be worked during the heel flap or heel turn. With RS facing, work back and forth as follows:
Row 1: *Sl 1 purlwise, k1. Repeat from * to end.
Row 2: Sl 1 purlwise, p to end.
Repeat these 2 rows until 26 (30, 34) rows are complete.
Heel turn
Note: Sl 1= slip 1 purlwise
Always slip the first stitch of each row and knit the last stitch
Row 1: (RS) Sl1, k8, k2tog, knit 8 (10, 12), ssk, k9, turn
Row 2: (WS) Sl1, purl until 1 st left, k1, turn
Row 3: (RS) Sl1, k7, k2tog, knit 8 (10, 12), ssk, k8, turn
Row 4: (WS) Sl1, purl until 1 st left, k1, turn
Row 5: (RS) Sl1, k6, k2tog, knit 8 (10, 12), ssk, k7, turn
Row 6: (WS) Sl1, purl until 1 st left, k1, turn
Row 7: (RS) Sl1, k5, k2tog, knit 8 (10, 12), ssk, k6, turn
Row 8: (WS) Sl1, purl until 1 st left, k1, turn
Row 9: (RS) Sl1, k4, k2tog, knit 8 (10, 12), ssk, k5, turn
Row 10: (WS) Sl1, purl until 1 st left, k1, turn
Row 11: (RS) Sl1, k3, k2tog, knit 8 (10, 12), ssk, k4, turn
Row 12: (WS) Sl1, purl until 1 st left, k1, turn
Row 13: (RS) Sl1, k2, k2tog, knit 8 (10, 12), ssk, k3, turn
Row 14: (WS) Sl1, purl until 1 st left, k1, turn
Row 15: (RS) Sl1, k1, k2tog, knit 8 (10, 12), ssk, k2, turn
Row 16: (WS) Sl1, purl until 1 st left, k1, turn
Row 17: (RS) Sl1, k2tog, knit 8 (10,12), ssk, k1
Row 18: (WS) Sl1, purl until 1 st left, k1, turn
Row 19: K2tog, k8 (10, 12), ssk
10 (12, 14) sts remain.
Heel Gusset
With the remaining heel turn sts, start picking up sts along the side of the heel flap, pick up 22 (24, 26) sts.
Work across instep sts starting to follow chart 5.
Pick up 22 (24, 26) sts along the side of the heel. Work remainder of the heel sts as knit.
Work across instep sts, working with chart 5. This is the new beginning of rnd.
Shape Gusset
The shaping of the gusset is part of chart 5.
Rnd 1: Work the first stitch of the instep (chart) and the last stitch of the sole as ssk, the last stitch of the instep and the first stitch of the sole as k2tog. All sole sts are knit sts.
Rnd 2: Work even
Repeat Rnds 1 and 2 until 58 (64, 70) sts rem.
Foot
Continue working in Chart 5 until foot measures 1.6 (1.7, 2) inches/4 (4.3, 5) cm shorter than the desired length.
Toe shape
If you want a more ‘organic’ look to your toe continue working the chart during the toe shaping (top-only) until there aren’t enough stitches left to knit the ‘middle section’ of the chart.
Toe
Arrange stitches on needles so you have 15 (16,18) on the sole needles and 14 (16, 17) on the instep needles.
Sizes S and L only: Sole: K1, ssk, work to last 3 sts, k2tog, k1. Instep: Knit across.14 (16, 17) sts on each needle.
Rnd 1 (decrease rnd): Sole: K1, ssk, work to last 3 sts, k2tog, k1. Instep: K1, ssk, work to last 3 sts, k2tog, k1.
Rnd 2 (plain rnd): Work even.
Repeat rnds 1 and 2 until 36 (44, 48) total sts rem. Work decrease rnd only until 8 sts rem. [4 instep sts, 4 sole sts]
Finishing
Move sts onto two needles, two instep and two sole sts per needle. Holding N1 and N2 together, graft sts using Kitchener Stitch.
Weave in ends.
Work second sock.
 About the Designer: Fabienne Gassmann
 About the Designer: Fabienne Gassmann
I am a London based fashion and knitwear designer. Craft infuses every aspect of my life and I was one of the last generation of lucky kids to learn knitting in primary school back home in Switzerland.
After years of working in the fashion industry I have recently decided to return to my real passion and focus on developing patterns for hand knitting in line with a more gentle approach to fashion, making and dealing with material resources. As a knitter, designer and researcher I love to immerse myself in technical conundrums and enjoy unusual garment constructions, which are only possible in hand knitting.


Why is the sizing based on ankle circumference? I have never seen that before. I can figure out sizing based on the number of stitches cast on, but even though I’ve knit a lot of socks, I’ve never seen sizing so confusing before.
it was the first time i saw it too, but i left it since i’m not the be-all end-all.
i’ve asked the designer if we can change it to leg circumference because i don’t just want to make that change without checking with her.
we just changed it to circumference – no modifier. we have a lot of socks that way, and the sizes are pretty standard. we also have approximated shoe sizes too in case that helps as well.