
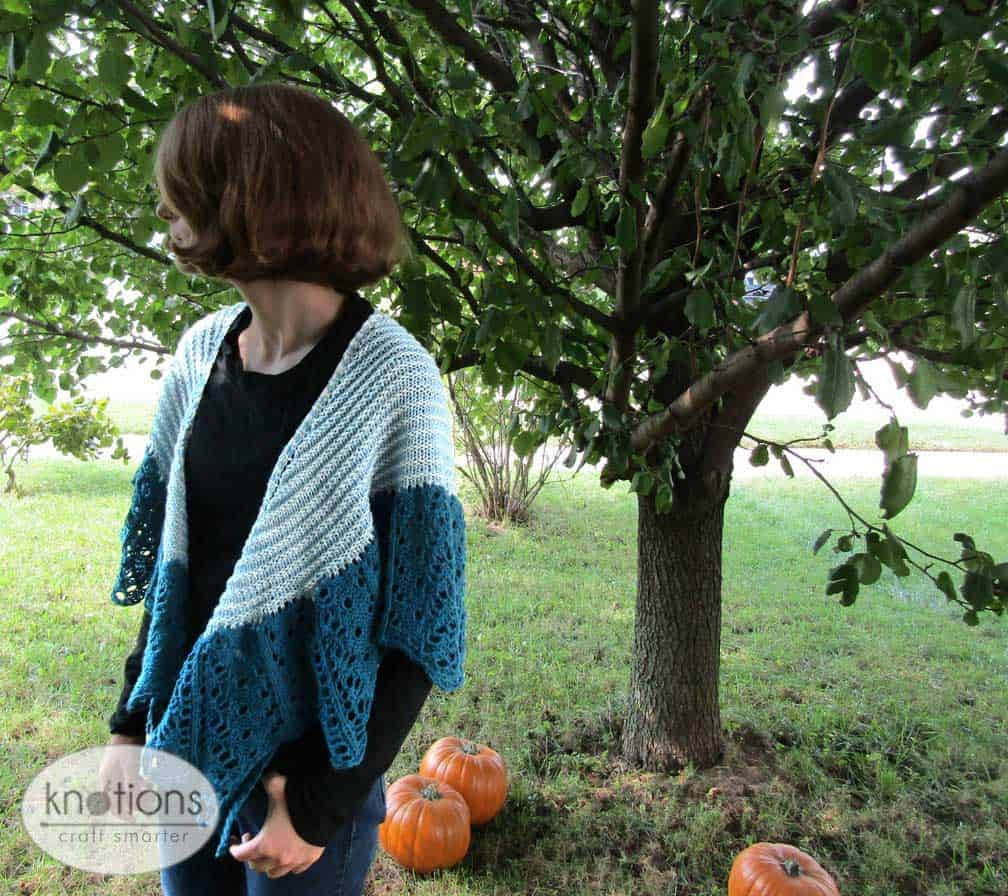
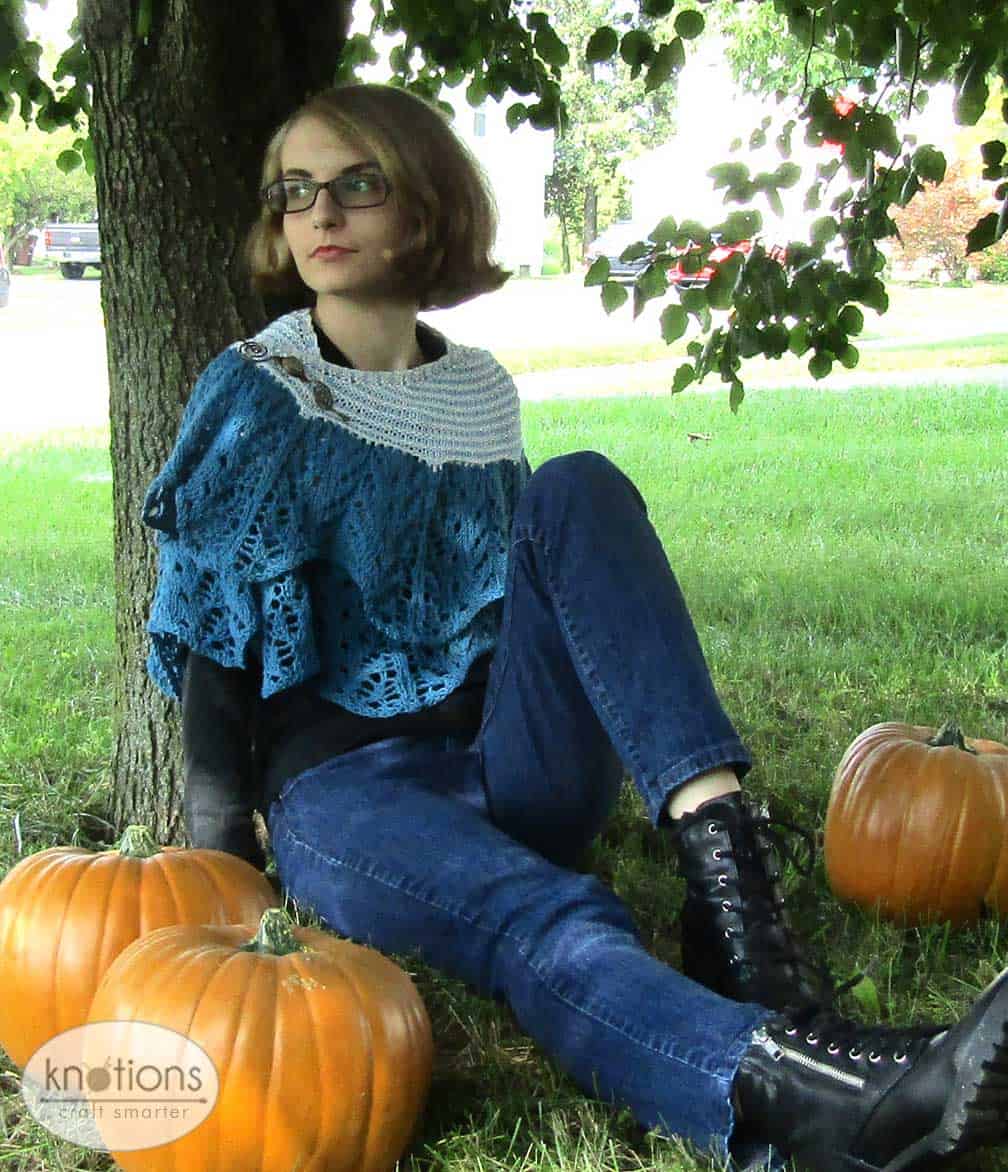
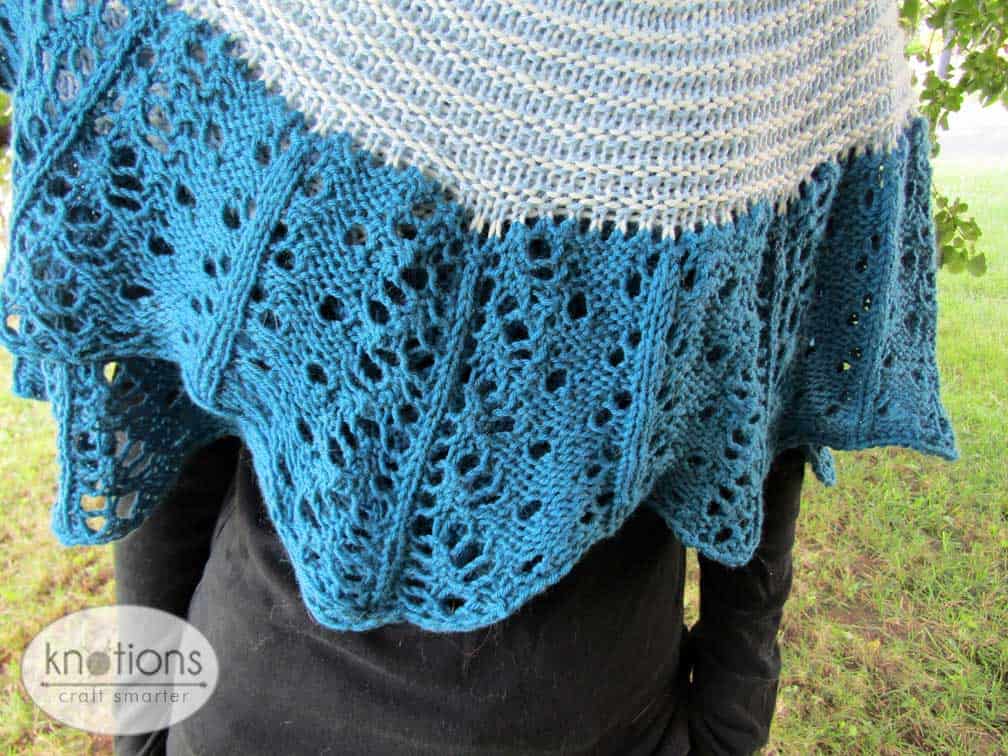
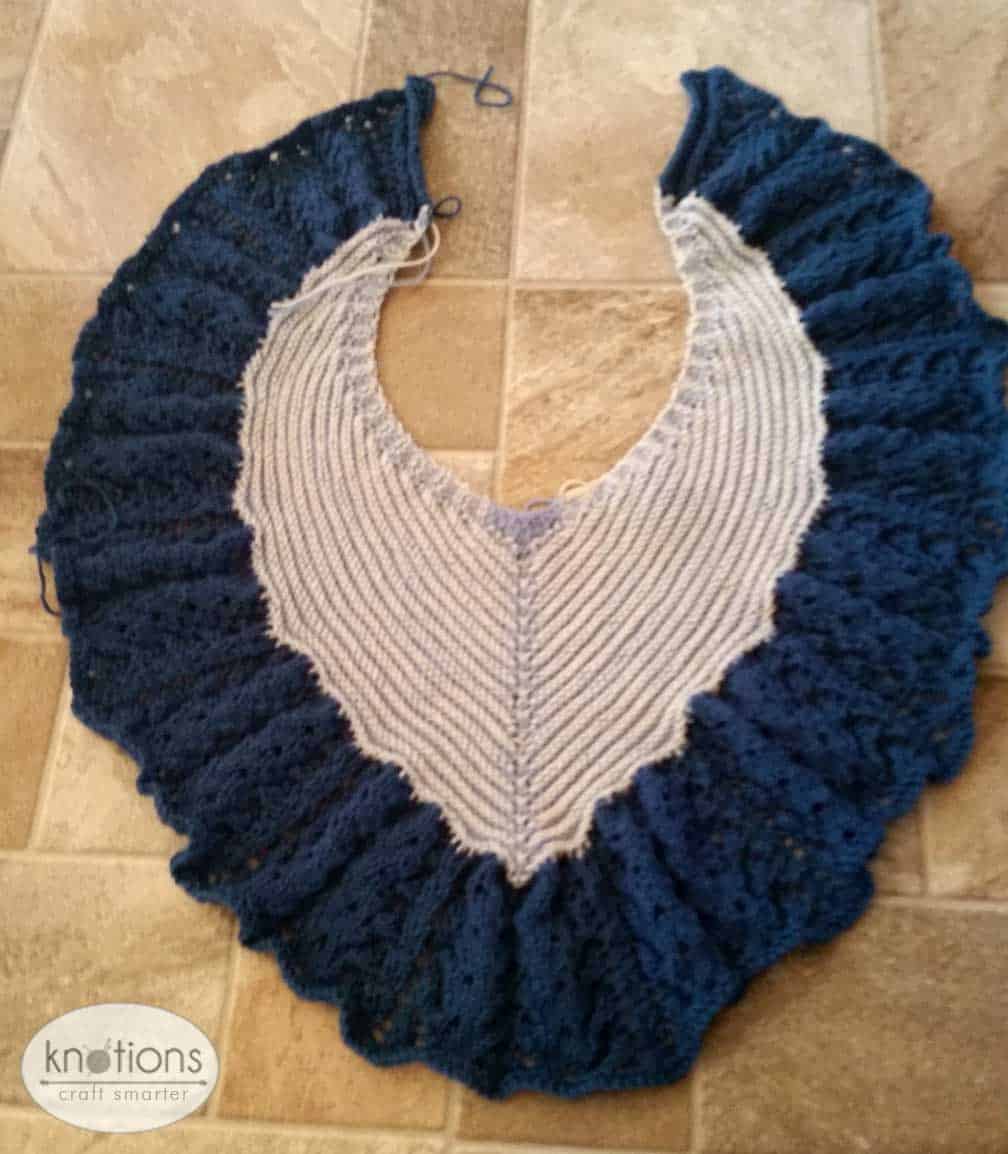
![]() Agalina is a glacier on the west side of the Antarctic Peninsula. Glaciers move two different ways: Plastic Flow involves movement within the ice itself while Basal Slip is slipping and sliding downward due to gravity. This top down heart shaped shawl starts with a garter tab and proceeds to slip and slide down to the lace border. Naomi Parkhurst, aka Gannet on Ravelry creates the most amazing stitch patterns based on words. The border on this shawl is adapted from her Iceberg Lace pattern that can be found on her blog.
Agalina is a glacier on the west side of the Antarctic Peninsula. Glaciers move two different ways: Plastic Flow involves movement within the ice itself while Basal Slip is slipping and sliding downward due to gravity. This top down heart shaped shawl starts with a garter tab and proceeds to slip and slide down to the lace border. Naomi Parkhurst, aka Gannet on Ravelry creates the most amazing stitch patterns based on words. The border on this shawl is adapted from her Iceberg Lace pattern that can be found on her blog.


Size
Depth at neck edge 19 inches [48 cm], width at widest point 45 inches [114.5cm]

Yarn
Cascade 220 Superwash 100% Wool, 220 yds [201 meters]/100 grams [3.53 ounces] MC – 1 ball, CC1 – 1 ball and CC2- 2 balls.
Sample used 50 grams of MC & CC1 and 180 grams of CC2
Needles
US 7 [4.5mm] circular needles
US 8 [5.0mm] circular needles
Circular needles are important for this design because you use both edges of them. Straight needles will not work in their place.
Notions
Smooth waste yarn for provisional cast on, large eyed tapestry needle for weaving in ends, 2 stitch markers, t-pins for blocking.
Gauge
24 sts and 26 rows to 4 inches [10 cm]
Gauge while always important is not critical to this piece, however knitter’s gauge and yarn choices will impact materials needed and finished dimensions.
Pattern Notes
- This shawl is worked top down, starting with a garter tab.
- Lace border is presented in charted form.
- For a two-tone shawl allow 50 grams (110 yds/100 meters) for your main color and 230 grams (520 yds/560 meters) of a contrasting color.
Abbreviations
Please see our standard abbreviations.
Chart
We’ve broken up the chart into 3 pieces to make it easier to print. Start with the bottom one, then work the middle one as the repeat, and the complete with the top one.

Key

Pattern
With MC, and US 7 [4.5mm] needles, provisionally CO 3 sts. Work 11 rows of garter (k every row), do not turn, pu and k 5 sts, then k3 from provisional cast on; 11 sts.
Body
Set Up Row 1: With MC: K3, yo, k2, yo, pm, k1, pm, yo, k2, yo, k3; 15 sts. Slide work back.
Set Up Row 2: With CC1 K3, yo k to m, yo, sm, k1, sm, yo k to last 3 sts, yo, k3; 19 sts.
Row 1: With MC, K3, yo, k to m, yo, sm, k1, sm, yo, k to last 3 sts, yo, k3; 4 sts inc’d. Slide work back to right edge – DO NOT TURN.
Row 2: With CC1 K3, yo k to last 3 sts, yo, k3; 2 sts inc’d. TURN.
Repeat Rows 1 and 2 31 more times; 211 sts.
Cut both MC and CC1, leaving 9 inch tails to weave in securely.
Border
Change to larger needles (US 8, 5.0mm) and CC2. Begin turning work regularly after every row (like normal).
Next Row (RS): With CC2: K3, *yo, k1 repeat from * to m, remove marker, kfb, remove marker, *k1, yo, repeat from * to last three sts, k3; 416 sts.
Following Row (WS): K 3, p to last 3 sts, k3.
Following the chart above, work charted rows 1-6, repeating outlined area 12 times, a total of 5 times. (30 rows worked)
Next Row (RS): K3, p to last 3 sts, k3.
Finishing
Bind off as follows: K 2, return both sts to the LH needle and k 2 together through the back loops, *k 1, return two sts from RH needle to LH needle and k2togtbl; repeat from * until all sts have been worked. Pull end through final st and cut yarn, leaving a 9 inch tail for weaving in.
Weave in ends and soak the piece in cool water for at least 30 minutes, block to shape and size, allowing to dry completely. Once dry, clip ends.
ABOUT THE DESIGNER – MARY E. ROSE
Mary learned to knit as a young child and it has had an impact on her life ever since. As a teen, when her friends were getting jobs at fast food restaurants, Mary worked at her LYS, where the hours and working conditions were much better. As with many knitters, when she couldn’t find patterns for what she wanted to knit, she started designing her own.
She currently lives in Central Ohio with her three children, who also craft. She can be found on Ravelry and her blog, or with knitting needles in hand, guarding her stash.


To avoid unwanted data in a printed pattern, simply copy the pattern and paste it to a blank page in your word processing program. You will have to do some light formatting, but the resultant copy is easier to read than the original with ads, and uses fewer pieces of paper. Alternatively, paste the pattern into a blank email, then print that.
TOo ha a advertizing junk on this page
I’m sorry you feel that way!
There are over 200 free patterns on Knotions and I need a way to pay the bills!