


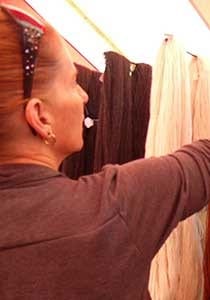
I can’t help myself. Each time I see a new colorway in a self-striping fingering weight yarn I find I have to buy it. But how many pairs of striped socks does one knitter need? This unique shawl pulls the stripes from some self-striping sock yarn in new directions, letting the colors go their own way, with a single stockinette stitch that winds around the wings and then blends in a neutral to really make those colors pop!
Subscribe and get access to ALL premium patterns!

Yarn
Lion Brand Mani Pedi (75% Wool, 25% Nylon; 219 yds [200 m]/50 g): Color Crew (MC), 4 balls.
Lion Brand Sock Ease (75% Wool, 25% Nylon; 438yds [401 m]/100g): Color #100 Marshmallow (CC), 1 ball.
Needle
Size US 2 (2.75mm) needles, 40″ (100 cm) circulars
Or size needed to obtain gauge
Gauge
22sts and 42 rows = 4″ [10cm] in garter st after blocking
Size
27” [68.5cm] from neck to bottom tip and 62” [157 cm] wide

Notions
Tapestry needle, removable stitch marker, cable needle (optional)
Abbreviations
See our standard abbreviations.
Pattern Notes
- Starting with a Mitered Diamond, wings are added to either side of the piece then the Center Body is knit from the outside in.
- When adding stitches for mitered diamonds, use a Knitted Cast On.
- Unless otherwise noted, do not cut yarn at color or direction changes.
- When color changes occur in the middle of a row twist yarns together on WS to avoid a hole.
- Gauge, while not critical, will affect final dimensions and yarn usage.
Charts
Left Side

Right Side

Shawl Instructions
With MC CO 81 sts.
Center Miter, Left Wing
*Row 1 (RS): K39, cdd, m this st with a removable m, k39 (2 sts dec).
Row 2 (WS): K39, p1, k39.
Row 3: K to 1 st bef marked st, cdd, k to end (2 sts dec).
Row 4: K to marked st, p1, k to end.
Rep rows [3-4] 37 more times until 3 sts rem.
Row 79: K3tog.
Leaving the final st on right needle, rotate work so the left edge (RS) of the miter is facing you.
Pu&k40 sts.
Set Up (WS): K to last st, p1.
Work Left Side Chart Rows 1-79 over 41 sts.
With WS facing, CO 40 sts (81 sts total).
Next Row (WS): K40, p1, k40.
Rep from * once.
Top Left Miter
Work Center Miter rows 1-79.
Cut yarn and pull through final st.
Right Wing
Starting at the bottom corner (cast on edge) of the first mitered diamond, with MC pu&k 40 sts and pu&k 1 st through the final k3tog.
*Set Up (WS): P1, k40.
Work Right Side Chart, rows 1 -80
CO 40 sts. (81 sts)
Row 1 (RS): K39, cdd, mark this st with a removable m, k39 (2 sts dec).
Row 2 (WS): K39, p1, k39.
Row 3: K to 1 st bef marked st, cdd, k to end (2 sts dec).
Row 4: K to marked st, p1, k to end.
Rep rows [3-4] 37 more times until 3 sts rem.
Row 79: K3tog.**
Cut yarn and pull through final st.
Starting at the bottom corner (cast on edge) of the last worked mitered diamond, pu&k 40 sts and pu&k 1 st through the final k3tog.
Repeat from * in right wing to ** once more.
Center Body
Leaving final st on RH needle, with MC pu&k 160 sts along long inside edge and pu&k1 st in final k3tog of first mitered diamond (center st), m with removable m, with CC pu&k 160 sts along the remainder of the long inside edge and pu&k 1 st through final k3tog.(323 sts)
Right Hand Stripe
Set Up (WS):With CC knit to center st, with MC p1, k to end.
Throughout the Center Body section, remember to twist yarns together on the WS when switching colors in the middle of a row. Lay the old yarn over the new to bind the knit fabric together.
Row 1 (RS): With MC k to 1 st bef marked st, cdd, with CC k to end. (2 sts dec)
Row 2: With CC knit to1 st bef marked st, with MC p3, k to end.
Repeat Rows [1 & 2] 9 times. (10 garter ridges)
Left Hand Stripe
*Next Row (RS):With MC k to 1 st bef marked st, cdd, k to end. (2 sts dec)
Set Up (WS):With MC k3, p to 1 st after marked st, with CC p to last 3 sts, k3.
Row 1: With CC k to 1 st bef marked st, with MC cdd, k to end. (2 sts dec)
Row 2: With MC k to 1 st bef marked st , p3, with CC k to end.
Row 3: With CC k to 1 st bef marked st, with MC cdd, k to end. (2 sts dec)
Row 4: With MC k to 1 st bef marked st, p3, with CC k to end.
Row 5: With CC k to 1 st bef marked st, with MC cdd, k to end. ( 2 sts dec)
Row 6: With MC K3, p to 1 st after marked st, with CC p to last 3 sts, k3.
Work Rows [1-6] once more, then rows 1-4.
Contrast Band
Next Row (RS): With CC k to 1 st bef marked st, with MC cdd, with CC k to end. (2 sts dec)
Following Row (WS): With CC k to 1 st bef marked st, with MC p3, with CC k to end.
Row 1: With CC k to 1 st bef marked st, with MC cdd, with CC k to end.(2 sts dec)
Row 2: With CC k to 1 st bef marked st, with MC p3, with CC k to end.
Work Rows [1&2] 8 more times.(9 garter ridges)**
Right Hand Stripe
Set Up 1 (RS): With CC k to 1 st bef marked st, with MC cdd, with CC k to end. (2 sts dec)
Set Up 2 (WS): With CC k3, p to 1 st bef marked st, with MC p to last 3 sts, k3.
Row 1: With MC k to 1 st bef marked st, cdd, with CC k to end. (2 sts dec)
Row 2: With CC k to 1 st bef marked st with MC p3, k to end.
Row 3: With MC k to 1 st bef marked st, cdd, with CC k to end. (2 sts dec)
Row 4: With CC k to 1 st bef marked st, with MC p3, k to end.
Row 5: With MC k to 1 st bef marked st, cdd, with CC k to end. (2 sts dec)
Row 6: With CC K3, p to 1 st bef marked st, with MC p to last 3 sts, k3.
Work Rows [1-6] once more then rows 1-4.
Second Left and Contrast Band
Repeat from * to ** of Left Hand Stripe and Contrast Band sections.
Cut both yarns, leaving long tails for weaving in.
Bind Off Center Body
With MC return to top right corner of Center Body and BO as follows: K2, slip 2 sts back to LH needle, *k1, ssk, slip 2 sts back to LH needle; repeat from * to end. (2 sts on LH needle).
Replace sts on RH needle, rotate piece then pu&k 95 sts along short edge, turn. (97 sts)
Left Edge Ending & Bind off
Row 1 (WS): K to last 2 sts, p2.
Row 2 (RS): Sl1, k to end.
Row 3: K to last 2 sts, p2.
Repeat Rows [2 & 3] 9 more times.
With RS facing, BO left bottom edge as follows: K2, *sl2 sts to RH needle, k1, ssk; repeat from* to end.
Rotate piece and pu&k 211 sts along one long edge, turn. (213 sts)
You will pick up 1 st in each garter ridge and 1 st in each cast on stitch of the mitered squares along the first half of the bottom edge of the shawl.
First Long Edge Ending & Bind off
Row 1 (WS): K to last 2 sts, p2.
With RS facing, BO left edge as follows: K2, slip 2 sts back to LH needle *k1, ssk, slip 2 sts back to LH needle; repeat from* until all picked up stitches have been used, replace 2 sts on RH needle.
Rotate piece and pu&k 200 sts along second long edge, turn (202 sts)
Second Long Edge Ending & Bind off
Row 1 (WS): K to last 2 sts, p2.
With RS facing, BO right bottom edge as follows: K2, slip 2 sts back to LH needle *k1, ssk, slip 2 sts back to LH needle; repeat from* until all picked up stitches have been used, replace 2 sts on RH needle.
Rotate piece and pu&k 97 sts along final short edge. (99 sts)
Second Short Edge Ending & Bind Off
Row 1 (WS): Sl1, p1, k to last 2 sts, p2.
Row 2 (RS): Sl1, k to end.
Row 3: As Row 1.
Repeat Rows [2 &3] 9 more times.
With RS facing, BO final short edge as follows: K2, *sl 2 sts back to LH needle, k1, ssk; repeat from* until 2 sts are unworked on LH needle, sl 2 sts back to LH needle, K2.
With WS’s facing, graft remaining 4 sts together.
Finishing
Weave in ends and block to finished dimensions.
Subscribe and get access to ALL premium patterns!
About the Designer: Mary E. Rose
Mary learned to knit as a young child and it has had an impact on her life ever since. As a teen, when her friends were getting jobs at fast food restaurants, Mary worked at her LYS, where the hours and working conditions were much better.
As with many knitters, when she couldn’t find patterns for what she wanted to knit, she started designing her own.
She currently lives in Central Ohio with her three children, who also craft. She can be found on Ravelry and her blog, or with knitting needles in hand, guarding her stash.


Leave a Reply