A Hunter’s Bend is another knot that can be used for a join.
Like the Magic Knot, you can trim the tails all the way to the end – meaning no tails to weave in!
Materials
- Old Yarn
- New Yarn
- Two Hands
- Scissors
Again – no darning needle!
USES
- Knitting or crochet
- Not great for precise color changes but it can be done. Once you get the hang of this you’ll have a much better idea where the knot will land.
- Not for super-bulky yarn because it does create a knot – and with that you’ll get some extra yarn in the space where the knot is.
- I haven’t tried it on laceweight yet but I suspect that it’s possible but more difficult because the strands might become unruly. I’d likely try the Magic Knot first.
Method
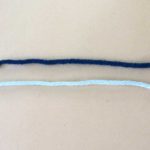
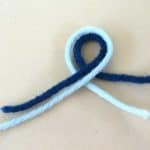
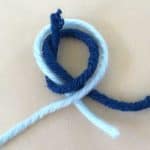
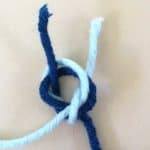
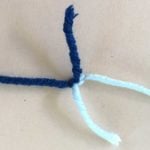
Ok, let’s get started
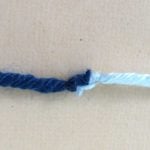
And here it is all done after a few rows have been knitted:
It’s another secure join when connecting two yarns together. This knot is a bit larger than the Magic Knot and I recommend you put the knot at the back of the work. This may take some finessing to do (knitting a few stitches more loosely or more tightly) but it’s definitely possible and creates a join that makes NO ENDS to weave in.
I suggest you try this out with some scrap yarn of two different colors on a swatch. The two different colors will really help you distinguish which yarn is which. After a bit of practice you’ll be tying Hunter’s Bends like it’s old hat.


If the tails are on the inside and will never show, I never trim them or weave them in, no matter how I join the yarn. I like having that safety net of some extra yarn at a join just in case it should come undone. At least there’s something to work with to make a fix. I’ve never had a knot pull through to the right side and never had ends pull through either. Just leave the tails. Don’t trim to the knot. Knots can and sometimes do come loose with the wear and tear of use.
I’m not sure what you’re saying. I don’t know if it’s like the knot from the mill but I’d guess no since it doesn’t budge. I find the knots from the mill do.
This looks like the kind of knot you get from the mill, when you find them in the middle of a skein.
i’m glad the blog post’s pictures work, as they didn’t come through in the email version. it just skips from “Ok, let’s get started.” to “And here it is all done…”.
Glad you got them! Let me know if you have any questions. This join can be hard to work at first so I definitely suggest trying it out with scrap yarn.