Yarn
Yarn in 3 colors. I used yarn Catona by Scheepjes in shades 261, 282, 392 (or 157, 179, 172)
Needles
Crochet hook 2.5 mm (C) or size needed to obtain acceptable gauge. (Please, feel free to choose another yarn weight and hook to get larger or smaller potholder).
Size
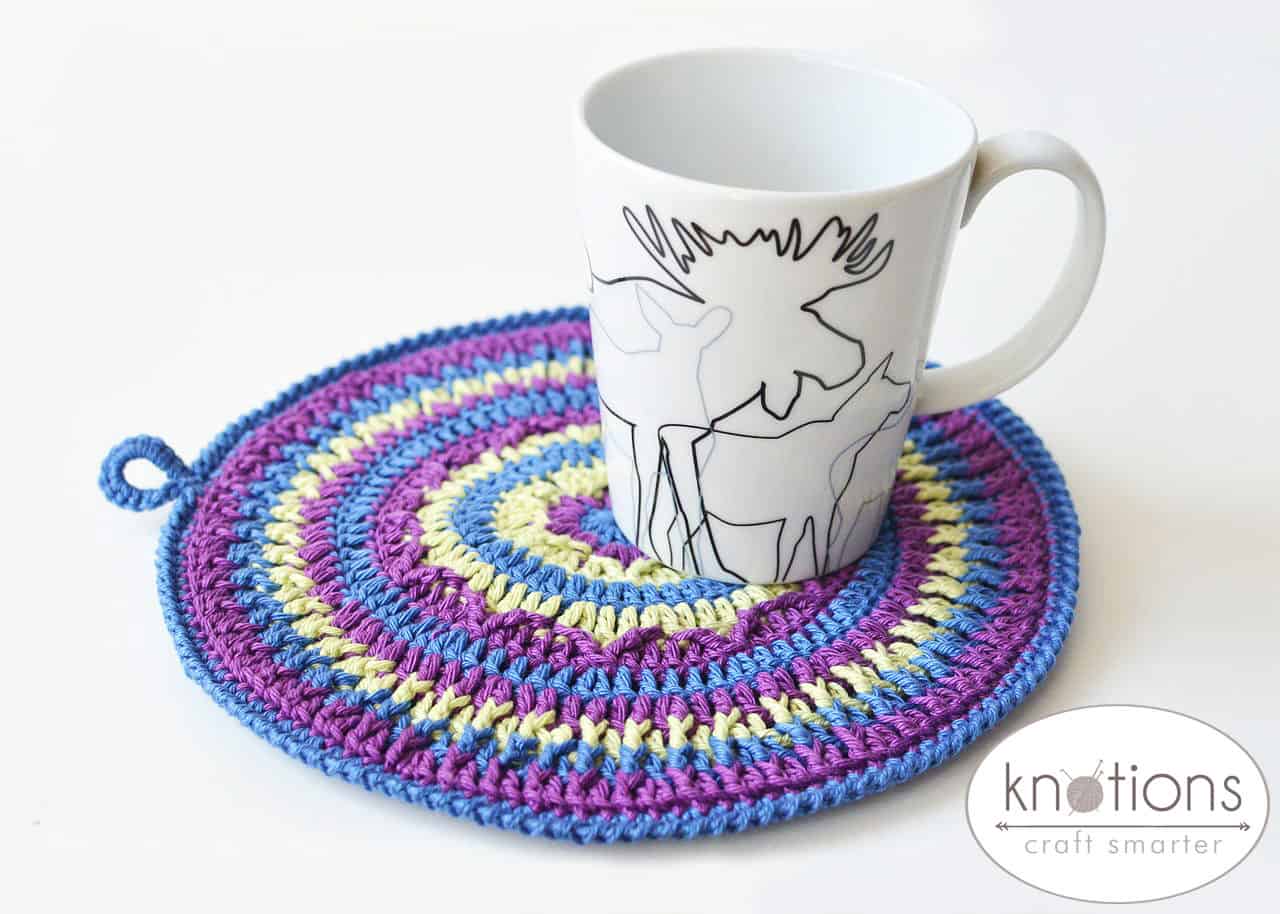
Potholder is approx. 7 ¾ inches(19.5 cm) large across.
Gauge
Not critical but mandala should lay flat.
Notions
Scissors, tapestry needle to weave in ends.
Stitch guide and Abbreviations
US standard abbreviations are used in this pattern.
rnd – round
beg – beginning
st(s) – stitch(es)
ch – chain
sp(s) – space(s)
yo – yarn over
lp(s) – loop(s)
NJ – needle join
*…* – *crochet following directions* as many times as indicated
[…] – [crochet following directions] as many times as indicated
slst (slip stitch) – insert hook in indicated st, yo, draw yarn up and pull 2nd lp through the 1st lp on hook.
dc (double crochet) – yo, insert hook in indicated st, yo, draw up a lp, *yo, pull through 2 lps* twice.
FPdc (front post double crochet) –yo, insert hook from front to back to front around the post of indicated stitch, yo, draw up alp, *yo, pull through 2 lps* twice.
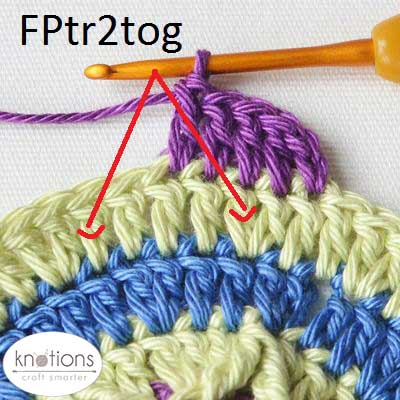
FPtr2tog (front post treble crochet 2 together) – *yo twice, insert hook from front to back to front around the post of indicated stitch, yo, draw up alp, [yo, pull through 2 lps] twice* twice, yo, pull through all 3 lps on hook.
Important Notes
- Attaching new yarn.New yarn is attached by simply pulling a loop of new color in the indicated st and making ch2, which will count as first dc of the rnd.
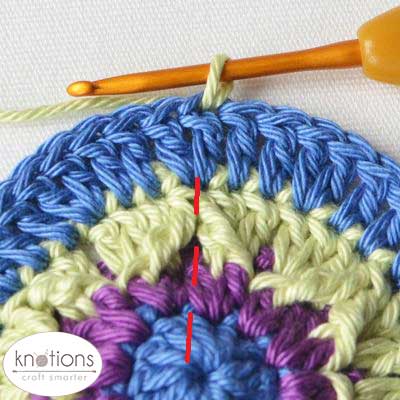
- Skipping sts.Front post stitches “hide” the stitches of background and this is the reason, why sc of the working round should be skipped.
- Needle join.The rnds are finished with a needle join (NJ) in the first st of the rnd (unless otherwise stated in the pattern). I use a hook instead of a needle to join, it saves a lot of time. (I also use a hook to weave in all yarn tails).
- Fasten yarn off leaving a long tail approx. 4 inches (10 cm). Insert hook under “V” (both loops) of the indicated st from the back to front, yo the yarn tail and pull it through lps.
- Insert hook under BL of the last stitch of the last rnd from back to front, yo the yarn tail and pull it through BL.
If you use this technique, you give the chain stitch at the beg of the rnd its BL and FL. Weave in the end and clip it close to the surface of the piece. Please, read more information about needle join and weave in yarn tails as-you-go on this blog post.
- Front post stitches are used in this pattern and it is very important to have their gauge under control: they should be neither too loose nor too tight, because this will lead to a deformation of the circle shape. Correctly tensioned front post stitches should be made to the height of the working round. And your mandala should stay flat!
- Inserting the hook.When you make a front post stitch, the hook is always inserted from front to back and then again to front around the post (vertical part) of the indicated stitch. In other words, the hook will be inserted behind the post.


Instructions
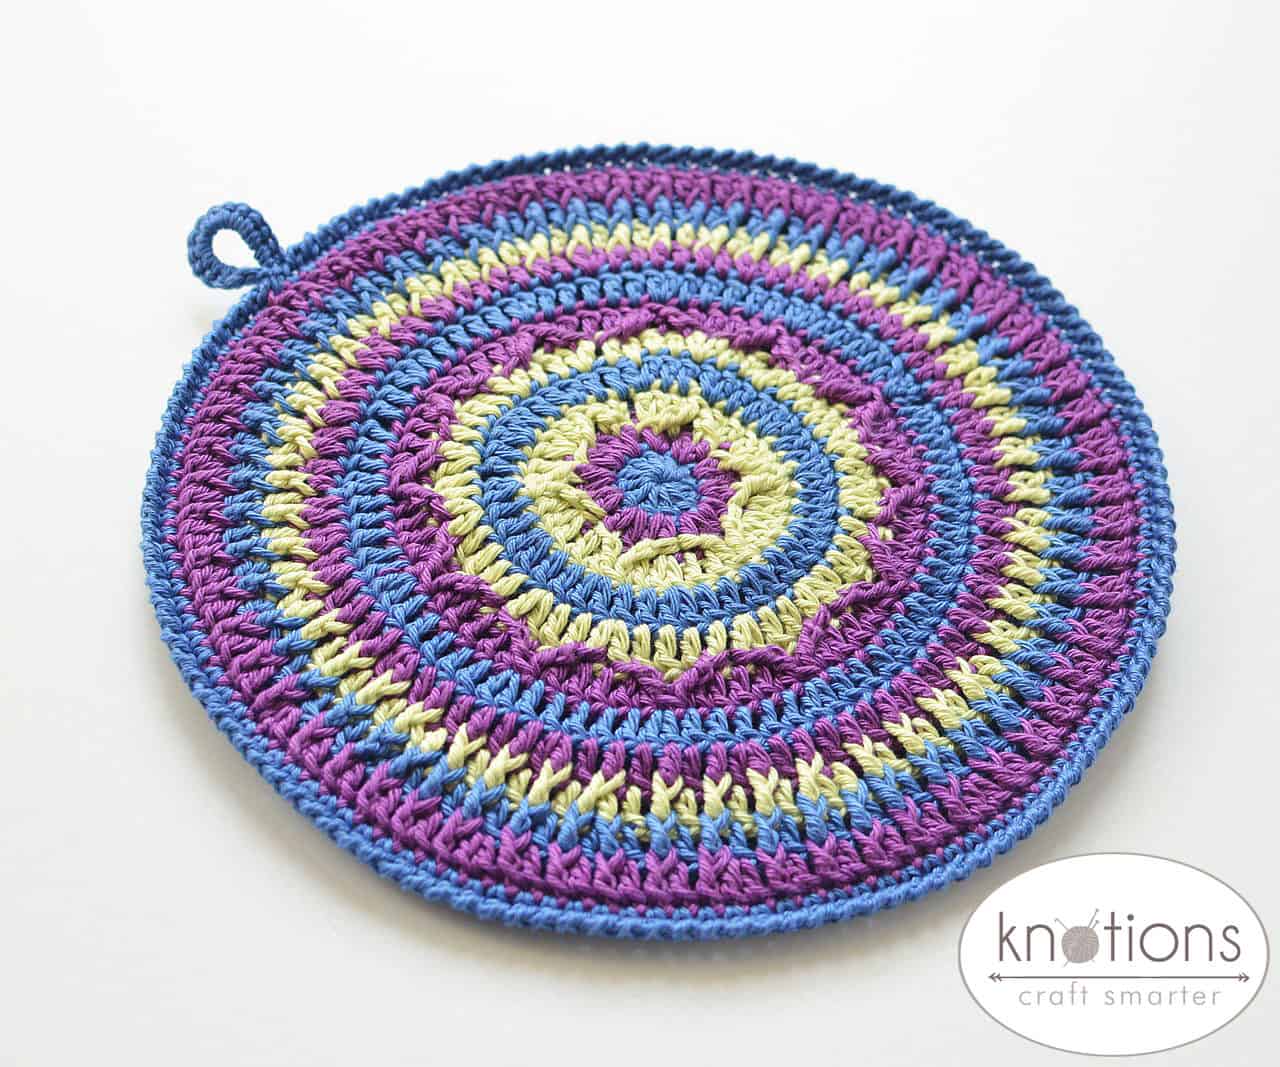
Color Key: C1 – Blue (261 – 6g), C2 – Purple (282 – 13g), C3 – Lime (392 – 6g)
Mandala part:
Rnd 1. Start with yarn C1.
Make magic ring, ch2 (counts as 1st dc) and 11 dc in magic ring; NJ in the 1st dc after ch2. (12)


Note: 1st increase of the rnd will be ch2+dc in the same st where yarn was attached.
*2dc in each st* 12 times, NJ in 1st dc of the rnd after ch2. (24sts)


*1dc in next 2 sts (1st dc of the rnd will be ch2), 1FPtr2tog (work 1stFPtr around 1st dc of previous increase of rnd 2, skip 2 dc and make 2ndFPtr around next dc), skip no sts on rnd 2, 1dc in next st, 2dc in next st* 6 times; NJ in 1st dc of the rnd after ch2. (36sts)


Note: 1stincrease of the rnd will be ch2+dc in the same st where yarn was attached.
*2dc in next st, 1dc in each of next 2 sts* 12 times, NJ in 1st dc of the rnd after ch2. (48sts)


*1dc in each of next 2 sts (1st dc of the rnd will be ch2), 2dc in next st, 1dc in each of next 4 sts, 2dc in next st* 6 times, NJ in 1st dc of the rnd after ch2. (60sts)
Note: 1st leg of 1st FPtr2tog is made around 2nd dc of previous increase of rnd 5.
*1dc in each of next 5 sts, 1FPtr2tog (work 1stFPtr around next dc of rnd 5 after the st where previous FPtr was made, skip 3 dc, make 2ndFPtr around next dc), skip no sts on rnd 5* 12 times, NJ in 1st dc of the rnd after ch2. (72sts)


Note: 1st increase of the rnd will be ch2+dc in the same st where yarn was attached.
*2dc in next st, 1dc in each of next 5 sts* 12 times, NJ in 1st dc of the rnd after ch2. (84sts)
Rnd 8.Change to yarn C2. Attach yarn in 2nd dc of any increase of rnd 7.
*1dc in each of next 3 sts (1st dc of the rnd will be ch2), 2dc in next st, 1dc in each of next 3 sts* 12 times, NJ in 1st dc of the rnd after ch2. (96sts)
Rnd 9.Change to yarn C3. Attach yarn in 2nd dc before any increase of rnd 8.
*[1dc in next st (1st dc of the rnd will be ch2), 1FPdc around next dc] 4 times, 1 dc in same dc* 12 times, NJ in 1st dc of the rnd after ch2. (108sts)


*1dc in next st (1st dc of the rnd will be ch2), (1FPdc, 1dc) in next st, [1FPdcaround next FPdc, 1 dc in next dc] 3 times, 1FPdc around next FPdc* 12 times, NJ in 1st dc of the rnd after ch2. (120sts)


Note: 1st increase of the rnd will be ch2+dc in the same st where yarn was attached.
*2dc in next st, 1FPdc around next FPdc, [1dc in next dc, 1FPdc around next FPdc] 4 times* 12 times, NJ in 1st dc of the rnd after ch2. (132sts) Cut yarn.
 Bottom layer and joining


(28g of yarnC1)
Note: don’t forget to make ch2 instead of 1st dc in the beginning of every round.
Rnd 1.Make a magic ring, ch2 (counts as 1st dc) and 11dc in magic ring, join with slst in ch2-sp. (12sts)
Rnd 2. *2dc in the next st* 12 times, join with slst in the ch2-sp. (24sts)
Rnd 3.*1dc, 2dc in next st* 12 times, join with slst in the ch2-sp. (36sts)
Rnd 4. *1dc, 2dc in next st, 1dc* 12 times, join with slst in the ch2-sp. (48sts)
Rnd 5. *2dc, 2dc in next st, 1dc* 12 times, join with slst in the ch2-sp. (60sts)
Rnd 6. *2dc, 2 dc in next st, 2dc* 12 times, join with slst in the ch2-sp. (72sts)
Rnd 7. *1dc, 2 dc in next st, 4 dc* 12 times, join with slst in the ch2-sp. (84sts)
Rnd 8.*4dc, 2dc in next st, 2dc* 12 times, join with slst in the ch2-sp. (96sts)
Rnd 9. *2dc, 2dc in next st, 5dc* 12 times, join with slst in the ch2-sp. (108sts)
Rnd 10. *6dc, 2dc in next st, 2dc* 12 times, join with slst in the ch2-space. (120sts)
Rnd 11. *3dc, 2dc in next st, 6dc* 12 times, join with slst in the ch2-space. (132sts)
Joining
To join top and bottom layers of the pot holder put wrong sides facing each other. Work joining rnd in C1 (with sc) on the right side of top part inserting your hook through both lps on the last rnd of both layers.
You can also make a loop while putting your potholder together: continue with sc until you come to the point of any petal, chain 10 and sc into the same stitch of joining round, forming a loop. Continue with the joining rnd until the end, finish with a slst in the first sc of joining rnd, don’t fasten off. Return making a rnd of crab stitch. When you reach the ch10-space, turn work, make 15 sc in the loop, turn work and continue with crab stitch until the end of the round. Cut yarn, fasten off.
About the Designer
 Hello! My name is Tatsiana. I am a designer of crocheted home accessories and toys behind Lilla Björn Crochet. “Lilla Björn” means “little bear” in Swedish. I am not from Sweden… But I love cold and gray sea, fresh windy air, and I like to crochet little bears. I enjoy creating new things, combining colors and drawing with yarn. I can spend long hours learning new techniques, and overlay crochet is my beloved at the moment. It is amazing that you can actually recreate everything in crochet using this technique!.. And I can also talk about that for hours! Please, check my work, designs and free patterns on my blog lillabjorncrochet.com.


This was terrific, thanks so much. I made a set in rainbow colors for my brother who is a yoga teacher and he loves them!
They sound great! Rainbow makes it even better 🙂
Do you happen to have a pic?
Hello – beautiful pattern using stunning colours. No problem printing pattern with both text and pictures.
Thank you.
Thank you! And I’m glad you printed the pattern without a hitch 🙂
Why can I not save the photos with the pattern? The great thing about Tatsianas patterns in the pictures in the tutorial.
You should absolutely be able to. What are you doing? I’m curious what is preventing you.
I attempted to copy and paste the tutorial into Evernote on my iPad, like I do with other tutes. The pics did not save, only the text. I was only able to save the images and paste each tiny photo, one at a time, into the text I had saved. Very tedious, unlike any other webpage I’ve come across. The PDF version had no images appear at all. It is unlike any of Tatsianas previous free patterns, which save the pics with the text together. I hope they won’t be in this form from now on! Her photos are always spot on and make the instructions so completely clear…I love her patterns, and have bought many of them.
Sorry , realy dont konw why this hapens to you. I think you should go to the original page
https://knotions.com/pattern/northern-lights-mandala-lilla-bjorn-crochet/
Now that there”s np more space problem of space on the web, WHY USE ABBREVIATIONS. Moreover as we’ré reading from all over the world it’really difficult! But thanks for the pattern it’s beautyfulllllll. Antonella
Hi Antonella – thanks for your comment. We use abbreviations because they’re a common way to express a pattern. I’m sorry that you don’t find them readable. It’s hard to find a single way that works for *all*.
just beautifull