You’ll find this stitch used in lots of places if they need a bit of decoration or, like in this month’s pattern for the Malo Cowl, as a way to transition from one color to the next.
How to Knit the Smock Stitch
For the purposes of this tutorial, we’ll assume it’s 3 rows between the slipped stitches and when you’ll pick that middle stitch up, and you’re slipping 7 sts. But the exact amount will depend on your pattern, the stretchiness of your yarn and the thickness of your yarn.
This tutorial will teach you how the smock stitch works even if your exact numbers are different.
As always, follow the instructions contained in your pattern.
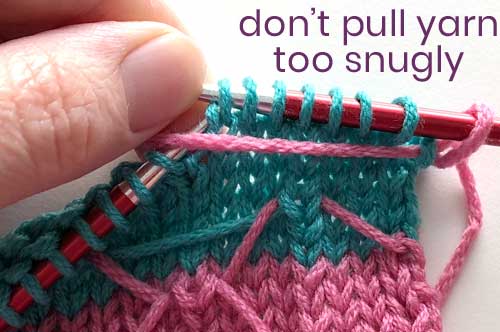
smock1 – Stranded smocked stitch: Slip 1 st knit wise to right needle, transfer back to left needle. Using right needle pick up horizontal strand created by the yif of sl sts 3 rnds below and place in front of stitch on left needle; k first st and strand together through the back loop.
Smock1 is our abbreviation for this stitch, but we’ve seen it abbreviated in a variety of ways. There doesn’t seem to be a standard abbreviation for the smocked stitch.
Rnd 1: *K1, sl7 sts pwise wyif, bring yarn to back; rep from * until 1 st rem, k1.
Rnds 2-4: Knit across.
Rnd 5: K4, *smock1, sl7 sts pwise wyif, bring yarn to back; rep from * until 4 sts rem, k4.

Rnd 6-8: Knit across.
Rnd 9: K1, *sl7 sts pwise wyif, bring yarn to back, smock1; rep from * until 1 st rem, k1.

Repeat rnds 2-9
After you’ve worked a couple repeats, it will look like this:

Try It for Yourself
Our free pattern for the Malo Cowl is an easy way for you to try out this stitch and get familiar with it. Give it a try! It would work equally well in a variegated hand-dyed yarn.


Leave a Reply