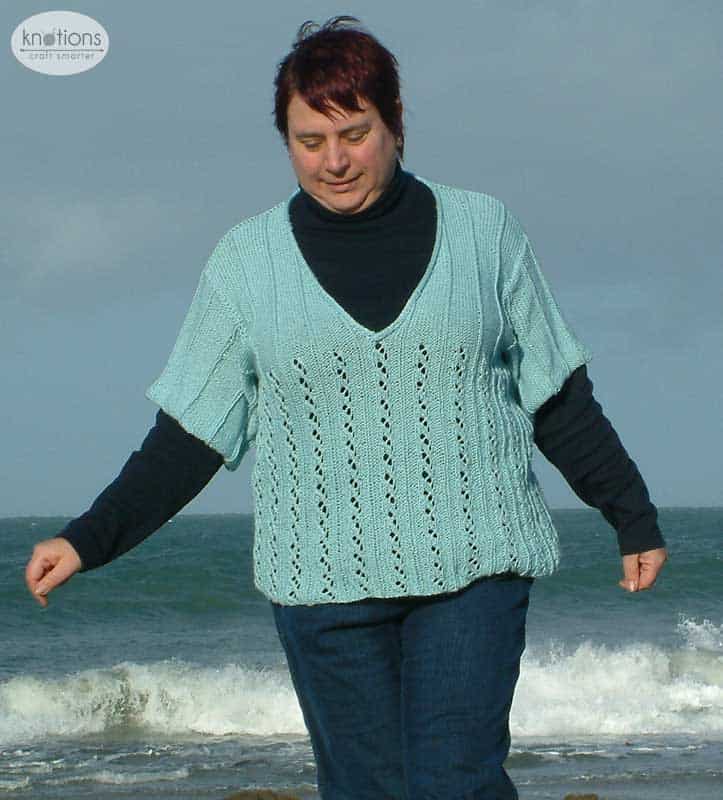
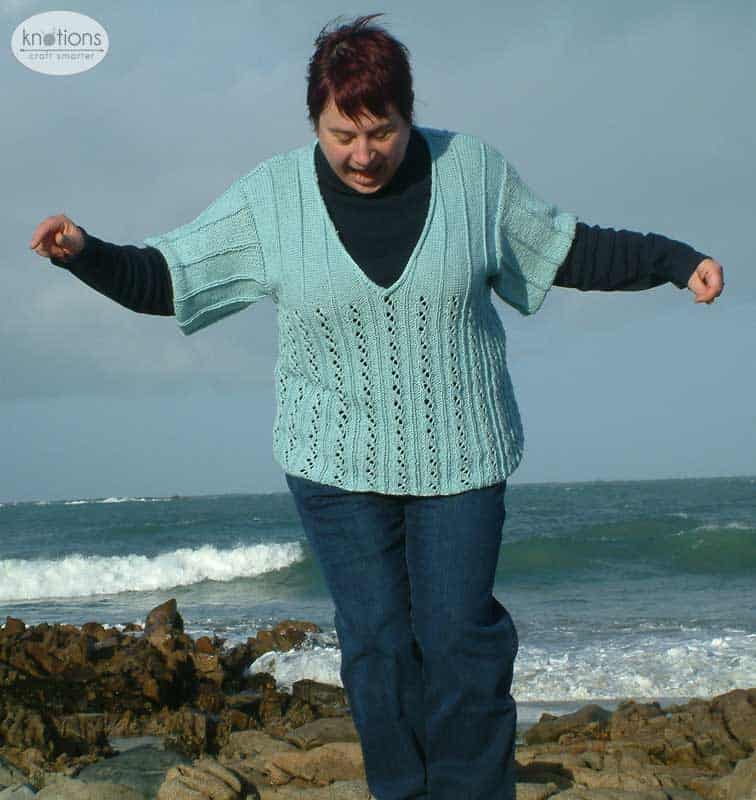
 I wanted to try and design a piece that would be flattering to all body types and also could bridge that tricky time between spring and summer when you can need that extra layer. This top has elbow length sleeves and can be worn over a long sleeved top, a tee shirt or a cami making it a truly versatile piece.
Knitted in the round from the bottom up, you divide for the front and back before joining the shoulder seams and knitting the sleeves from the top down. The neckline is neatened with an applied icord edging.
The cotton bamboo yarn gives a wonderful drape and also keeps you cool.
The lace pattern is easy to follow and as there is only simple shaping so this top would be suitable for an advanced beginner.


Sizes
Finished Bust Size 32 (36, 40, 44, 48)” to fit bust 32 (36, 40, 44, 48)”
No ease is recommended, the yarn and stitch patterns have a lot of give.
Shown in size 44”
Yarn
Valley Yarns – Southwick (50% Pima cotton 50% bamboo; 105 yards [99 meters]/50 grams): Color 03 – 8 (9, 10, 11, 12) balls
Needles
US #7 (4.5 mm): 24” circular
US #6 (4mm ): 24” circular
Gauge
19 sts and 26 rows = 4” on smaller needles in 9 x 1 rib
Notions
Removable markers; stitch holders; tapestry needle.
Abbreviations
Please see our standard list of abbreviations.
Pattern Notes
This pattern is worked in the round from the bottom up.
This pattern is shaped in the body using two different sizes of needles.
Please note that the stitch count in the lace pattern increases by 1 stitch on row 1 and decreases back down to the original stitch count on row 4.
Spring Kimono Chart

Pattern
Body
CO 160 (180, 200, 220, 240) sts on a US #7 (4.5mm) circular needle. PM to indicate beg of rn and join for working in the rnd taking care not to twist sts. Place a second m after 80 (90, 100, 110, 120) sts to mark the other side seam.
Beg working the lace chart, starting at row 1 and cont until work measures 6 (6, 7, 7, 8)” . Change to US #6 (4mm) needle and continue in the lace pattern until work measures 13 ½ ( 13 ½ , 14, 15, 16)” ending with row 6.
Divide for bodice
Switch from the lace pattern to knit 1 purl 9 rib, the knit st should continue the line of sts from the lace chart (first stitch of the chart). Work to within 7 (8, 9, 10, 11) sts of the second marker. BO 14 (16, 18, 20, 22) sts. Continue in 1 x 9 rib to within 7 (8, 9, 10, 11) sts of the next m and BO 14 (16, 18, 20, 22) sts.
Place the next 66 (74, 82, 90, 98) sts on a stitch holder – you may wish to place a marker to mark the center of these sts to make it easier when you come to work the fronts.
Work Back
On the rem 66 (74, 82, 90, 98) sts, cont working in 1 x 9 rib as set until upper back measures 8 ½ (9, 10, 11, 12) inches from bodice split . Slip the first 17 (18, 21, 22, 25) sts onto a stitch holder, BO the center 32 (38, 40, 46, 48) sts and slip the remaining 17 (18, 21, 22, 25) sts onto a stitch holder.
Work Fronts
Place the first 33 (37, 41, 45, 49) sts of the front onto a US #6 (4mm) needle and work the front decreases as follows:
At the neck edge, k2tog every 4th row 12 (10, 12, 12, 13) times and then every other row 4 (9, 8, 11, 11) times. Cont until work measures 8 ½ (9, 10, 11, 12)”. Place rem 17 (18, 21, 22, 25) sts on a stitch holder. Place the held sts for the right front onto a US 6 (4mm) needle. Work other side of front in the same way. At the neck edge ssk every 4th row 12 (10, 12, 12, 13) times and then every other row 4 (9, 8, 11, 11) times, until work measures 8 ½ (9, 10, 11, 12. Place rem 17 (18, 21, 22, 25) sts on a stitch holder.
Join shoulder seams using a three needle bind off.
Sleeves
Starting at the bottom of the sleeve opening and with the RS of the work facing, Pick up 80 (80, 90, 100, 110) sts around the armhole. Place a marker to indicate the beg of rnd and work in knit 1 purl 9 rib for 7 (8, 8, 9, 9)” . BO in pattern.
Finishing
Weave in ends and block according to measurements on the schematic.
Neckband
With RS facing pick up 39 (41, 46, 50, 54) sts along the right side of the V neck, pick up 32 (38, 40, 46, 48) sts across the back of the neck and pick up 39 (41, 46, 50, 54) sts along the left side of the V neck. CO 3 sts on the left hand needle (this is to begin the icord edging) Work edging as follows:
*K2, slip last st of the icord onto the RH needle kwise, knit the next stitch (from the neck edge), pass the slipped stitch over the knitted stitch. Slip the 3 st on the RH needle back onto the LH needle, repeat from * until all neck sts have been incorporated into the icord. Knit the 3 remaining sts together and fasten off securely. Sew the end of the icord neatly to the base of the V neck and then slip stitch the beg of the neck edge neatly behind it to form an overlapping edge.
Press the neck edge lightly to neaten.
Schematic

 About the Designer: Janine LeCras
 About the Designer: Janine LeCras
Janine Le Cras, lives works and windsurfs on the small island of Guernsey in the middle of the English Channel. When she is not knitting, spinning or designing she can usually be found on her favorite beach sailing over the waves.
She can also be found at her blog and on Ravelry under the user name Guernseygal.
Pattern and images © 2009 Janine LeCras.


Leave a Reply