Haven’t you been curious how the heck you do those funky curvy parts in some FOs?

They might have been stacked increases and decreases.
A few pointers
Here are a few things that I find helpful.
- Use pointy needles. There will be lots of stitches all clumped on top of each other. Do yourself a favor and use pointy needles.
- Use a yarn that isn’t splitty. See the point above about clumped stitches.
- Use a circular needle. While not a requirement, if you’re working a lot of stitches, it will be much easier to handle on a flexible cable rather than a straight needle. You might even end up pulling out some of the cable magic-loop-style.
- Work the increases loosely so it’s easier to do the k-yo-k and also slipping them back. Plus it’ll be easier to work them on the next row.
- Try this (and all new techniques) on a swatch first so you have a good idea of what to do.
Now that we’ve covered that, let’s take a look at a few abbreviations
Abbreviations for the Increases
KYOK – this is all done in ONE STITCH. Knit the stitch and don’t slip it off the needle, then, YO, then, knit the stitch again. Finally, slip the stitch off the needle.
SB – Slip the stitch back from the right needle to the left.
Swatch Instructions
CO 12 with MC
Knit 3 rows
Next row: K2, *K1, [KYOK, SB2] x 3, KYOK, K5, rep from * 1 once more, k2
Cut MC and attach CC1
Next row: Knit
Next row: BO
Working the Increases
Step 1: KYOK

1: Knit. DON’T SLIP IT OFF THE NEEDLE.

2: YO
3: Knit again and slip it off the needle.
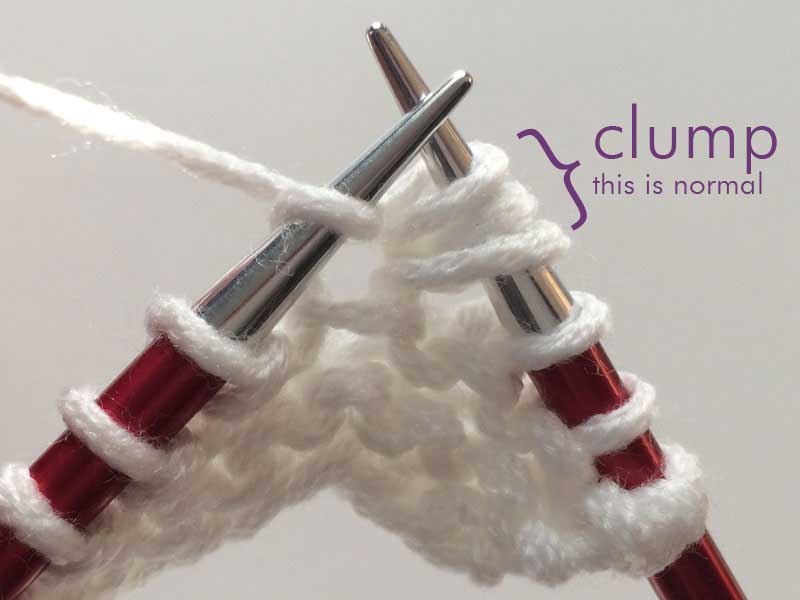
When you’re done it will look like this on your right needle. The clump might make you feel like you did something wrong BUT IT’S CORRECT.
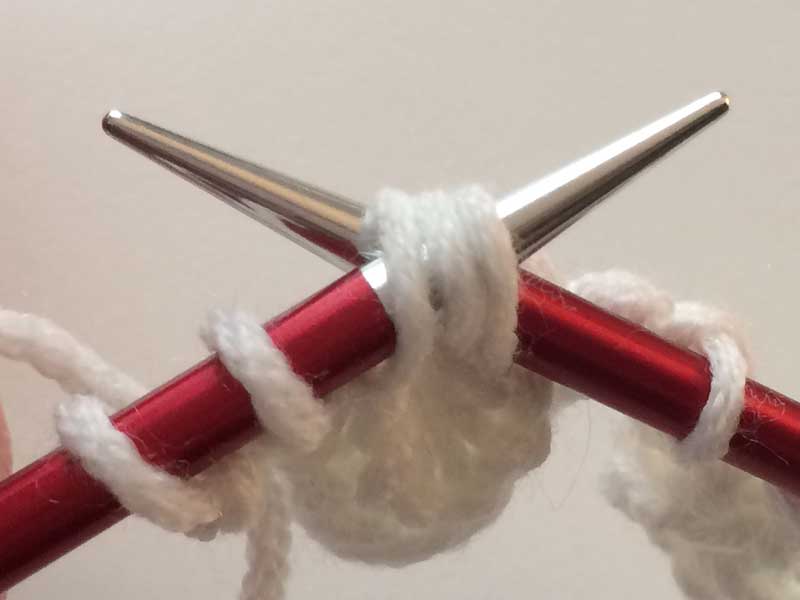
Step 2: SB2 (so, slip 2 of the KYOK stitches back to the left needle)

Step 3: Repeat Steps 1 and 2 however many times it says in the pattern. The more times you do this, the longer the nub will be.
Here’s what it looks like on the needle when you’re done with the row.
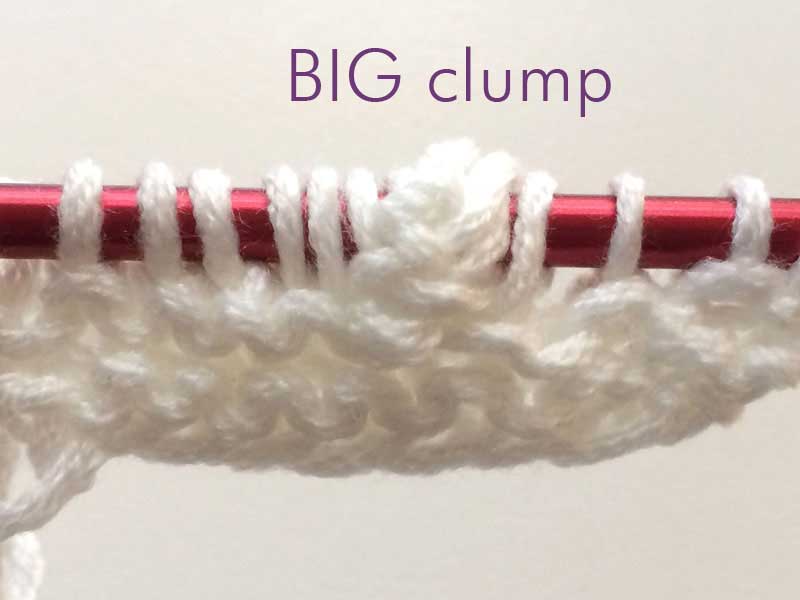
And then after you’ve worked one more row after that. You might need to work the clump sts a bit slower so you can get them in the right order. This is one of the reasons I recommended the swatch 🙂

It’s straight right now but after you take it off the needles, it’ll curve like it did in my finished example.
Abbreviations for the Decreases
K5togTBL (do this instead of the K5tog) – Knit 5 together through the back loop.
K5tog – Knit 5 together. You can alternatively work a S2K3P2SO (this might be easier for you than a K5TOG and the effect is the same).
S2K3P2SO – Slip 2, K3tog, pass 2 stitches over the K3TOG
SB – Slip the stitch back from the right needle to the left.
Swatch Instructions
CO 22
Knit 1 row (a bit loosely so you can work the k5tog’s/k5togTBL’s)
I work a K5 or K3 through the back loops (TBL) – I find it a lot easier and the change isn’t visible to me.
Here’s a comparison of regular and tbl stitches:

Decrease row: K1, *K3, K5togTBL, [SB2, K3togTBL] x 2, repeat from * 1 more time, k1); 6 sts rem
Knit 3 rows; BO
Working the Decreases
Before this, work the pattern as instructed. This may include some stacked increases (but it’s not necessary).
Now, for the fun stuff…
Step 1: K5togTBL

Step 2: SB2
Step 3: K3togTBL (note this is a THREE and not a FIVE – like it is in Step 1)
Repeat Steps 2 and 3 for as many times as instructed in the pattern.
Craft Smarter In the New Year
This post is part of our Craft Smarter in the New Year series in January 2018! Don’t miss any of our posts!

- Improved SSK’s (knit)
- Centered Double Decrease (knit)
- Stacked Increases and Decreases (knit)
- Post Stitches (crochet)
- Weaving in Ends (crochet)
- Jogless Stripes (crochet)
- Bias Bindoff (knit)
- Fix-a-Stitch Review (knit)
- One-Row Buttonhole (knit)

I want to try this, have always liked the turkish wave knit pattern. BO here refers to what? having a memory issue today…
Sure thing! BO = bind off.