Thumb gussets shouldn’t be scary. They’re basically increases and then holding those stitches for later.

Any time knitting creates an unusual shape it can be scary – but it shouldn’t. A thumb gusset is a simple way to create some nice shaping and it’s truly a simple method. Here are some step-by-step instructions for you if you’re still not convinced.
Step 1: Increases
Follow the pattern and work the increases. If the pattern just says “increase” or “make 1”, I suggest the lifted increases. They’re tight and work great on a thumb gusset. They’re the type of increase I used in these pics.
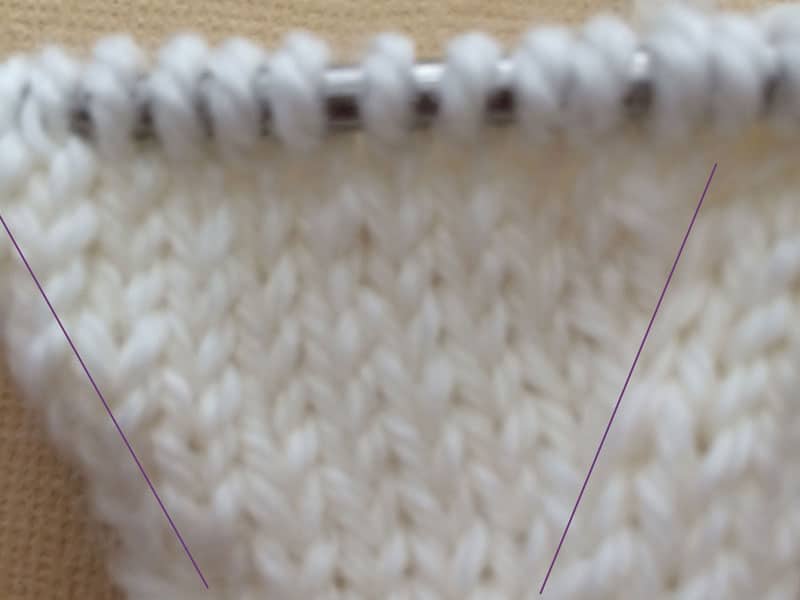
For your first thumb gusset, I suggest working a left-leaning increase, then the stitches in between, then a right-leaning increase. Once you’ve made a few gussets, you might want to switch the direction of each increase by starting out with a right-leaning increase and then ending with a left-leaning increase. They both work and make nice increases for this step.
Just note which one you use so you can make your second thumb the same way as your first.
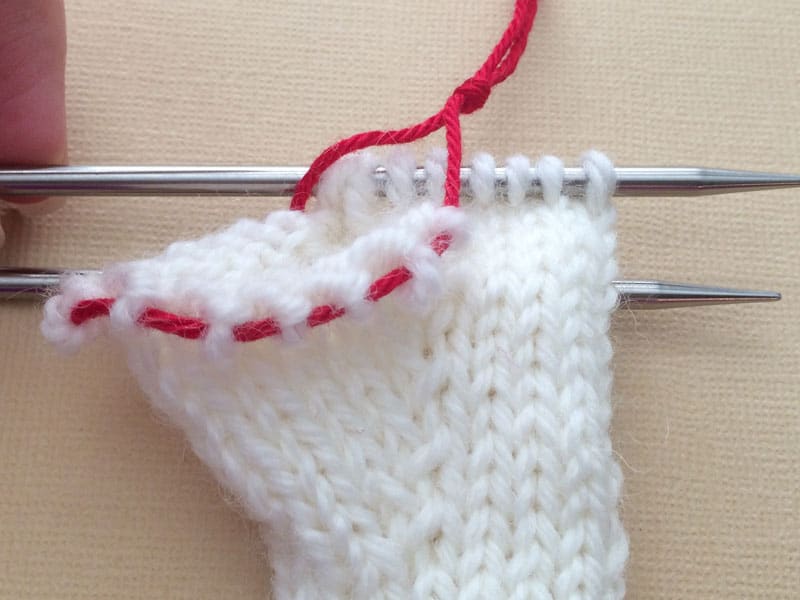
Step 2: Hold the thumb stitches

Thread waste yarn through the thumb stitches so you can save them for later use. Knot them together so they form a thumb but leave the waste yarn loose enough so you can try it on as you go. You’ll thank me in the next step.
Step 3: Work the rest of the hand
Follow the pattern and work the rest of the hand.

If your pattern tells you to cast on any extra stitches at the base of the thumb, I suggest the backward loop cast on.
Step 4: Pick up thumb stitches again
Put the held thumb stitches on the needle again.

Pick up stitches at the base of the thumb, as instructed by the pattern. You may also want to pick up a couple extra stitches on either side and then decrease them right away. You won’t be changing the stitch count at all by doing this, but you’ll likely avoid or limit holes in that area.
Work the thumb as instructed in the pattern.
That’s it! Now you have a beautiful thumb gusset and a glove or mitten that fits well.
Thumb gussets are more forgiving than sock gussets because they’re not supposed to fit tightly – they have more give. If you’re considering making a pair of gloves or mittens as gifts, it’s a great way to try out the gusset.
Where can I use a thumb gusset?
We have several patterns for fingerless mitts, mittens or gloves so you can give you new-found skill a try.


How do I add on a pocket to cover the fingers. (One that is sown on and flips off)
that’s a fairly simple thing to do!
first, you want to BO on the palm side where you want the mitten to end when the pocket is folded down.
then, on separate work (not part of the mitten) CO just the number of sts for the palm side and (KNITTING FLAT) and do something that makes it not curl (ribbing or garter are the two typical choices). work that for about 3/4″, ending with a RS row and DO NOT TURN. instead, connect it to the mitten by working the back of the hand on the mitten (the live sts) and continue working in the rnd by working the pocket sts. stop working the ribbing on the pocket sts and just do whatever your pattern says to do on the palm of the hand (it’s typically st st). you’re now back to following the pattern for the back of the mitten as well. but when you’re done, you’ll have a pocket that you can fold down.
when everything is done, tack down the two ends of the ribbing (tack it down so the ribbing is on the outside).
does that make sense?