Our Tips
If you have a yarn you love the look of, but something’s not right, read on for some ideas to make it right.
- Get the kinks out
- Make it smell better
- Soften it so it doesn’t tear your hands apart
Any of these things can be helped by just washing the yarn. But washing the yarn while it’s still in its hank-form can be a little intimidating.

What you’ll need
- If it’s an animal fiber,
- Use a Wool Wash (the kind that doesn’t require a rinse)
- if a plant fiber
- Hair shampoo or hand washing dish detergent
- Vodka (to remove the smell) – I know it’s an odd choice, but it really works. Just make sure it’s a clear alcohol – you don’t want to add any color to the yarn.
- Yarn swift or a chair
- Portable laundry rack or a plastic hanger to dry it.
- Box fan or ceiling fan (optional, but they make the drying go faster)

Step 1: Make it into a hank
If your yarn is either skeined up or in a ball, the first step is to make it into a hank. This way, the water can get to the entire yarn.
You have a couple options:
- Wrap it around a chair back. Take a chair, just a regular chair, and unwind the skein and wrap it around the chair back.
- Wind it around a swift. I thought this option would take A LONG time – but I was wrong! Even though the swift doesn’t wind itself, it was easy! I pushed the swift to make it go around a few times. When it slowed down, I pushed it again.
Step 2: Tie the hank off in 4 places

This step is CRITICAL. You need to do this so that the yarn doesn’t tangle on itself.
The ties shouldn’t be tight; they should allow you to easily slip in a finger or two. If you make the ties too tight, liquid won’t be able to get in there.
Whichever method you choose for making the hank, do this step BEFORE you remove the yarn.
I can’t stress this enough. DO NOT SKIP THIS STEP. If the yarns tangles on itself, it will be next to impossible to untangle it.
Step 3: Prepare the Bucket
If you’re removing a smell, add vodka. Use a few inches so that the yarn will be fully submerged.
I know this sounds strange, but the vodka evaporates and the yarn DOES NOT SMELL LIKE ALCOHOL AFTER IT’S DRIED. I promise. You can use whatever vodka you want. I bought a cheap vodka and it worked fine.
For all issues, add some wash (about the size of a quarter, maybe 1 inch/2.5 cm.). Then add a few inches of water. It should be deep enough to allow the yarn to be fully submerged in the next step.
Now your tub is prepared.
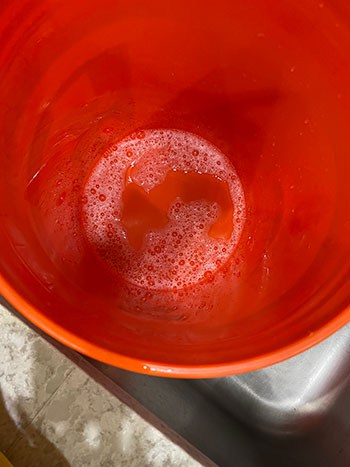
Step 4: Place the yarn in the tub
Place the yarn into the tub and submerge it. If it’s an animal fiber, avoid swishing it around. Just push it down so that it gets submerged.
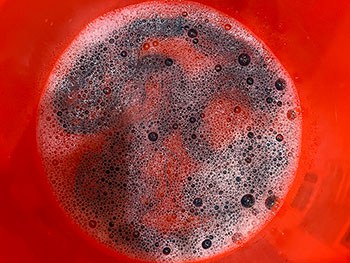
Step 4: Soak it
Allow the yarn to soak for at least 15 minutes. More than that is fine, less is not. You need to let the entire yarn to soak up the water.
I watched a little TV while it was soaking, and I set an alarm on my phone. While this step isn’t necessary, it made me feel more comfortable.
Step 5: Remove it
Yarn is much more delicate when it’s wet. Push and squeeze the yarn to remove the liquid.
Avoid wringing or twisting it.
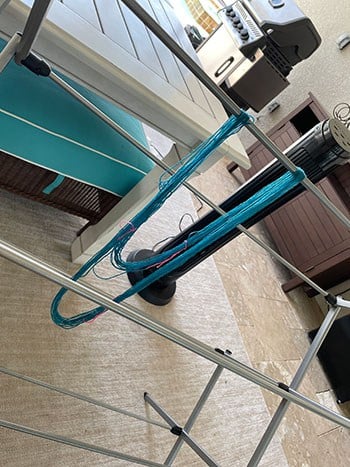
Step 6: Dry it
Place the yarn so it can dry (either on the laundry rack or even hung on a plastic hanger).
If you’re using a fan, now’s the time to get it out. I had both the ceiling fan on as well as the standing fan.
I live in Florida, so I did NOT put the yarn in the sun. If your sun isn’t too strong and the yarn isn’t in danger of fading, you can speed it up by putting it in the sun.
If you’re unsure, don’t put it in the sun. Once it’s faded you can’t undo it. And the fade will only be on the parts that the sun can get to.
I’d also guess that fading would weaken the yarn as well.
Can you tell that I’m not a big fan of putting it in the sun?
Wait for the yarn to dry before you go to Step 7

Step 7: Make it into a hank or ball
Once your yarn is dry, you can make it into a ball so that you can use it. Or, I just twisted it into a hank.
Note that I kept the ties on it. I won’t cut off the ties until I’m ready to wind it into a ball.
If you want to make a hank, hold the yarn on fingers of both hands, so that your hands pull the yarn fully apart. Twist it a bunch – more than you think you should. Keep your hands apart. If it’s tight-enough, if you don’t keep the yarn apart, it’ll want to twist on itself.
Hold the yarn in the center (I use my chin but you could also use a large hook or the tip of a spindle that’s on a chair).
Holding the yarn in the center and the 2 tips right next to each other, release the yarn and allow it to twist on itself.
Step 8: You’re Done!
Take a deep breath and pat yourself on the back.
(optional) Pour yourself a glass of wine or mix up a nice drink with that vodka.
About the Instructor: Jody Richards

Jody is the founder and lead editor of Knotions. She loves poring over stitch dictionaries and trying out new stitches.
She’s also on a mission to get everyone to embrace the blocking. And, to avoid using garter stitch edges in knit swatches made for gauge.
And while she likes all things crafting (well ok, except that one thing), yarn crafts are her true love (and she has the stash to prove it).
Leave a Reply