
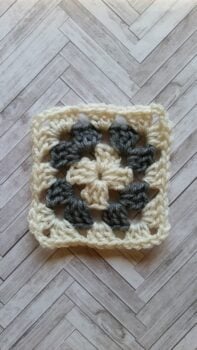
The classic Granny Square is my absolute favorite to work up. While you may be thinking Grandma’s blanket, they can be used for so much more!
The Granny Square is worked in the round starting at the center, and then evenly increases to produce a larger, and larger square until you have your desired measurement.
When you are working in the same color, you will join at the end of the round, and then slip stitch over to the next chain space, and begin the next round. When you are changing colors, you will join at the end of the round as normal, then fasten off the yarn, and reattach the new color in the next chain space.
When joining at the end of the round, you will join to the first double crochet when there will be another round to follow, or to the top of the beginning chain 2 when it is the final round. Joining in the top of the beginning chain 2 is needed in the final round if there will be another row of stitches added (say you were working a blanket where there was a row of granny squares, and then a few rows of double crochet above it), or a border. Without it, you will be missing a stitch.
How to Crochet a Granny Square
Rnd 1
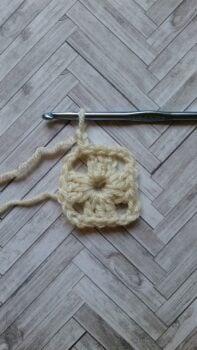
Crochet a ch of 5. Ss join to form a ring. Ch 2 (counts as a dc).
Work 2 dc into the ring… first cluster completed.
Ch 3 to form a corner…
3 dc into the ring…
Ch 3 for the next corner…
3 dc into the ring…
Ch 3 for the next corner…
Last 3 dc into the ring…
Ch 2 for the final corner… This is the only corner worked with a ch 2 instead of 3, and it’s to help keep the shape, otherwise it’s a little wonky
Ss join to the 1st dc if there will be another rnd added, or to the top of the beg ch 2 if this is the final rnd
Rnd 2
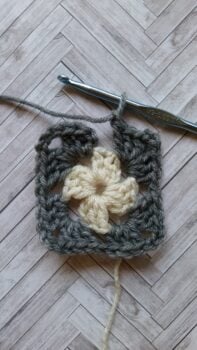
If continuing in the same color, ss in ea st over to the ch-sp, ch 2…
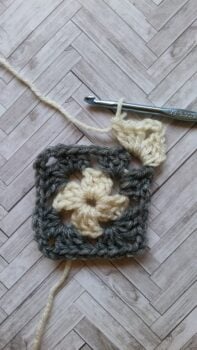
If changing colors, fasten off after the last join, and rejoin new color in the next ch-sp, ch 2, 2 dc into the 1st ch-sp, ch 3, 3 dc into the same sp…
Ch 1 in between corners, and then (3 dc, ch 3, 3 dc) into the next ch-sp…
Ch 1…
*(3 dc, ch 3, 3 dc) into the next ch-sp, ch 1, rep from * 2 more times, join
Rnd 3
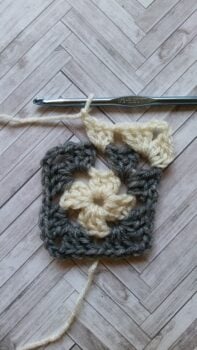
Ss over to the ch-sp if continuing in the same color (or fasten off, and rejoin yarn), ch 2, 2 dc into the 1st ch-sp, ch 3, 3 dc into the same sp…
Ch 1…
3 dc into the next ch-sp, ch 1…
(3 dc, ch 3, 3 dc) into the next ch-sp, ch 1…
3 dc into the next ch-sp, ch 1, *(3 dc, ch 3, 3 dc) into the next ch-sp, ch 1, 3 dc into the next ch-sp, ch 1, rep from * 1 more time, join.
Continue working in pattern increasing to the size you like. You will work a (3 dc, ch 3, 3 dc) in each corner, and a ch 1, 3 dc in the next ch-sp, ch 1, in between the corners.
3 Rnd Granny Square Fully Written Out
R1: Ch 5. Join to form a ring. Ch 2. 2 dc into the ring, *ch 3, 3 dc into ring, rep from * 2 more times, ch 2, join (12 dc).
R2: Ss over to the next ch-sp, ch 2. 2 dc into the ch-sp, ch 3, 3 dc into the same ch-sp, ch 1, *(3 dc, ch 3, 3 dc) into the next ch-sp, ch 1, rep from * 2 more times. Join (24 dc).
R3: Ss over to the next ch-sp, ch 2. 2 dc into the ch-sp, ch 3, 3 dc into the same ch-sp, ch 1, 3 dc into the next ch-sp, ch 1, *(3 dc, ch 3, 3 dc) into the next ch-sp, ch 1, 3 dc into the next ch-sp, ch 1, rep from * 2 more times. Join (36 dc).
 ABOUT THE Instructor: ALEXANDRA RICHARDS
Alexandra is described as a “craft, coffee and cat addict”.
Though she has always been a crafty person, she picked up needlepoint on plastic canvas in 2006. In 2015, she learned to crochet, and began her blogging journey as EyeLoveKnots, named in honor of family members affected by Retinoblastoma – a cancer of the eye.






 ABOUT THE Instructor: ALEXANDRA RICHARDS
Leave a Reply