This tutorial uses a single circular needle.
While it’s most commonly used for knitting toe up socks, it can be used anywhere you need to start the work seamlessly from the center-out (e.g., a circular/oval shawl or a mobius cowl).
As always, follow the instructions contained in your pattern.
Step 1: Position your 2 needles by holding them so that one needle is above and one below. The points of the needles should be facing your left.

Step 2: Create a slip knot and place on your top needle. This will count as your 1st cast on stitch.

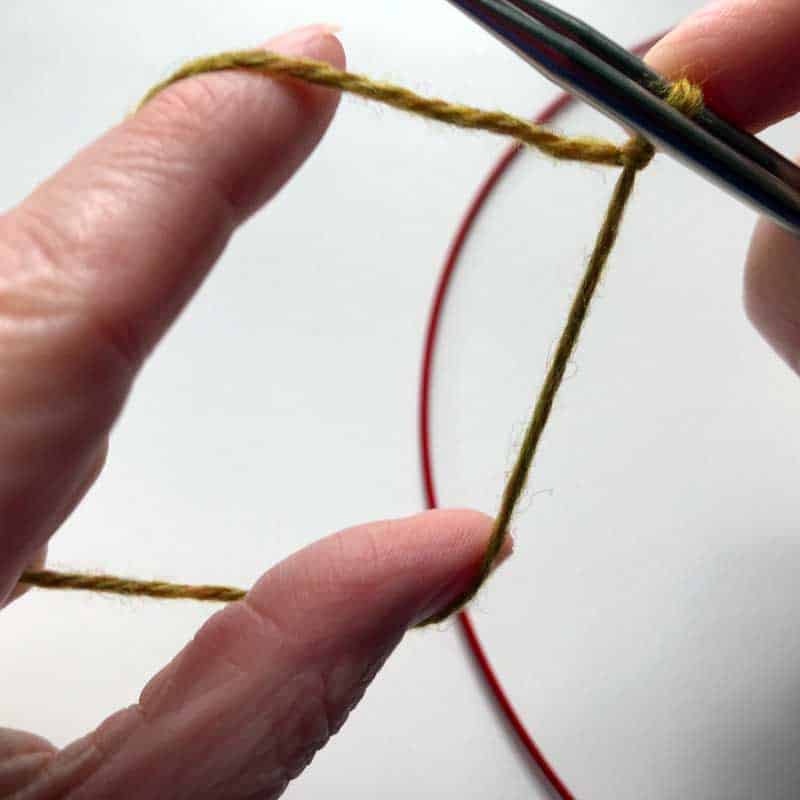
Step 3: Set up your yarn so that the yarn that is attached to the ball (working yarn), is in front and the tail end in back.

With your left hand position the working yarn over your index finger and the tail end over your thumb.

This position can best be described as a sling shot position.
Step 4: Still holding the needles together, you are going to grab the yarn on your index finger (working yarn), with the needles and wind it up and over.
Put the yarn on your thumb through the center of the two needles.

You’ve now cast on the second stitch using the tail end.
Step 5: Winding the needles in the other direction, grab the yarn on your thumb (tail end) around and under. Put the yarn from your index finger through the center again to anchor it.

You’ve now cast on the third stitch, this time using the working yarn.
Step 6: Alternate Steps 4 & 5 (ending with a Step 4) until you have the amount of cast on stitches the pattern indicates. The cast on stitches will be split up evenly between the top and bottom needle. In our example below, we’ve cast on a TOTAL of 16 stitches, 8 on each needle.

Some patterns count it as the total number and others count just the stitches on one of the two needles. Typically you’ll be able to tell based on something the pattern says – either when instructing you to cast on, or even in the next round.
Now that you’re done casting on stitches, let’s knit the first round.
Step 7: Turn your needles so that the points are facing the right. The tail will dangle in the back and you can use your finger to anchor it.

The RS of the work needs to be facing you. The purl bumps will be in the back of the needles.
Step 8: Pull your bottom needle to the right so that the cast on stitches are resting on the cable of your circular needle.

Use the needle part to knit across the stitches on your top needle.
TAKE CARE NOT TO USE THE TAIL WHEN KNITTING. I’m just about positive you will use the tail at least once when using this cast on.
I’ve personally used the tail more times than I can count.
Step 9: Rotate your work again. Pull the bottom needle to the right again so the knitting is on the cable. You will notice that the stitches on the top needle are mounted with the right leg of the stitch in back.

To correct this, insert the right needle into the stitch from right to left – similar to how you’d perform a KTBL. This is the opposite way you typically insert a needle. Knit the entire half-round that way.
You’re done! All cast on stitches have now been knit and you are ready to begin your pattern.

And here you can see what it looks like after a few rounds.

A video would be so helpful. Thumb yarn path isn’t quite clear to me.
Thanks for letting me know! I’ll def put it on the video list.