Knitting a Latvian Braid is such a pretty way to add a decorative detail. It’s hard to believe it’s made out of ordinary stitches but it is! You just need to strand it differently. But don’t worry – we’ll show you how.
It’s easiest to work this in the round, but to make it simple for us, we’ll work it flat for demonstration purposes.
Setup Row: Knit a row in alternating both Color A and Color B.

Left-Leaning Latvian Braid
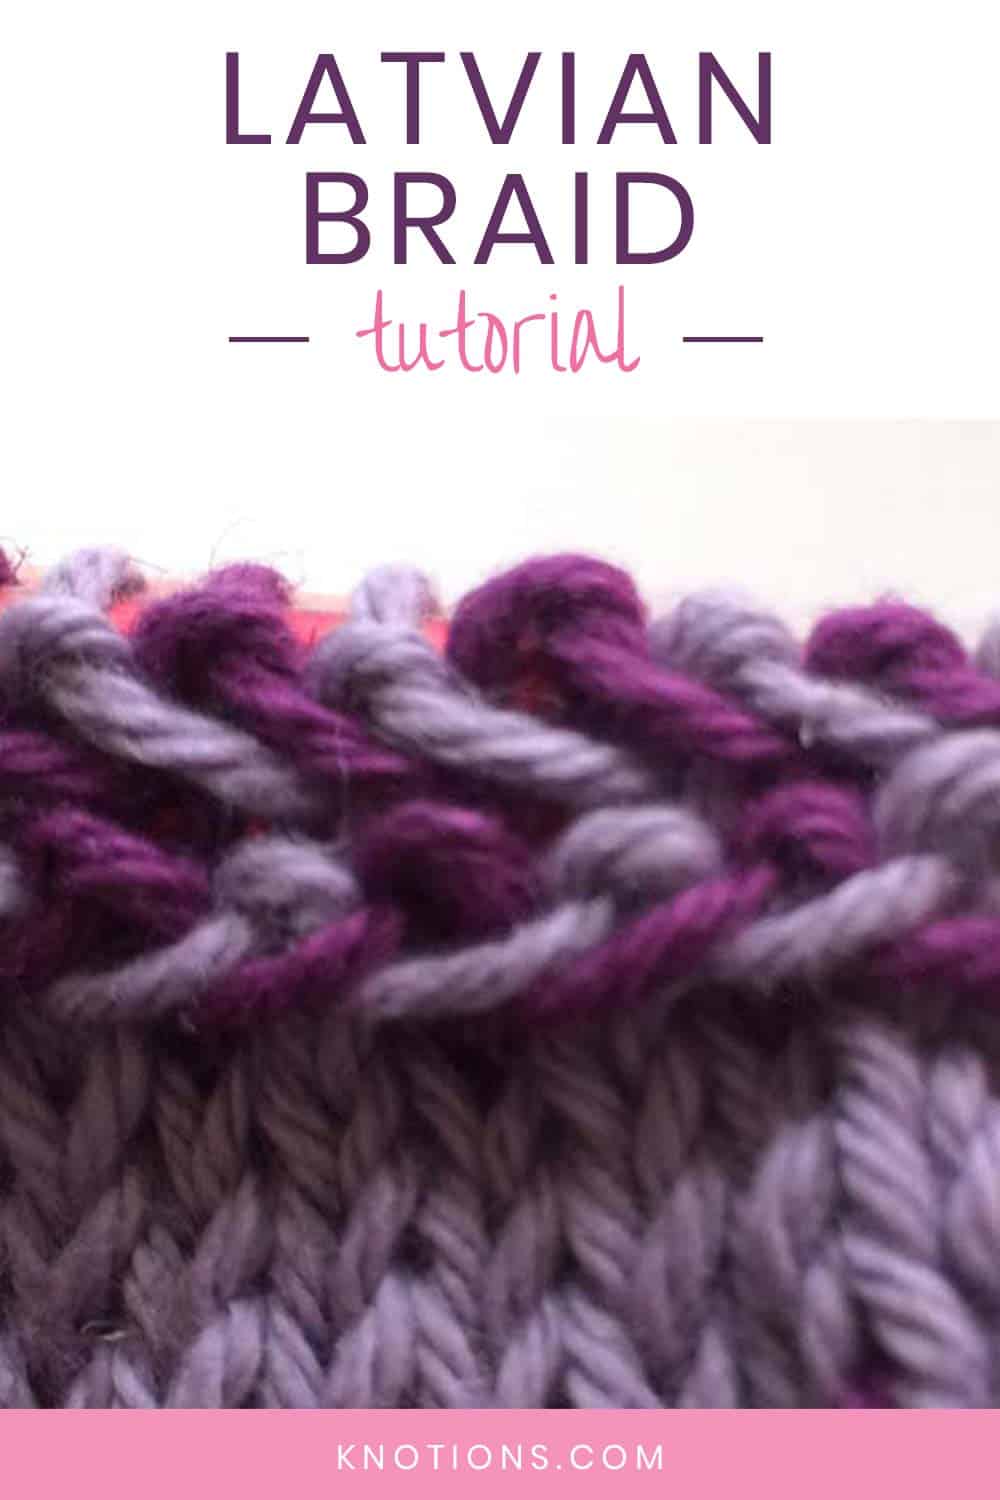
What it looks like when it’s done:

Step 1: Purl, using the same color that’s on the left needle, and strand it in the front of the previous stitch.

Step 2: Purl, using the same color that’s on the left needle, BUT strand it BELOW the previous stitch. This feels a little odd for me, so it’s a slow row.

Right-Leaning Latvian Braid
What it looks like when it’s done:

The right-leaning Latvian Braid is worked the exact opposite way as the left-leaning braid. If you can make a left-leaning Latvian Braid you can also make a right-leaning Latvian Braid. Just do the steps for the left-leaning braid in the opposite way – Step 2 and then Step 1.
What can you do with it?
The Latvian Braid is a great way to edge something – a mitten or a sock – or to break up two areas of a shawl or sweater. It’s a pretty stitch to have in your arsenal. And as you can see, it’s easy to knit as well.
Thanks so much for the tutorial! I have been admiring Latvian braids placed around the cuffs of various knitters’ mittens, and I was curious about how to do this technique. I really appreciate the clear instructions.
Of course! I’m so glad it was helpful for you. It’s really a pretty simple technique once you get the hang of it.