Pom poms can add such a touch of whimsy. Add them to a hat, or the back of a footie or on the edge of a mitten. String a bunch of them together to make a pretty garland. Connect a bunch of very large ones together for a scarf. Just google pom pom ideas and you’ll get unending inspiration.
While you can go old school and wrap them around a folded piece of cardboard or around a couple of your fingers, do yourself a favor and buy a pom pom maker. They’re inexpensive and make it go SO MUCH quicker.
It’s easy to use too. Here’s how.
Start with a pom pom maker. There are lots of brands but they all pretty much work the same way.
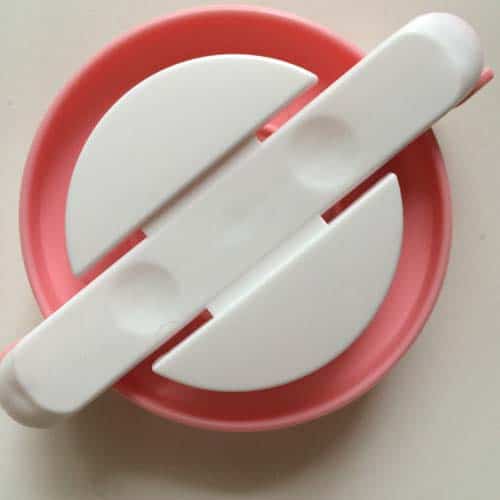
Here it is opened up.
Now you’re ready for the fun part.
Put the 2 pink edges from one side next to each other and wrap and wrap. Start at one of the unattached ends and wrap toward the white center. Once you get to the end of the pink, rotate it to close it up and use the same yarn to repeat the process on the other side.
You definitely don’t want to see any pink through your wrapping. You may want to make one or two as an experiment until you get the density you want.

Once you’re done wrapping, close up that side too.

And cut around the outer edges.

Now you’re ready to secure your pompom with a strand of matching thread.
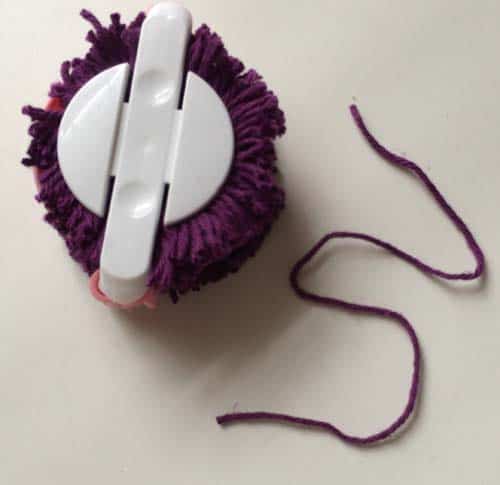
Wrap it around the pom pom maker and tie it in a knot. Really tight. And then tie another knot. Trim the ends so they’re around the same length as the rest of the pom pom. Don’t fret about this step too much because you’ll be able to trim it all when you’re done.

Now swing all four pink edges out.

And pull the pom pom maker apart. If it’s the first time you’re using it, it may be very tight.
Your pom pom is free!

Now fluff it up and trim any areas that seem a bit off. My trimmings are behind the pom pom in the upper left.
Be careful not to go crazy with your trimming or you may end up with a pom pom the size of a dime!

Leave a Reply