
What It’s Used For
P2togtbl (or Purl 2 Together Through the Back Loop) is often used when you’re working the WS in flat lace knitting.
It’s also used on the RS, but on the WS is even more common.
How to Work a P2TogTBL
For this tutorial, I’m going to demonstrate it on a WS row. The mechanics are the same on a RS row though.
Step 1: Work up until the stitch
This next part requires a bit of calisthenics. I promise it’ll be worth it in the end though.
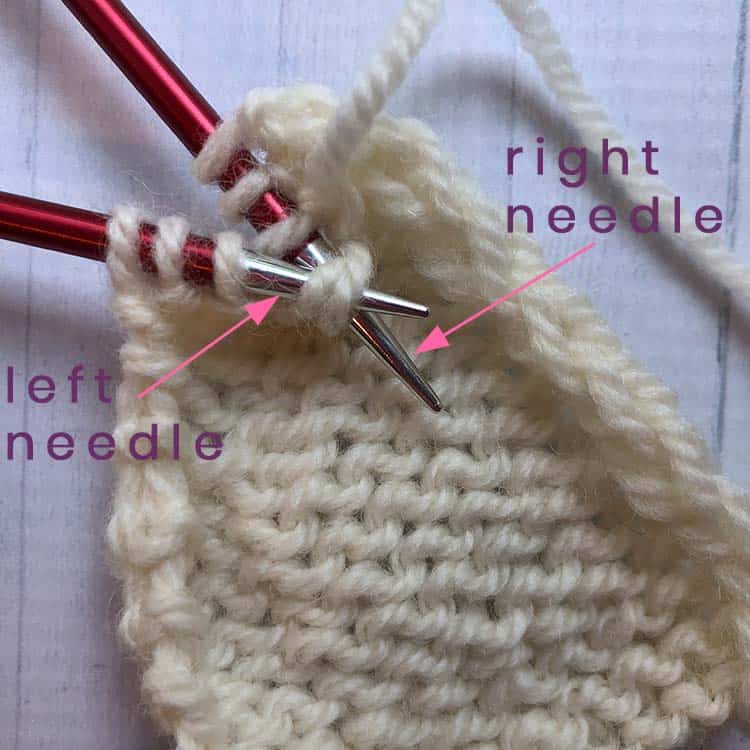
Step 2a: Take your RN and twist it so you’re working the next 2 stitches together on the LN BUT FROM THE BACK.
Step 2b: Insert the RN from the left to the right, into those next 2 stitches. The first few times you do this will feel weird and awkward, so don’t make that stop you.
Step 2c: Rotate the RN so it’s oriented like you’re ready to work a regular purl stitch.
Step 2d: Purl those 2 stitches together. This last step is very similar to a P2TOG.
What the P2TOGTBL looks like when it’s done
Here’s what it looks like from the RS.

Some Final Comments
The P2TOGTBL is going to look like a SSK on a chart. It’s a left-leaning decrease when viewed from the RS.
But, the difference is that it will be worked on a WS row. The WS equivalent of an SSK is a P2TOGTBL. This is similar to how the WS equivalent of a KNIT stitch is the PURL stitch.
All of these RS and WS equivalents should be spelled out in the pattern key. But, I know that some of you just want to better understand how things work, so I’m giving you the extra information.
Leave a Reply