We’re all familiar with slipping the last stitch to join to work in the round, but did you know that you can use this stitch for more than just a join?
Keep these in mind for Slip Stitch Crochet
When working slip stitch crochet, you need to work LOOSELY.
Also, keep in mind that loosely DOES NOT mean sloppily.
Either use a larger crochet hook or make sure you work quite loosely.
If you’re new to slip stitch crochet, I recommend you try it on a small swatch until you get the feel for it.
You can work slip stitches in either the BLO or the FLO, or even in both loops. For this tutorial, we’re going to focus on BLO.
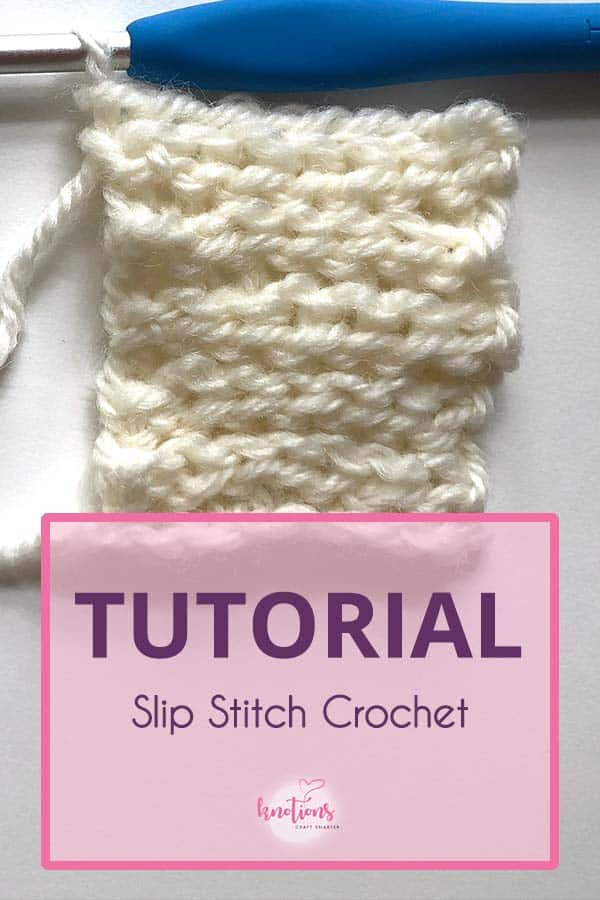
When worked in the BLO, it can look and stretch like ribbing. But, like many things, you need to work a few rows of slip stitch crochet before it looks like ribbing.
How to Work Slip Stitch Crochet
I suggest working the slip stitch as a 2-step process (again, to keep it looser).
Start with a chain of however many your pattern states. This can be any number – odd, even, doesn’t matter. And since you’re working vertically, the length is actually what’s going to be attached to the other piece. So, truly, this can be any number that looks aesthetically pleasing.
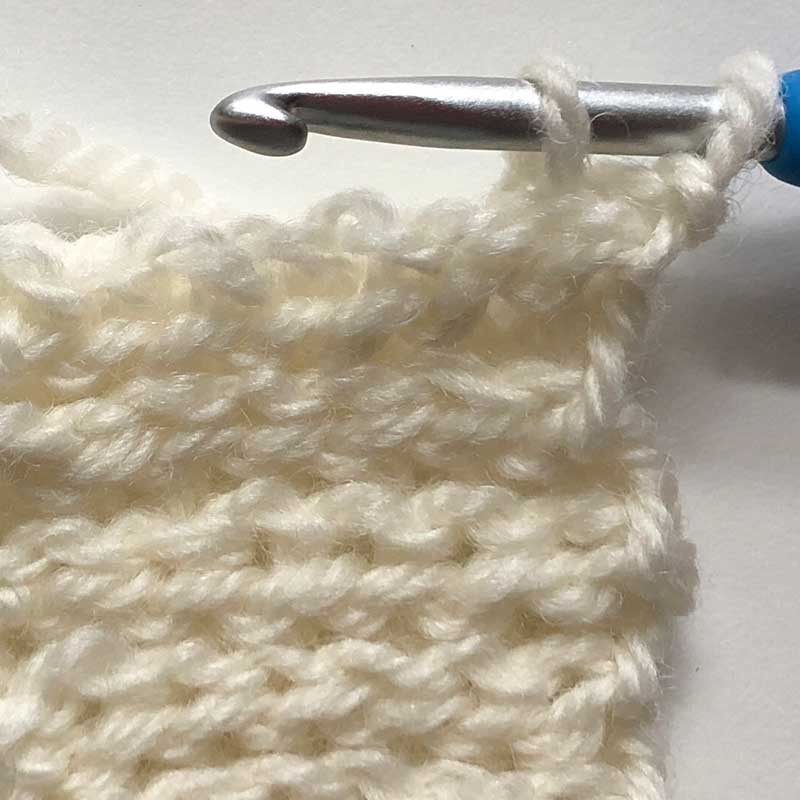
Step 1
1 loop is already on the hook.
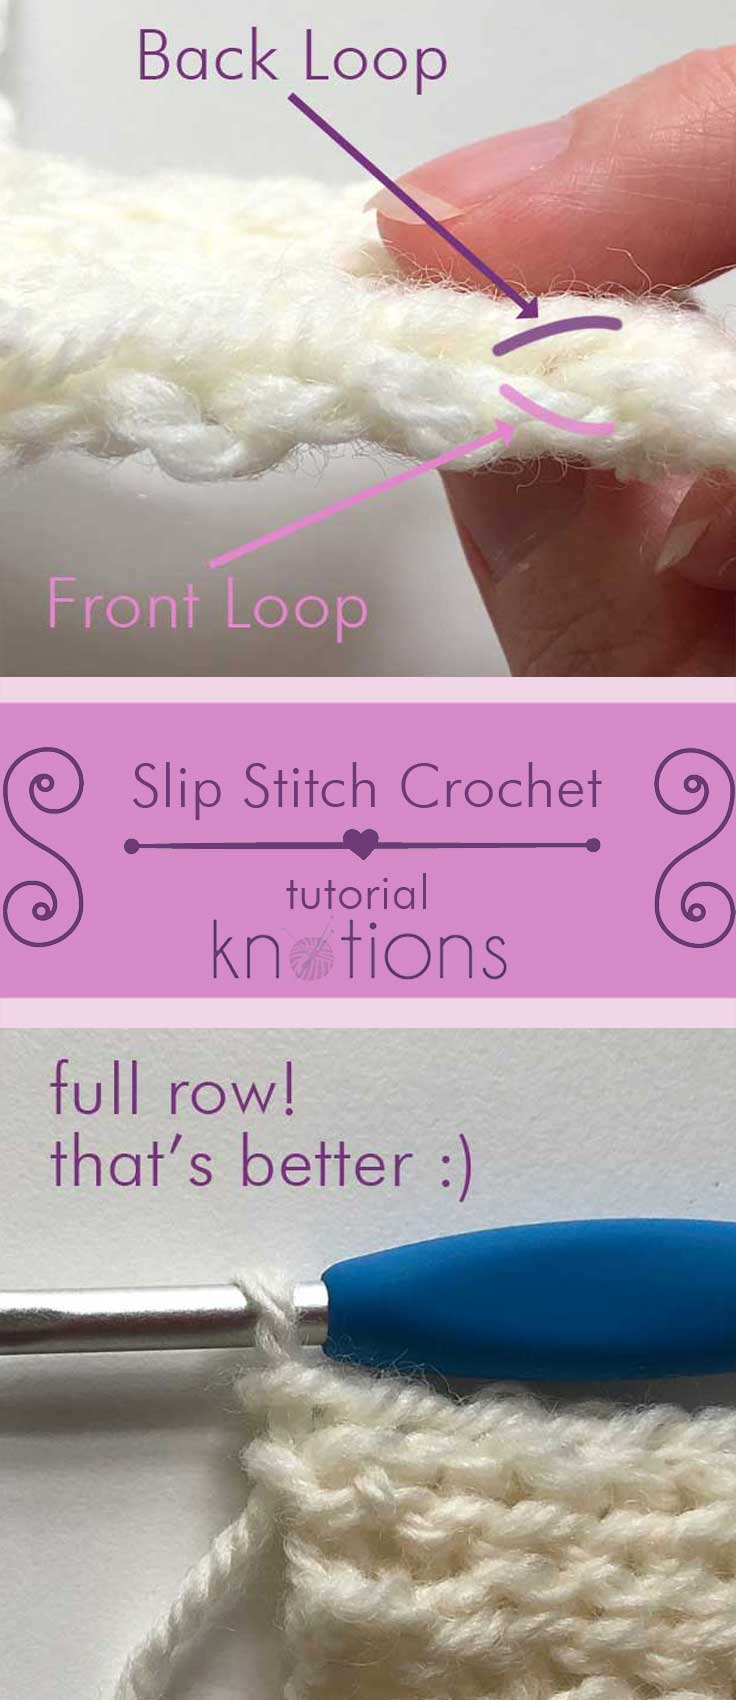
Insert hook in the BACK LOOP ONLY (blo), yarn over and pull up a loop. Not sure where the back loop is? Here’s a pic:

This loop should be loose – I’ve even heard some people say to hold the hook parallel at this point in order to help keep it loose or just to pause; either work, just make sure you do this as two separate steps, even if you’re tempted to do it as one.
Here’s that first step:
If you’re having trouble getting into the blo then you’re probably crocheting too tightly. Pull out the crochet and try again.
At this point you’ll have 2 loops on the hook.
Step 2
Pull the loop you just created in Step 1 through the loop that was already on the hook – 1 loop on the hook.

Repeat steps 1 and 2 based on your instructions. Keep in mind that, like many other stitches, it will take a few rows before it sets up and really looks like ribbing.
A word of caution
Make sure you work that last stitch or you’ll inadvertently be working short rows. I suggest counting them until you get good and recognizing a full row.


Also, it’s reversible. The back looks the same as the front!

Uses for Slip Stitch Crochet
I’ll give you a couple uses, but this list isn’t exhaustive.
Slip Stitch Ribbing
This is worked vertically and creates a very stretchy ribbing. It’s great for the edge of a hat, cuff of a sweater or fingerless mitts or anywhere else you want some extra stretch that can come back to its relaxed state.
Give it a try – it’s a lovely way to add some stretch AND keep your crochet nice and flat.
And did you also notice how much it looks like knitted ribbing? I consider this a bonus as I HATE to knit ribbing – especially 1×1 ribbing.
Free Pattern – Coaster or Trivet

We also have Slype – a free pattern for a coaster (smaller) or trivet (larger), using Slip Stitches and Short Rows. It’s a perfect opportunity to try out slip stitches in a small project.
About the Instructor: Jody Richards

Jody loves pouring over stitch dictionaries and trying out new stitches. And while she likes all things crafting (well ok, except that one thing), yarn crafts are her true love (and she has the stash to prove it).
She’s a serial starter-of-projects and has a serious problem with finishing things without a deadline.
And don’t get her talking about hand-dyed yarns. You’ve been warned.
Leave a Reply