


![]() The universe is so vast and huge, that I often stare into the stars wondering what fantastical creatures are gracefully flying through the cosmos thousands and thousands of light years away, and whether a pod of multicolored whales are out there circling stars.
The universe is so vast and huge, that I often stare into the stars wondering what fantastical creatures are gracefully flying through the cosmos thousands and thousands of light years away, and whether a pod of multicolored whales are out there circling stars.
I have always liked to imagine what it would be like to see a pod of whales swimming through the cosmos, a thought that came to me after hearing about Star Trek IV: The Voyage Home where they go back to save the whales. The thought then came to life more recently when the new Star Trek: Discovery TV show on Netflix featured a large whale-like creature flying through space.
It has been a dream of mine to see whales swimming in the wild – they are such graceful and majestic creatures. It’s a dream I hope to fulfill soon. One dream I am honest with myself about never seeing, is a pod of Whales of the Universe, so my way of seeing them swim through the cosmos was to create it myself in crochet form and hang the mobile up my living room so I can see it every day.
This pattern is written in US crochet terms.
Pattern Notes
The mobile is made up of seven Small Whales that are attached to the mobile ring with a thread of yarn. The Large Whale is about double the size of the Small Whale and is perfect for putting in the crib or cot with the baby as they look up at the mobile. The small whales can also be made up individually or as a set for a child to play with whenever the mood strikes!
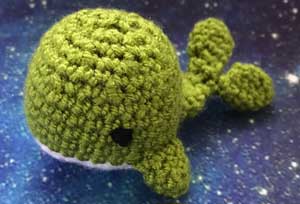
Small Whale
Yarn (for one Whale)
White: 2g of Women’s Institute Premium Acrylic Double Knitting Yarn in White.
MC: 10g of Women’s Institute Premium Acrylic Double Knitting Yarn in color of your choice.
Scrap of black yarn for eyes
Hook
3mm crochet hook
Notions
Fiberfill Stuffing
Sewing needle to sew in ends
Scissors
Stitch marker to mark the start of the round
For Mobile: 8” (25 cm) Styrofoam/polystyrene wreath
Finished size
Approximately 3.5 inches (9cm) end to end, 2.75 (7cm) wide

Gauge
11 stitches and 11 rows to measure 2×2 inches (5x5cm) over single crochet using a 3mm hook or size needed to obtain stated gauge.
Abbreviations
Please see our standard abbreviations.
Repeats
I have put the instructions that need to be repeated within ** like this *2sc*, followed by X8 to indicate number of repeats.
Round and row totals are in brackets at the end of each round.
Small Whale Instructions
Rnd 1: With white, create a magic ring and sc 8 into the ring. Pull the thread to close the gap. (8)
Rnd 2: *2sc* X8 (16)
Rnd 3: *Sc 1, 2sc* X8 (24)
Rnd 4: *Sc 2, 2sc* X8 (32)
Rnd 5: Sc 32 (32)
Cut the white yarn leaving a short end to sew in at a later stage.
Rnd 6: Join MC, sc 32 (32)
Repeat rnd 6, four more times. Sew in the ends from rnd 5.
Rnd 11: *Sc 2, sc2tog* X8 (24)
Rnd 12: Sc 24 (24)
Rnd 13: *Sc 1, sc2tog* X8 (16)
Rnd 14: Sc 16 (16)
Stuff your whale here.
Rnd 15: *Sc2tog* X8 (8)
Add in a bit more stuffing before sewing up here if required.
Rnd 16: Cut the yarn leaving a 2 inch tail and attach a sewing needle to the end of the yarn, then draw it through the top of all final 8 stitches, and then you can pull the top of the whale head shut like a drawstring. Sew in the end to secure it.
Flippers (Make two)
Rnd 1: With MC, create a magic ring and sc 4 into the ring. Pull tail to close the gap. (4)
Rnd 2: *2sc* X4 (8)
Sew in the end from rnd 1.
Rnd 3: Sc 8 (8)
Rnd 4: Sc 8 (8)
Now cut the yarn leaving a 3 inch tail to sew the flipper to the side of the whale. Sew the flipper halfway along the body on the first MC round, just above the last white round on the body.
Tail
To make the tail, you will first need to make two tail flippers. Then you will join them together.
Tail flippers (Make two)
Rnd 1: With MC, create a magic ring and sc 4 into the ring. Pull the thread to close the gap. (4)
Rnd 2: *2sc* X4 (8)
Sew in the end from rnd 1.
Rnd 3: Sc 8 (8)
Rnd 4: Sc 8 (8)
Rnd 5: *sc2tog* X4 (4)
To finish your first tail flipper, cut the yarn leaving a 2 inch tail to sew in at a later stage.
Make a second tail flipper.
When you have finished your second tail flipper, do not cut the yarn.
Joining tail flippers to make the tail
Rnd 1: Hold the first flipper to the right of the second flipper. Using the yarn for the second flipper (the yarn you didn’t cut), sc 4 into the top of stitches from Rnd 5 on the first flipper to join both flippers together.
Then sc4 at the top of Rnd 5 of the second flipper. Now your flippers are both joined together and you will be working over these 8 stitches.
Sew in the cut yarn end from flipper one and use this to close up any gaps between flippers one and two.
Rnd 2: Sc 8 (8)
Rnd 3: Sc 8 (8)
Rnd 4: *2sc* X8 (16)
Rnd 5: Sc 16 (16)
Cut the yarn leaving a 2-3 inch tail and then sew it onto the end of the whale. Sew in the end and cut off any excess yarn.
Eyes
Sew two eyes onto the whale using black yarn.
Now your whale is finished!
Mobile Instructions
To make a Whales of the Universe mobile you will need to make seven whales in different colors and a Styrofoam/polystyrene ring wreath of diameter 8” or 25cm for the top of the mobile. To cover the mobile you will crochet a striped strip using all seven colors that you used for your whales.
Ring cover
Row 1: Chain 33, starting in the second chain from the hook, sc along the chain. You will have 32 sc stitches.
Row 2: Chain 1, turn, sc 32.
Repeat row 2 until the strip measures 30 in[77 cm], changing color every 2 rows. Leave a short tail when you change colors as you can use this to sew up the ring at the end. Once you have finished the strip, wrap it around the ring and then sew it up.
Attach the whales to the mobile using different lengths of yarn so that the whales hang in a spiral.
To hang up the mobile, attach some threads of yarn to the top of the ring, hold together about 8 in [20 cm] above the ring and knot all the threads together. Then attach a hook into the knot.
Large Whale Pattern
Yarn (for one whale)
White: 6g of Women’s Institute Premium Acrylic Double Knitting Yarn in White
MC: 14g of Women’s Institute Premium Acrylic Double Knitting Yarn color of your choice
Scrap of black yarn for eyes
Hook
3mm crochet hook
Notions
Fiberfill Stuffing
Sewing needle to sew in ends
Scissors
Stitch marker to mark the start of the round
Finished size
Approximately 5.5 inches (14cm) end to end, 4 inches (10cm) wide

Gauge
11 stitches and 11 rows to measure 2×2 in (5x5cm) over single crochet using a 3mm hook or size needed to obtain stated gauge.
Abbreviations
See our standard abbreviations.
Repeats
I have put the instructions that need to be repeated within ** like this *2sc*, followed by X8 to indicate number of repeats.
Round and row totals are in parentheses at the end of each round.
Large Whale Instructions
Rnd 1: With white, create a magic ring and sc 8 into the ring. Pull the tail to close the gap. (8)
Rnd 2: *2sc* X8 (16)
Rnd 3: *Sc 1, 2sc* X8 (24)
Rnd 4: *Sc 2, 2sc* X8 (32)
Sew in end from rnd 1.
Rnd 5: *Sc 3, 2sc* X8 (40)
Rnd 6: *Sc 4, 2sc* X8 (48)
Rnd 7: *Sc 5, 2sc* X8 (56)
Rnd 8: Sc 3, 2sc, *Sc 6, 2sc* X7, Sc3 (64)
Rnd 9: Sc 64 (64)
Rnd 10: Sc 64 (64)
Cut the white yarn, leaving a 2 inch tail to sew in at a later stage.
Rnd 11: Join yarn of MC, sc 64 (64)
Repeat rnd 11, five more times.
Sew in the white end from rnd 10 and then continue working with end from rnd 16.
Rnd 17: *Sc 6, sc2tog* X8 (56)
Rnd 18: Sc 56 (56)
Rnd 19: *Sc 5, sc2tog* X8 (48)
Rnd 20: Sc 48 (48)
Rnd 21: *Sc 4, sc2tog* X8 (40)
Rnd 22: Sc 40 (40)
Rnd 23: *Sc 3, sc2tog* X8 (32)
Rnd 24: Sc 32 (32)
Stuff your whale here.
Rnd 25: *Sc 2, sc2tog* X8 (24)
Rnd 26: Sc 24 (24)
Rnd 27: *Sc 1, sc2tog* X8 (16)
Rnd 28: *Sc2tog* X8 (8)
Add in a bit more stuffing before sewing up here if required.
Rnd 29: Cut the yarn leaving a 2 inch tail and attach a sewing needle to the end of the yarn, then draw it through the top of all the final 8 stitches, and cinch top of the whale head shut like a drawstring. Sew in the end to secure it.
Flippers (Make two)
Rnd 1: With MC, create a magic ring and sc 6 into the ring. Pull the thread to close the gap. (6)
Rnd 2: *2sc* X6 (12)
Sew in the end from rnd 1.
Rnd 3: Sc 12 (12)
Repeat rnd 3, twice more.
Now cut the yarn leaving a 3 inch length to sew the flipper to the side of the whale. You will want to sew the flipper on the side of the body around the middle, just on the first MC round and above the last white round.
Tail
To make the tail, you will first need to make two tail flippers separately and then join them together.
Tail flippers (Make two)
Rnd 1: With MC, create a magic ring and sc 6 into the ring. Pull the thread to close the gap. (6)
Rnd 2: *2sc* X6 (12)
Sew in the end from round 1.
Rnd 3: Sc 12 (12)
Repeat rnd 3, twice more.
Rnd 6: *sc2tog* X6 (6)
To finish your first tail flipper, cut the yarn leaving a 2 inch length to sew in at a later stage.
When you have finished your second tail flipper, do not cut the yarn.
Joining tail flippers to make the tail
Rnd 1: Hold the first flipper to the right the second flipper. Using the yarn for the second flipper (the yarn you didn’t cut), sc 6 into the top of stitches from Rnd 6 on the first flipper to join both flippers together together.
Then sc6 at the top of Rnd 6 of the second flipper. Now your flippers are both joined together and you will be working on these 12 stitches you just worked.
Sew in the cut end from flipper one and use it to close any gaps between flippers one and two.
Rnd 2: Sc 12 (12)
Rnd 3: Sc 12 (12)
Rnd 4: *2sc, sc 4, 2sc* X2 (16)
Rnd 5: Sc 16 (16)
Rnd 6: *2sc, sc 6, 2sc* X2 (20)
Rnd 7: Sc 20 (20)
Cut the yarn leaving a 2-3 inch tail and then sew it onto the end of the whale. Sew in the end and cut off any excess yarn.
Eyes
Sew two eyes onto the whale using black yarn.
Now your whale is finished!
 About the Designer: Ruth Haydock
 About the Designer: Ruth Haydock
Ruth Haydock is a Knitting and Crochet Designer currently based in the UK. Ruth’s mum taught her to knit in 2008, just before she started university and then a few years later taught her how to crochet. Throughout the years, knitting and crochet has been a constant in Ruth’s life, helping her to overcome depression, find purpose and to become the person that she is today.
Her designs are inspired by her travels abroad and her love of science fiction movies and TV shows. Her most popular designs include her knitted and crocheted Globes and her Knitted Solar System Pattern and Spheres, which are available on Ravelry. This year Ruth had a design featured in Simply Crochet Magazine in the Hook to Hook Designer Challenge in Issue 71.


Leave a Reply