 Size
Size
About 8” tall
Abbreviations
Please see our standard crochet abbreviations.
Yarn
Worsted weight yarn – I used Caron Simply Soft Party in “Black Sparkle” 115 yards
Hook
Size H/8 (5mm) hook
Notions
Polyester stuffing
Locking stitch markers (optional)
Scissors
Tapestry needle
1 pipe cleaner in a color to match your yarn
Small scraps of embroidery floss in red and white for mouth and fangs (I used DMC red 817 and DMC white B5200)
Embroidery needle
One pair 18 mm colored safety eyes (I used green) (can be found in various shops on etsy.com, suncatchereyes.net, or FreshStitches.com) NOTE: these are NOT safe for children under 3. Instructions are provided at the end of this pattern for making crocheted eyes (you’ll need a scrap of green yarn for these), or you can just embroider the eyes (using green embroidery floss).


Body (in black)
Starting with a Sloppy Slip Knot or a Magic Loop, ch 2.
Rnd 1: Sc 6 times in 2nd ch from hook (6 sts). PM in last sc st to denote end of rnd. Work in continuous spirals (i.e., don’t join with a ss).
Rnd 2: Sc twice in each st (12 sts)
Rnd 3: Sc twice in the next st, sc in next st; repeat 5 more times (18 sts)
Rnd 4: Sc twice in the next st, sc in next 2 sts; repeat 5 more times (24 sts)
Rnd 5: Sc twice in the next st, sc in next 3 sts; repeat 5 more times (30 sts)
Rnd 6: Sc twice in the next st, sc in next 4 sts; repeat 5 more times (36 sts)
Rnd 7: Sc twice in the next st, sc in next 5 sts; repeat 5 more times (42 sts)
Rnd 8: Sc twice in the next st, sc in next 6 sts; repeat 5 more times (48 sts)
Rnd 9: Sc twice in the next st, sc in next 7 sts; repeat 5 more times (54 sts)
Rnd 10: Sc twice in the next st, sc in next 8 sts; repeat 5 more times (60 sts)
Rnds 11 – 20 (10 rnds): Sc in each st (60 sts)
Rnd 21: Sc2tog, sc in next 8 sts; repeat 5 more times (54 sts)
Rnd 22: Sc2tog, sc in next 7 sts; repeat 5 more times (48 sts)
Rnd 23: Sc2tog, sc in next 6 sts; repeat 5 more times (42 sts)
Rnd 24: Sc2tog, sc in next 5 sts; repeat 5 more times (36 sts)
Rnd 25: Sc2tog, sc in next 4 sts; repeat 5 more times (30 sts)
Fasten off, leaving a long tail.
Head (in Black)
Starting with a Sloppy Slip Knot or a Magic Loop, ch 2.
Rnd 1: Sc 6 times in 2nd ch from hook (6 sts). PM in last sc st to denote end of rnd. Work in continuous spirals.
Rnd 2: Sc twice in each st (12 sts)
Rnd 3: Sc twice in the next st, sc in next st; repeat 5 more times (18 sts)
Rnd 4: Sc twice in the next st, sc in next 2 sts; repeat 5 more times (24 sts)
Rnd 5: Sc twice in the next st, sc in next 3 sts; repeat 5 more times (30 sts)
Rnd 6: Sc twice in the next st, sc in next 4 sts; repeat 5 more times (36 sts)
Rnd 7: Sc twice in the next st, sc in next 5 sts; repeat 5 more times (42 sts)
Rnd 8: Sc twice in the next st, sc in next 6 sts; repeat 5 more times (48 sts)
Rnds 9 – 16 (8 rnds): Sc in each st (48 sts)
Rnd 17: Sc2tog, sc in next 6 sts; repeat 5 more times (42 sts)
Rnd 18: Sc2tog, sc in next 5 sts; repeat 5 more times (36 sts)
Rnd 19: Sc2tog, sc in next 4 sts; repeat 5 more times (30 sts)
Fasten off, leaving a long tail.
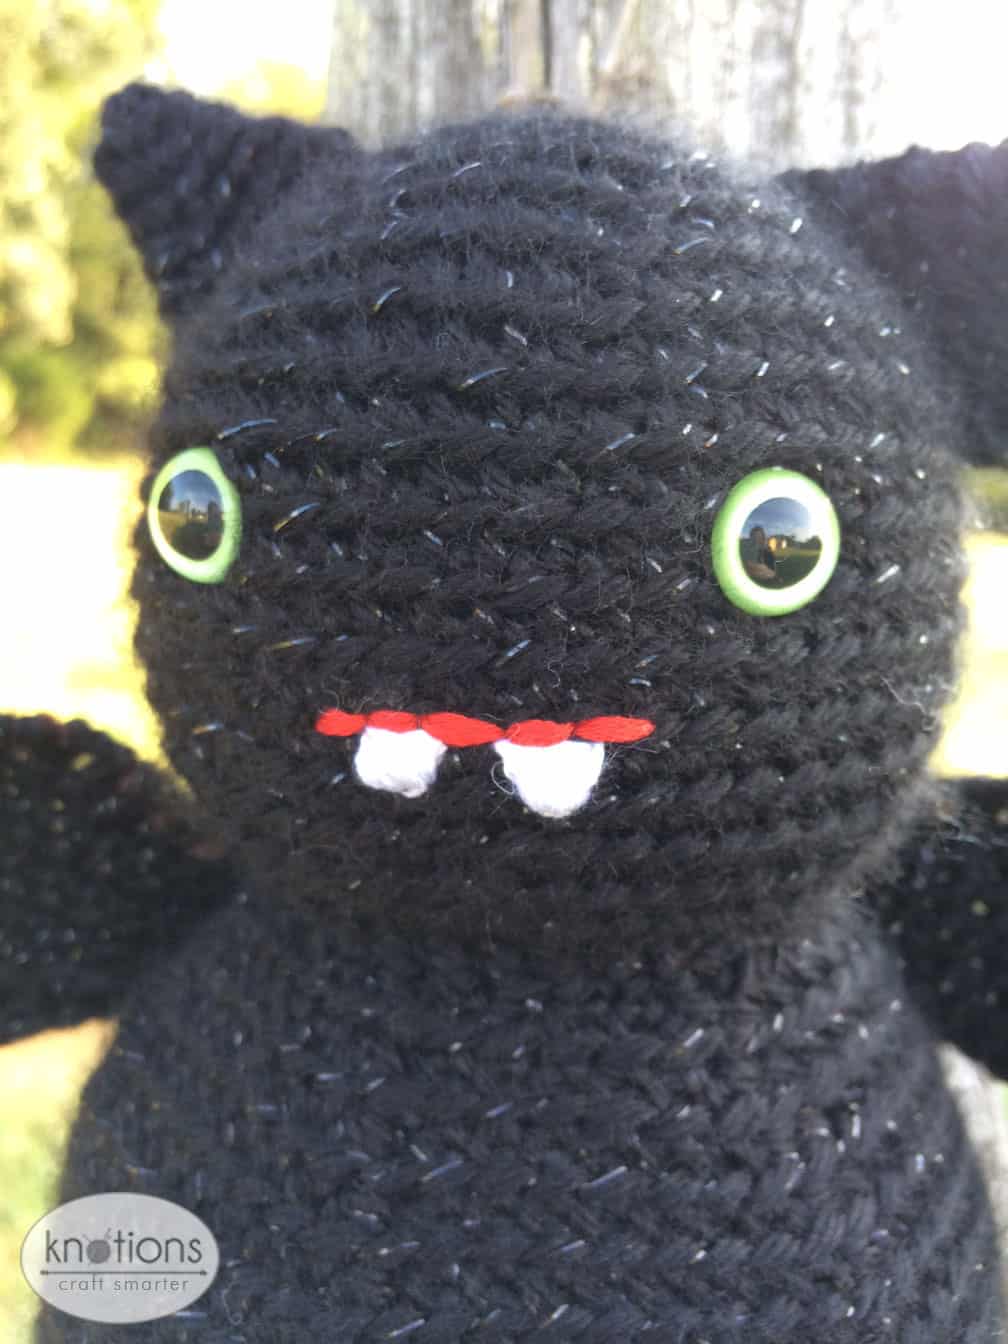
Embroider the mouth at about round 14 in red, then embroider two pointy fangs underneath in white. Also, place safety eyes at about round 11, with about 8 sts between them.
Feet (in Black; make 2)
Starting with a Sloppy Slip Knot or a Magic Loop, ch 2.
Rnd 1: Sc 6 times in 2nd ch from hook (6 sts). PM in last sc st to denote end of rnd. Work in continuous spirals.
Rnd 2: Sc twice in each st (12 sts)
Rnds 3 & 4: Sc in each st (12 sts)
Rnd 5: Sc2tog; repeat 5 more times (6 sts)
Fasten off, leaving a long tail.
Leave unstuffed, flatten and sew the top together.
Sew to bottom front of body at about round 8, with about 9 stitches between them.
Ears (in Black; make 2)
Starting with a Sloppy Slip Knot or a Magic Loop, ch 2.
Rnd 1: Sc 6 times in 2nd ch from hook (6 sts). PM in last sc st to denote end of rnd. Work in continuous spirals.
Rnd 2: Sc in each st (6 sts)
Rnd 3: Sc twice in the next st, sc in next st; repeat 2 more times (9 sts)
Rnd 4: Sc in each st (9 sts)
Rnd 5: Sc twice in the next st, sc in next 2 sts; repeat 2 more times (12 sts)
Rnd 6: Sc in each st (12 sts)
Rnd 7: Sc twice in the next st, sc in next 3 sts; repeat 2 more times (15 sts)
Fasten off, leaving a long tail.
Leave unstuffed, flatten and sew the top together.
Sew to top of head on either side, at about rnds 4-10.
Wings (in Black)
 With pipe cleaner, sc 33 sts around it, leaving about ½” on either end to fold over towards the back to hold stitches on. (See tutorial for how to do this)
Ch 1, turn.
Rows 1 – 6: Sc (or enough rows until piece measures about 1 1/2 “). Ch2, turn.
Row 7: Dc next 3 sts, hdc next 2 sts, sc next 2 sts, hdc next 2 sts, hdc next 2 sts, hdc next 2 sts, sc next 7 sts, hdc next 2 sts, dc next 2 sts, hdc next 2 sts, sc next 2 sts, hdc next 2 sts, dc next 3 sts. Ch2, turn.
Row 8: Repeat row 7.
Finish Off, weave in ends.
If needed, block piece before attaching to body.
Attach a length of yarn to the middle of the wings, near the pipe cleaner. After attaching head to body, sew the wings to the back of the body starting at the neck and working down the middle of the wings. Sew another row of stitches down either side of the middle line of stitches to secure wings in place. Tie a knot under the wings next to the body where it can’t be seen, then fasten off and pull the knot to the inside of the body.
Assembly
(detailed instructions included in each section above)
Embroider mouth and fangs on head, then place safety eyes (or sew baby-safe eyes to head, if not using safety eyes).
Sew ears to top of head.
Sew feet to bottom front of body.
Stuff head.
Stuff body.
Sew head on to body.
Sew wings to back of body.
Optional crocheted eyes
Using a scrap of green yarn, ch 2.
Rnd 1: Sc 6 times in 2nd ch from hook (6 sts)
Fasten off, leaving a long tail.
You’re done!
 About the Designer: Shauna Jared
 About the Designer: Shauna Jared
Shauna Jared lives in Middle Tennessee with her husband and five-year-old son. She has been knitting since 2009; she learned to crochet a few years later. Besides knitting and crocheting, she also enjoys drawing, painting with watercolors, reading, collecting vintage Pyrex, and spending time with her family. You can find Shauna on Ravelry.com where she has several patterns available. She is on Instagram as shaunajared75 and would love to see your finished objects using her patterns! Please feel free to tag her and use the hashtag #shaunajareddesigns.


Leave a Reply