
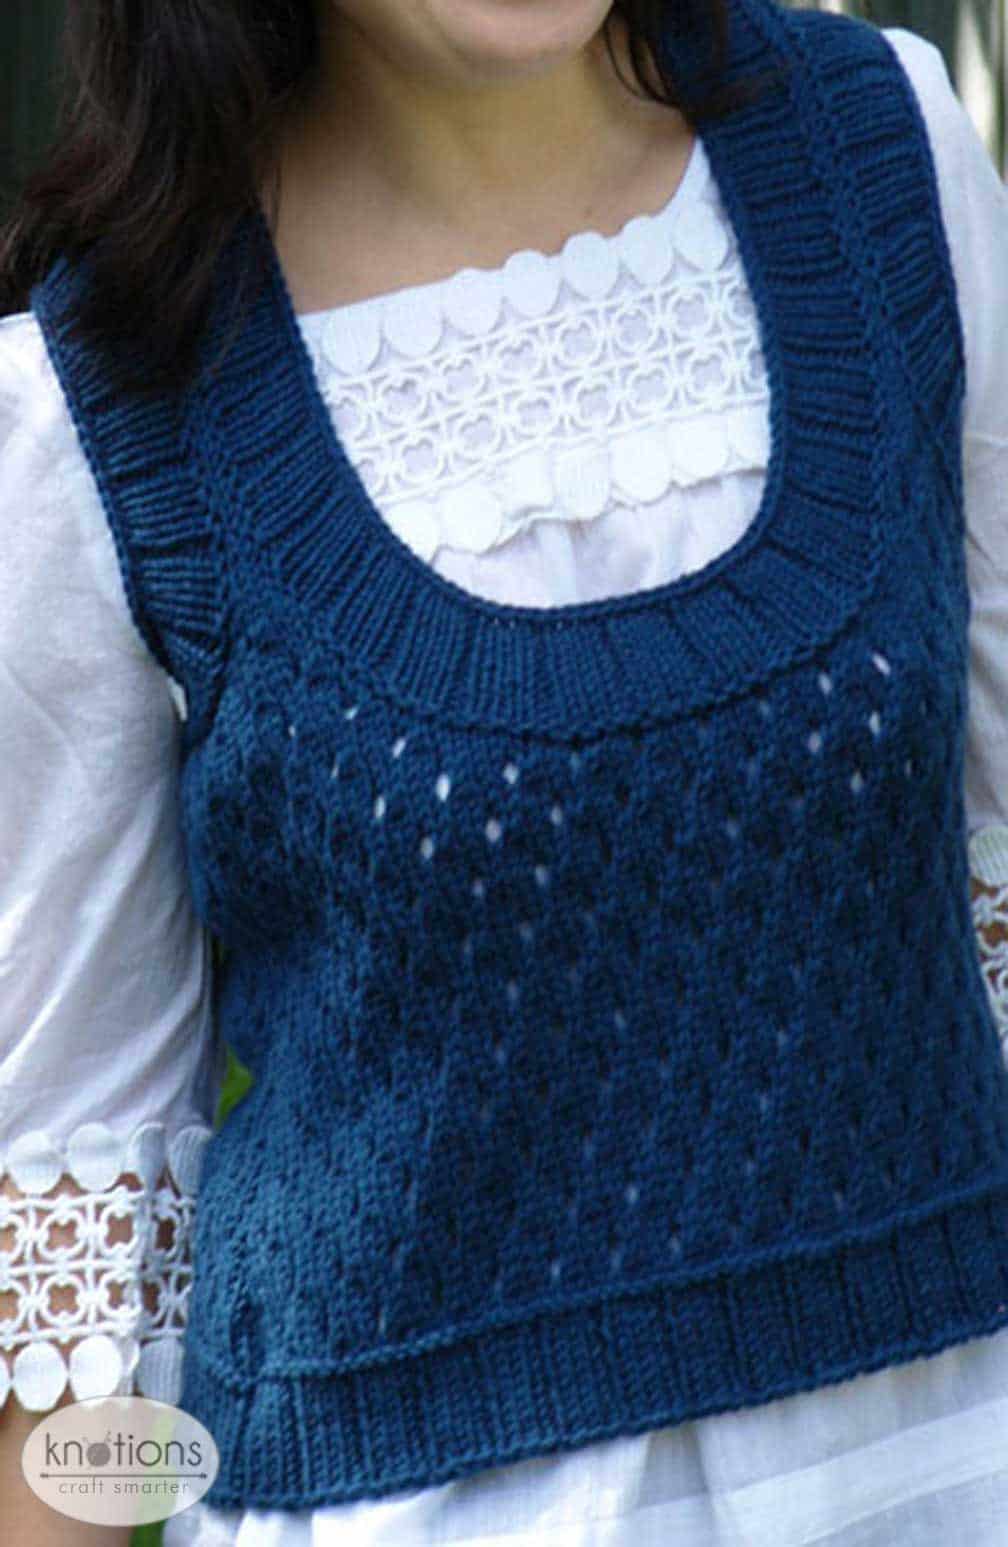
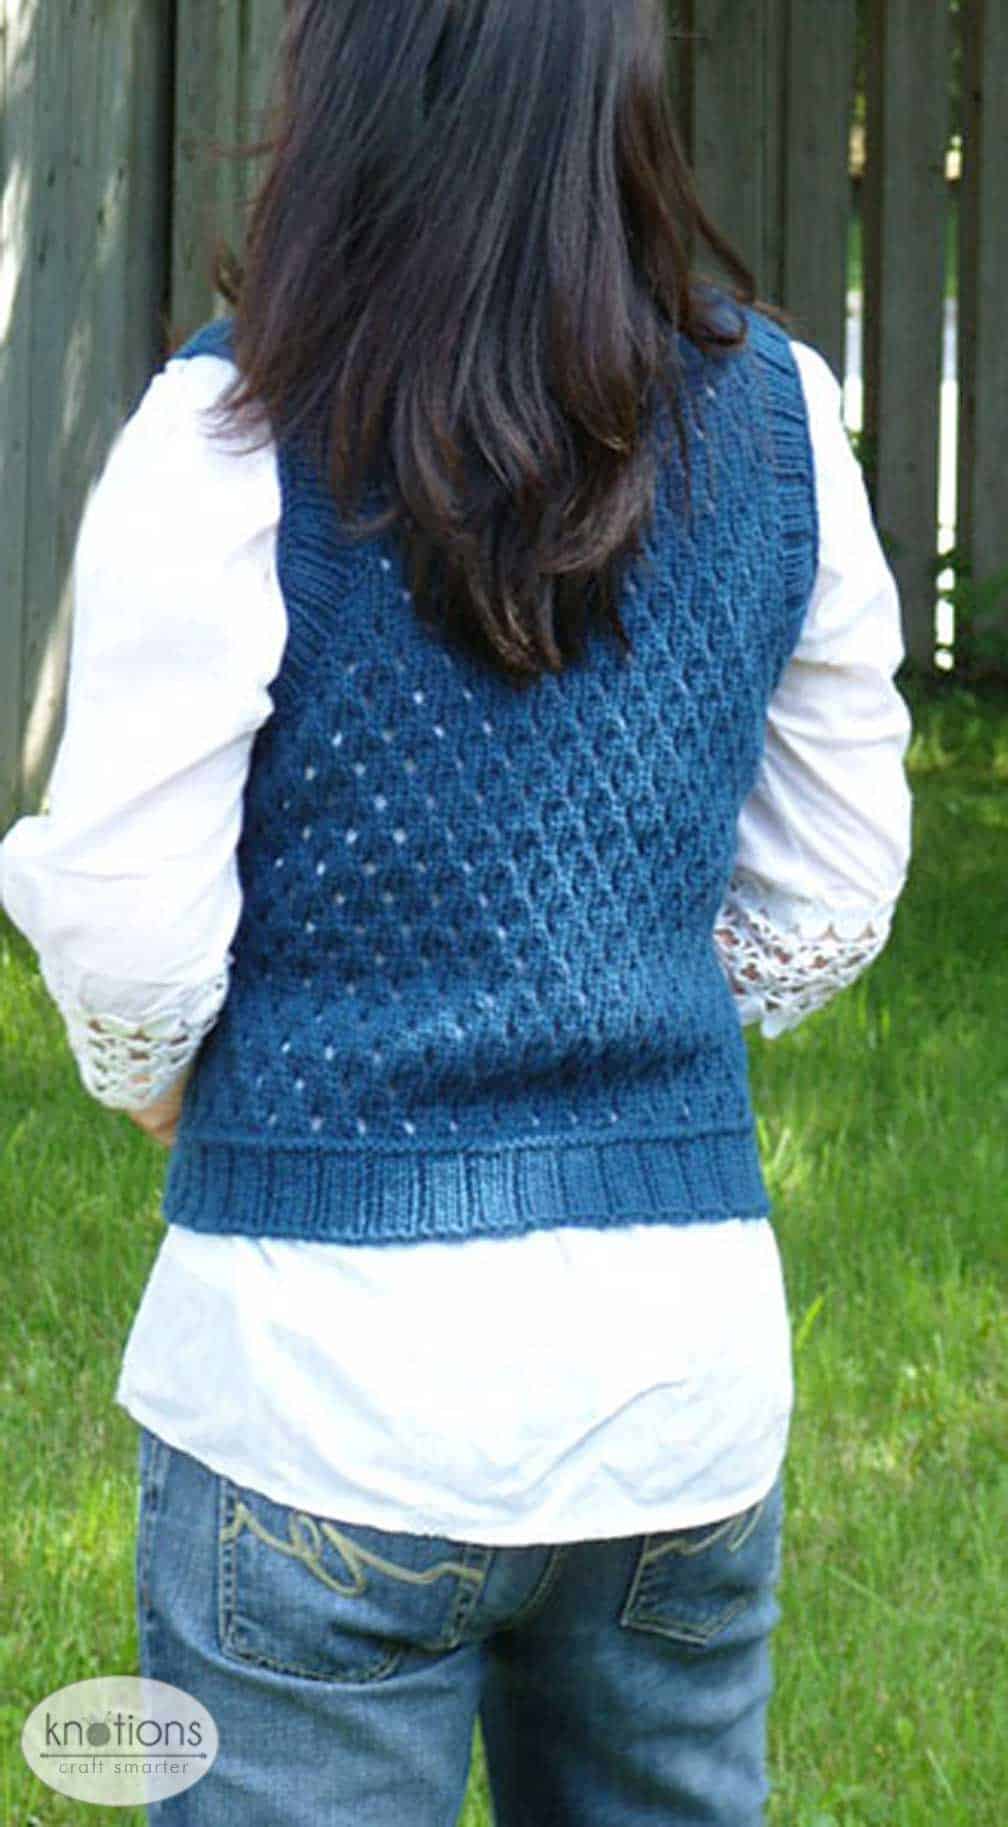
I was inspired to design this vest by the criss cross pattern of my neighbor’s fence.
We all know how hard it is to put our arms into those tight winter jackets when we wear bulky winter sweaters. Wear this vest layered over a shirt; your arms will be free and the vest will shield your back from those cold winter winds just like a protective fence. And if you need more incentive, this is a relatively quick knit with just two main pieces.
I hope you enjoy knitting this vest as much as I loved sharing it with you.


Sizes
Finished Bust Size 32 (36, 40, 44, 48, 52, 56, 60)” to Fit Bust Size 32 (36, 40, 44, 48, 52, 56, 60)” – No Ease Recommended
Shown is size 36” – short length
Yarn
Zaol Canon (100% Merino wool; 95 yds (87 m) / 50 g): Color# 529
Short Length: 5 (5, 6, 6, 7, 8, 8, 9) balls, Long Length: 6 (6, 7, 8, 8, 9, 10, 11) balls
Needles
US#7 (4.5 mm): 24″ circular
US#8 (5.0 mm): 24” circular
US G (4.5 mm) Crochet Hook (for crochet CO)
Gauge
16 sts and 20 rows = 4”, or 8 sts and 10 rows = 2” in staggered eyelet pattern after wet blocking.
Notions
Stitch markers; stitch holders; tapestry needle.
Chart

Abbreviations
Please see our standard list of abbreviations.
LKI (Left-leaning lifted incresase): Insert left needle into left loop of stitch two low below last completed stitch. Knit this stitch through the back loop. You can substitute this for m1L.
RKI (Right-leaning lifted increase): Insert right needle into right loop of stitch just below next stitch. Place it onto left needle and knit. Then Knit the stitch on needle. You can substitute this for m1R.
Please see detailed step-by-step instructions on the lifted increase here.
Pattern Notes
The body pieces have very narrow shoulders; wide neck and arm bands are added to the body during finishing to create the shoulder width.
The pattern includes options for two different lengths and instructions for how to re-size the pattern if you’re in between sizes, so, read the pattern carefully and let’s knit.
Side Shaping
Note: Side shaping is identical on front and back.
Dec Row (RS): K1, k2tog, work to last 3 sts, ssk, k1
Inc Row (RS): K2, LKI, work to last 2 sts, RKI, k1
Staggered Eyelet Pattern
(multiple of 4 sts plus 2)
Setup Row 1 (RS): K
Setup Row 2: P
Rows 1, 5 (RS):K
Rows 2, 4, 6, 8 (all WS rows): P
Rows 3: K1, *K2, k2tog, yo, rep from * until 1 st rem, k1
Row 7: K1, *k2tog, yo, k2, rep from * until 1 st rem, k1
Repeat Rows 1-8
How to get correct gauge?
It’s important to check the gauge in pattern. Make a gauge swatch as follows:
Using the long tail method, CO 30 sts
Rows 1-6: Knit
Row 7 (WS): K3, p24, k3
Rows 8, 16, 24 (RS): K4, *k2, K2tog, yo* 5 times, k6
Rows 9, 11, 13, 15, 17, 19, 21, 23, 25, 27, 29 (WS): K3, p24, k3
Rows 10, 14, 18, 22, 26, 30: Knit
Rows 12, 20, 28: K4, *k2tog, yo, k2* 5 times, k6
Rows 30-35: Knit
BO all sts.
Count sts and rows within a 2” or 4” square after wet blocking.
Crochet Chain CO
This CO stitch is worked with a crochet hook 0.5 mm smaller than the main needle size. I selected this CO because it matches the look of the bindoff.
Make a slip knot. Hold crochet hook in your right hand and hold knitting needle in your left hand.
Bring the yarn under the needle and grab a loop over the top of the needle using crochet hook.
Bring the yarn back under the needle in preparation for the next stitch. Repeat for desired number of stitches minus one. Move the loop from the crochet hook on right hand to the needle for the last stitch.
Pattern
Front and Back (both lengths)
Crochet CO 62 (70, 78, 86, 94, 102, 110, 118) sts with US 8 (5mm) needle and US G (4.5mm) crochet hook.
Row 1 (WS): K2, *p3, k1, rep from * to end.
Row 2 (RS): P1, *k3, p1 rep from * until 1 st rem, p1
Repeat Rows 1 and 2 until piece measures 2” from CO, ending with a RS row.
Next Row (WS): K15 (17, 19, 21, 23, 25, 27, 29), m1R, *k16 (18, 20, 22, 24, 26, 28, 30), m1R* twice, k15 (17, 19, 21, 23, 25, 27, 29) – 65 (73, 81, 89, 97, 105, 113, 121) sts.
Work Staggered Eyelet Pattern from chart, or as written below (note a single selvage st on each edge)
Rows 1, 5 (RS): Knit
Rows 2, 4, 6, 8: Purl
Row 3: K1(selvage st), *k2, k2tog, yo, rep from * until 4 sts rem, k3, k1(selvage st)
Row 7: K1 (selvage st), *k2tog, yo, k2, rep from * to end of row (note – selvage st is worked as a part of the last rep – no need to work a separate selvage st).
Cont even in patt until piece measures 3 (3, 3, 3, 3½, 3½, 4, 4)” from CO edge, ending with a WS row.
Dec Row (RS): K1, k2tog, work to last 3 sts, ssk, k1 – 2 sts dec’d.
Short Version
Keeping continuity of patt, rep Dec Row every 4th Row an additional 5 times; 53 (61, 69, 77, 85, 93, 101, 109) sts rem
Cont even in patt until piece measures 8 (8, 8, 8, 8½, 8½, 9, 9)” from CO edge, ending with a WS row.
Inc Row (RS): K1, LKI, work until 2 sts rem, RKI, k1 – 2 sts inc
Keeping continuity of patt, rep Inc Row every 6th row an additional 3 times; 61 (69, 77, 85, 93, 101, 109, 117) sts.
You will now folow separate instructions for the front and the back.
Back (Short Version)
Cont even in patt until piece measures 13 (13, 13, 13, 13½, 13½, 14, 14)” from CO edge, ending with a WS row.
Back (Long Version)
Keeping continuity of patt, rep Dec Row every 6th Row an additional 5 times; 53 (61, 69, 77, 85, 93, 101, 109) sts rem.
Cont even in patt until piece measures 10 (10, 10, 10, 10½, 10½, 11, 11)” from CO edge, ending with a WS row
Inc Row (RS): K1, LKI, work until 2 sts rem, RKI, k1 – 2 sts inc
Keeping continuity of patt, rep Inc Row every 6th row an additional 3 times; 61 (69, 77, 85, 93, 101, 109, 117) sts.
Cont even in patt until piece measures 15 (15, 15, 15, 15½, 15½, 16, 16)” from CO edge, ending with a WS row.
Back Armholes (both lengths)
BO 7 (9, 11, 12, 13, 14, 15, 17) sts at beg of next 2 rows, and BO 3 (3, 3, 4, 4, 4, 5, 5) sts at beg of next 2 rows.
Dec 1 st at each armhole edge next RS row once, 4th row once, and 6th row once – 35 (39, 43, 47, 53, 59, 63, 67) sts rem.
Cont even in patt until piece measure 9 (9, 9½, 9½, 10, 10, 10½, 10½)” from armhole edge.
Back: AT THE SAME TIME, work Back Neck and Shoulder Shaping
Back Neck
Work even in patt until piece measure 7½ (7½, 8, 8, 8½, 8½, 9, 9)” from armhole edge.
Split for Neck (RS): Work 6 (7, 8, 9, 11, 13, 14, 15) sts, rejoin new yarn, BO 23 (25, 27, 29, 31, 33, 35, 37) sts, work 6 (7, 8, 9, 11, 13, 14, 15)
Left Neck
Row 1(WS): Purl
Row 2 (RS): BO 3 (4, 5, 6, 7, 8, 9, 10) sts, k3 (3, 3, 3, 4,5, 5, 5)
Work even in st st until piece measures 1½” from back neck edge. Place rem sts on stitch holder or safety pin.
Right Neck
Row 1 (WS): Purl
Row 2 (RS): Knit
Row 3 (WS): BO 3 (4, 5, 6, 7, 8, 9, 10) sts, p3 (3, 3, 3, 4, 5, 5, 5)
Work even in st st until piece measure 1½” from Back Neck edge. Place rem sts on stitch holder or safety pin.
Front Neck
At the same time, begin neck shaping when work measures:
Short Version: 10 (10, 10, 10, 10½, 10½, 11, 11) ” from CO edge, ending with WS row.
Long Version: 12 (12, 12, 12, 12½, 12½, 13, 13) ” from CO edge, ending with WS row.
Sizes 32 (36, 40)”
Split for Neck (RS): K23 (26, 28) sts, join new yarn, BO 15 (17, 21) sts, k to end of row.
Right Neck
Row 1 (and all WS rows): P
Row 2: BO 4 (4, 5) sts, work to end of row .
Work evenly for 2 rows.
Rows 5, 9, 15 (Dec Row): Ssk, work to end of row.
Left Neck
Row 1: BO 4 (4, 5) sts, purl to end of row.
Row 2 (and all RS rows): K
Work evenly for 1 row.
Rows 4, 8, 14 (Dec Row): Work until 2 sts rem, k2tog.
Short Version: Cont even in patt, working both sides of neck separately, until piece measures 13 (13, 13)” from CO edge, ending with a WS row.
Long Version: Cont even in patt, working both sides of neck separately, until piece measures 15 (15, 15)” from CO edge, ending with a WS row.
Sizes 44 (48, 52)”
Split for Neck (RS): K33 (36, 39) sts, join new yarn, BO 19 (21, 23) sts, k to end of row.
Right Neck
Row 1 (and all WS rows): P
Row 2: BO 4 (5, 5) sts, k to end of row.
Row 4: BO 3 (3, 4) sts, k to end of row.
Rows 6, 8, 12, 18: Ssk, k to end of row.
Left Neck
Row 1(WS): P
Row 3: BO 4 (5, 5,) sts, purl to end of row.
Row 5: BO 3 (3, 4) sts, purl to end of row.
Row 6, 8, 12, 18: Work until 2 sts rem, k2tog
Short Version: Cont even in patt, working both sides of neck separately, until piece measures 13 (13½, 13½)” from CO edge, ending with a WS row.
Long Version: Cont even in patt, working both sides of neck separately, until piece measures 15 (15½, 15½)” from CO edge, ending with a WS row.
Sizes 56 (60)”
Split for Neck (RS): K41 (45) sts, join new yarn, BO 27 (27) sts, k to end of row.
Right Neck
Row 1 (and all WS rows): P
Row 2: BO 5 (6) sts, k to end of row..
Row 4: BO 3 (4) sts, k to end of row.
Rows 6, 8, 12, 16, 22: Ssk, k to end of row.
Left Neck
Row 1(WS): P
Row 3: BO 5 (6) sts, purl to end of row.
Row 5: BO 3 (4) sts, purl to end of row.
Rows 6, 8, 12, 16, 22: Work until 2 sts rem, k2tog
Short Version: Cont even in patt, working both sides of neck separately, until piece measures 14 (14)” from CO edge, ending with a WS row.
Long Version: Cont even in patt, working both sides of neck separately, until piece measures 16 (16)” from CO edge, ending with a WS row.
Front Armholes (both lengths)
BO 7 (9, 11, 12, 13, 14, 15, 17) sts at beg of next 2 rows, and BO 3 (3, 3, 4, 4, 4, 5, 5) sts at beg of next 2 rows.
Dec 1 st at each armhole edge next RS row once, 4th row once, and 6th row once – 3 (4, 3, 3, 4, 5, 5, 5) sts rem.
Cont even in st st until piece measure 9 (9, 9½, 9½, 10, 10, 10½, 10½)” from armhole edge.
Finishing
Using mattress stitch, sew sides seams. Using backstitch, sew shoulder seams.
Neck and Arm Band
Neck Band Pick Up Row: With RS facing, Pick up 80 (84, 92, 96, 104, 108, 116, 120) sts on Front and 24 (28, 32, 36, 40, 44, 48) sts on Back using larger circular needle.
Arm Band Pick Up Row: With RS facing, pick up 60 (64, 72, 76, 84, 88, 92, 100) sts on Armhole using larger circular needle.
Place sm and work all bands as follows, working in the rnd:
Setup Row: Purl
3×1 Rib Pattern: *k3, p1, rep from * to end of rnd.
Work evenly in 3×1 Rib Pattern until ribbing measures ¾ (¾, 1, 1, 1¼, 1¼, 1¼, 1¼)” from pick up edge. Change to smaller circular needle.
Work evenly in 3X1 Rib Pattern until ribbing measure 1½(1½, 1¾, 1¾, 2, 2, 2, 2)” from pick up edge. BO.
Tips for Custom Sizing
If your bust size falls in the middle of two sizes (e.g. 34”), you can easily adjust this pattern for a better fit as follows:
Add 4 sts to the CO count for each of the back and front.
For example: Size 34”
CO 66 sts. When working the armholes, work an extra decrease on each side, and when working the neck, BO 2 additional sts when doing the Split for Neck row.
Neck Band and Arm Band sts can remain the same as a size 30”.
Schematic


Is there any errata for this pattern?
Thank you.
no there isn’t. if there was it would be right on the pattern page in red, and it would also have the date of the errata too.
here’s an example of a pattern with errata https://knotions.com/issues/march-2017/pattern-march-2017/dryad-cowl/