 Spirals are magical. They move and manage to somehow stay the same and change at the same time. They lead you in and send you out . . . more than one magical journey has begun with a spiral.
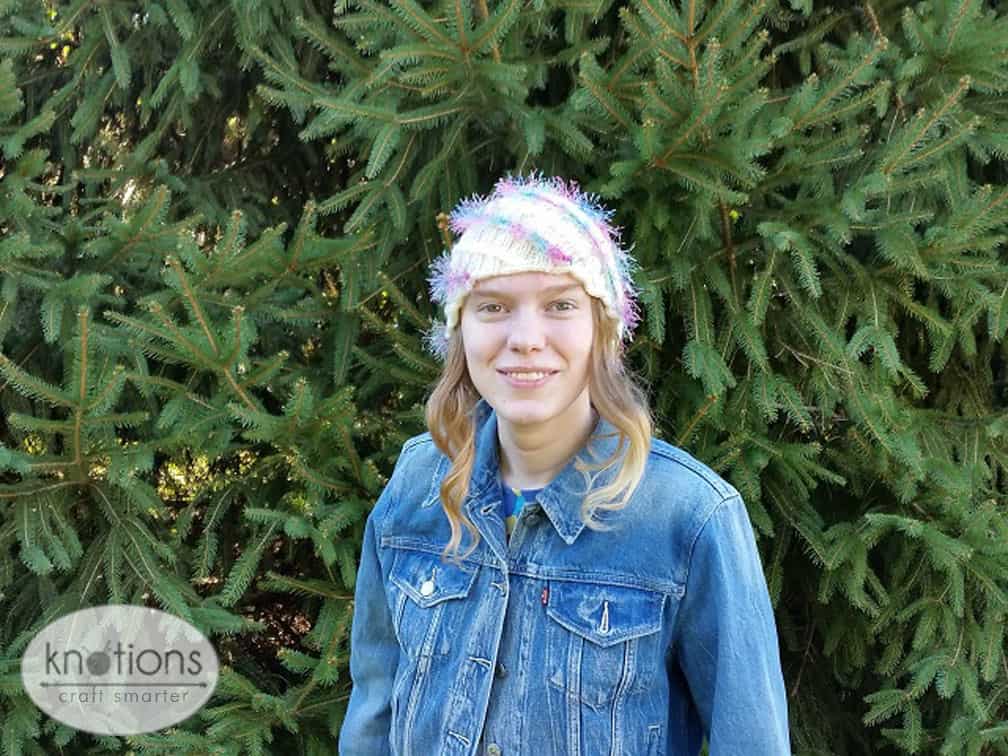
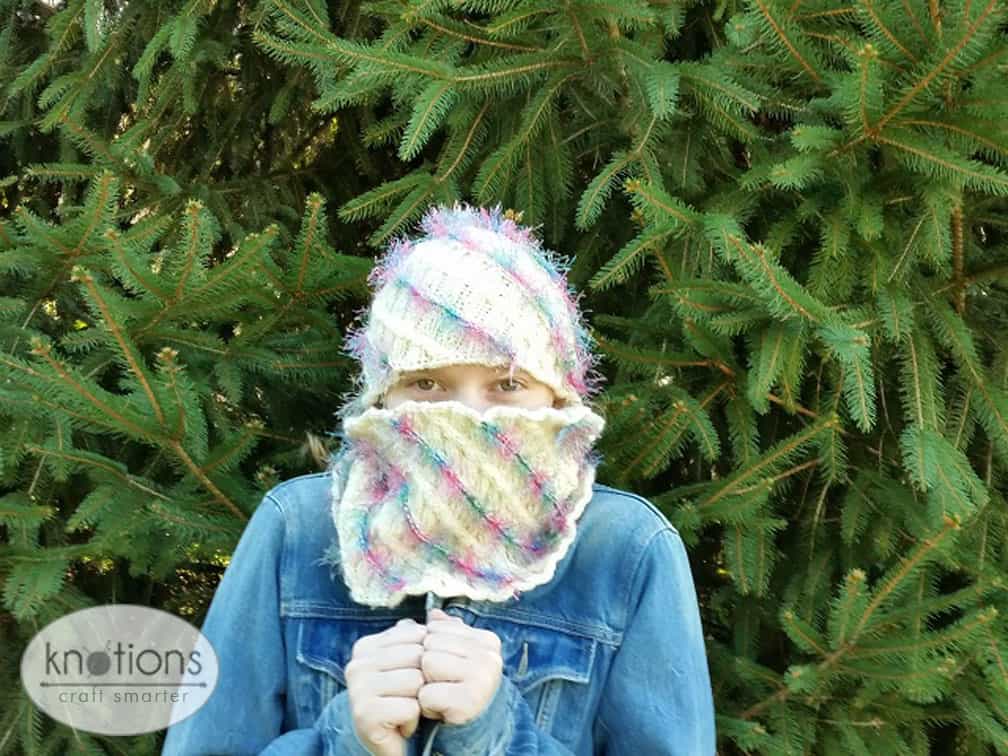
I bought several skeins of Lion Brand Fun Fur to make a humiliating cat bed or two for my kitties. I never thought I would use Fun Fur in a design, but then I thought up this hat, and a matching cowl. It seemed like a magical combination.
The spirals in this hat are 2-stitch wide, left-slanting cables, over a 2×2 rib, making a nicely stretchy fabric in a winter white, worsted weight yarn. Then, to make it truly magical, brightly colored fun fur is crocheted in slipstitches up the bars between the cable stitches on every other cable.
Fun fur is, well, fun! But one definite problem it has is being a little scratchy against the skin. Using slipstitches in this way keeps the fun fur to the outside of the piece, and also allows you to have small accents of it, instead of possible overkill, without worrying about floats.
Start your own magical journey with this hat. It’ll be fun!
TUTORIALS FOR THIS PATTERN
Size
Finished Size 16” [40.6 cm] circumference, 8” [20.3 cm] depth. Stretches to fit up to 22” [55.9 cm] around.

Yarn
Knit Picks Bare Wool of the Andes Superwash Worsted (100% Wool; 220 yards [201 meters]/100 grams): Bare (MC), 1 ball.
Lion Brand Fun Fur Prints (100% Polyester; 57 yards [52 meters]/40 grams): 208 Tropical (CC), 1 ball.
Needles
Size US 8 (5 mm): 16” [40 cm] circular and dpns (preferably set of 5, but 4 will work, also).
Notions
Size H/8 (5 mm) crochet hook, or size to match needles
stitch marker;
locking stitch marker
cable needle;
tapestry needle
small dpn (size US 00 or 0/1.75-2mm) (optional).
Gauge
20 sts and 25 rows = 4” [10 cm] in St st, unblocked.
30 sts and 30 rows = 4” [10 cm] in cable pattern, unblocked.

Abbreviations
Please see our standard abbreviations.
2/2lc Place next 2 sts on cn and hold to front; k2 from left needle; k2 from cn.
2/2lpc Place next 2 sts on cn and hold to front; p2 from left needle; k2 from cn.
2/2lc-ls K2 from cn.
2/2lc-rs Place next 2 sts on cn and hold to front; remove marker; k2 from left needle; pm.
2/2lpc-rs Place next 2 sts on cn and hold to front; remove marker; p2 from left needle; pm.
Pattern Notes
This hat is worked in the round from the bottom up.
The hat is knit entirely in the MC, with the CC embellishment crocheted on.
This pattern includes a photo-tutorial for adding the crocheted embellishment.
This hat has all-over cables that occasionally cross the end of the round, and between dpns in the decrease section.
This pattern results in a very stretchy fabric, even after adding the crocheted embellishment, and should fit a wide range of sizes. To make it larger or smaller, add or subtract a multiple of 20 sts (equal to about 2.7” or 6.9cm). You can add an odd multiple of 10 sts, but then you would need to change the placement of the embellishments.
This hat is designed to be a little longer than usual (6” or 15.25cm), before starting the crown decreases. To make it longer or shorter, work to the desired length, ending on an even numbered round. If the next round has 2/2lpc cables, work the next two rounds as normal. On the next round, remove the end of round marker, work to the first (2/2lc) cable, place marker, and start the first round of decreases there. Move the locking marker on the first row to the beginning of that cable.
Because of the way the cables spiral around the hat, it is strongly recommended that the beginning of round is marked, even if you normally do not do this.
This pattern is good for using up scraps of Fun Fur. The hat uses about 2 yards [1.8 meters] of CC per cable, or 12 yards [11 meters].
The hat as written used about 176 yards [161 meters] or 80 grams of MC.
Between the ribbing and the cables, this fabric is very dense. It may take longer to make these pieces than other similar items.
For the first several rounds, the fabric may seem looser than it should be. Persevere! After ten rounds or so, the fabric should start to pull together, thanks to the cables.
This hat was not blocked. Superwash yarn behaves differently from untreated wool. If you use superwash, machine wash and dry your hat as needed, turned inside out, instead of blocking. If you don’t want to use a dryer, allow the hat to lie flat to dry, and do not stretch it out.
The samples for this hat was started with the Chinese Waitress Cast-On (https://www.youtube.com/watch?v=ragBNdHwjg8).
Hat
CO 120 sts with MC on circular needles. Join to work in the round, pm at beginning of round. Place locking marker on first stitch.
Setup Rounds 1-2: *K4, p2, k2, p2, rep from * to end
Cable Pattern
Rnd 1: *2/2lc, p2, k2, p2, rep from * to end; 120 sts.
Rnd 2: *K4, p2, k2, p2, rep from * to end.
Rnd 3: *K2, 2/2lpc, k2, p2, rep from * to end.
Rnd 4: *K2, p2, k4, p2, rep from * to end.
Rnd 5: *K2, p2, 2/2lc, p2, rep from * to end.
Rnd 6: *K2, p2, k4, p2, rep from * to end.
Rnd 7: *K2, p2, k2, 2/2lpc, rep from * to end.
Rnd 8: *K2, p2, k2, p2, k2, rep from * until 10 sts rem, k2, p2, k2, p2, 2/2lc-rs.
Rnd 9: 2/2lc-ls, *p2, k2, p2, 2/2lc, rep from * until 8 sts rem, p2, k2, p2, k2.
Rnd 10: *K2, p2, rep from * to end, k4, *P2, k2, rep from * to end.
Rnd 11: *2/2lpc, k2, p2, k2, rep from * to end.
Rnd 12: *P2, k4, p2, k2, rep from * to end.
Rnd 13: *P2, 2/2lc, p2, k2, rep from * to end.
Rnd 14: *P2, k4, p2, k2, rep from * to end.
Rnd 15: *P2, k2, 2/2lpc, k2, rep from * to end.
Rnd 16: *P2, k2, p2, k4, rep from * to end.
Rnd 17: *P2, k2, p2, 2/2 LC, rep from * to end.
Rnd 18: *P2, k2, p2, k4, rep from * until 10 sts rem, p2, k2, p2, k2, 2/2lpc-rs.
Rnd 19: 2/2lc-ls, *k2, p2, k2, 2/2lpc, rep from * until 8 sts rem, k2, p2, k2, p2.
Rnd 20: *K4, p2, k2, p2, rep from * to end.
Repeat rnds 1-20 (42 rounds total, including setup).
Decrease rounds. Switch to dpns whenever necessary, dividing sts evenly.
Rnd 1: *2/2lc, p2, k2, p2, rep from * to end; 120 sts.
Rnd 2: *K2tog, k2, p2, k2, p2, rep from * to end; 108 sts.
Rnd 3: *K1, 2/2lpc, k2, p2, rep from * to end.
Rnd 4: *K1, p2tog, k4, p2, rep from * to end; 96 sts.
Rnd 5: *K1, p1, 2/2LC, p2, rep from * to end.
Rnd 6: *k1, p1, k2tog, k2, p2, rep from * to end; 84 sts.
Rnd 7: *K1, p1, k1, 2/2lpc, rep from * to end.
Rnd 8: *K1, p1, k1, p2tog, k2, rep from * until 7 sts rem, k1, p1, k1, p2tog, 2/2lc-r; 72 sts)
Rnd 9: *2/2lc-ls, k1, p1, 2/2lpc, rep from * until 4 sts rem, k1, p1, k2.
Rnd 10: *K3, p1, k2tog; repeat from *; 60 sts.
Rnd 11: *2/2lc, k1; repeat from *.
Rnd 12: *K2tog, k3; repeat from *; 48 sts.
Rnd 13: *K1, 2/2lc; repeat from *.
Rnd 14: *K2tog, k2; repeat from *; 36 sts.
Rnd 15: *K1, ssk; repeat from *; 24 sts.
Rnd 16: *Sl st to right needle, sl st to cn and hold in front, sl st from right needle back to left needle, ssk, put st from cn back on left needle, ssk, rep from * to end; 12 sts.
Break wool, leaving a 6” (15.25 cm) tail. Pull tail through rem sts twice, and tighten.
FINISHING
Step 1: Starting at the bottom of a cable, slide the small dpn under the bars between the two cable sts. (In the picture, a larger needle is used on the cable to the left, for better detail.) You will not get all of the stitches on there. Only do as many rounds as you feel are workable. When you’ve worked all of the bars on the dpn, take it out and slide it under more bars. (This step is optional. If you feel comfortable finding the bars without the needle under them, you do not need it.)

Step 2: With CC, make a slipknot and place on crochet hook.

Step 3: Slide hook under first bar and back up.

Step 4: Bring working yarn down over the hook and catch a loop of it. Pull loop under bar, and through loop on hook.


Repeat steps 3 and 4 to the top of the cable.
Step 5: Cut yarn, leaving a 3” (7.6cm) tail. Pull tail through last loop and tighten.

Repeat on every other cable (8 cables total).
Step 6: Weave the CC ends into the backs of the cables. Weave in MC ends. Block as desired.


ABOUT THE DESIGNER: MONA TERWEDOW
 Mona Terwedow tried being normal once, but that experiment failed explosively. Now she tries to follow her own path, which sometimes spirals wildly out of control. Her designs reflect her personal sense of style and wonder. You can find her on Ravelry as WildTalents.


Leave a Reply