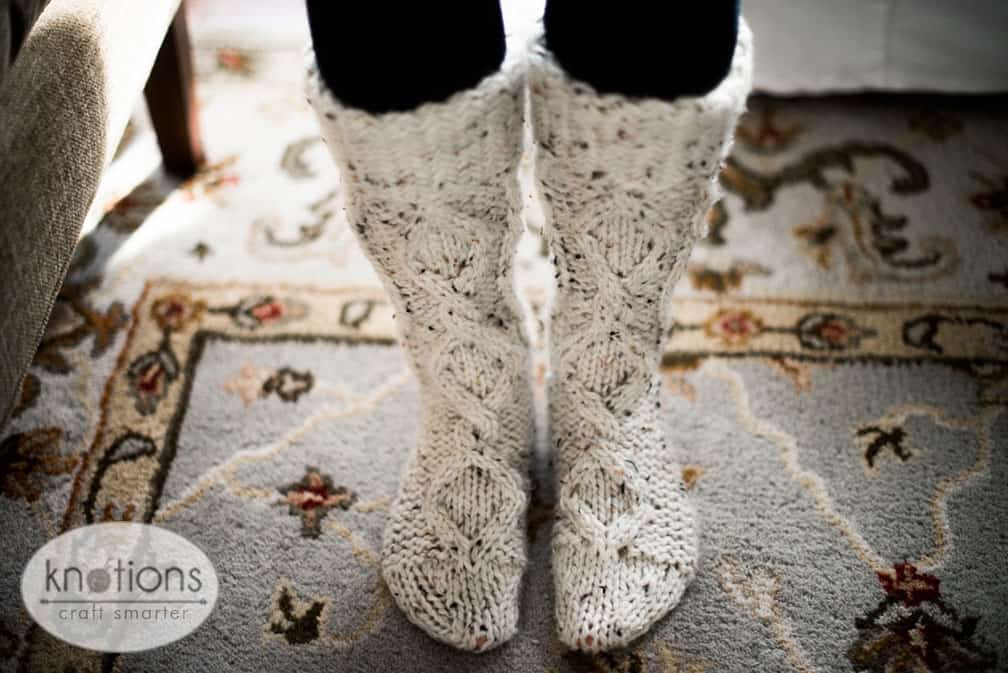
 These slipper socks are a super cozy, fun and fast knit! Made with bulky yarn and a fun and easy to memorize cable design, they make a great knit for a cold day.
Size (in US/Canadian shoe sizes)
Small – Womens size 5-6
Medium – Womens size 7-8
Large – Womens size 9-10
Shown in size medium
Yarn
Loops & Threads Charisma Tweed (97% Manufactured Fibers – Acrylic 3% Manufactured Fibers – Rayon / Viscose; 93 yards [85 meters]/85 grams): Color: Cream. Pattern requires 250 yards.
Needles
Size US 10 (6 mm): double pointed needles or magic loop method.
Size US 11 (6.5 mm): straight needles for the cuff
Notions
crochet hook (any size); stitch holders; cable needle; tapestry needle.
Gauge
12 sts and 16 rows = 4” [10 cm] in St st before blocking


Abbreviations
Please see our standard abbreviations.
- C4F – Cable 4 front
- T3B – Twist 3 back
- T3F – Twist 3 front
- C3F – Cross 3 front
- C3B – Cross 3 back
Charts
Leg Chart

Foot Chart

Pattern Notes
The cuff is knit flat and seamed.
The body of the sock is knit in the round from the top down.
This pattern uses the heel flap & gusset technique.
Chart is made for medium sock.
Sock
Cuff: (worked flat – in horizontal herringbone stitch)
- CO 14 sts using the larger (US 11) needles
- Ssk, drop only the first stitch off the left needle, *slp, slk, knit them together like a ssk, drop only the first stitch off the needle *, rep from * to last stitch, k1 (keeping in mind the stitch is oriented on the needle is the opposite direcion); 14 sts
- *P2tog, drop only the first stitch off the needle *, rep from * to last stitch, p1
- Repeat steps 2-3 until it measures 12.5 (13, 13.5)”
- Sew short ends together to create a circle to work in the rnd.
Leg: (worked in the round)
- Pick up 36 (38, 40) sts along the cuff (start at the seam and work your way around, this is the seam and will run along the back of your leg)
- Rnd 1: P5 (6, 7), k8, p3, k4, p3, k8, p5 (6, 7).
- Rnd 2: P5 (6, 7), T3F, k2, T3B, p3, C4F, p3, T3F, k2, T3B, p5 (6, 7).
- Rnd 3: P6 (7, 8), k6, p4, k4, p4, k6, p6 (7, 8).
- Rnd 4: P6 (7, 8), T3F, T3B, p3, C3B, C3F, p3, T3F, T3B, p4(5, 6), p2tog; 35 (37, 39) sts.
- Rnd 5: P7 (8, 9), k4, p4, k6, p4, k4, p6 (7, 8).
- Rnd 6: P7 (8, 9), C4F, p3, C3B, k2, C3F, p3, C4F, p6 (7, 8).
- Rnd 7: P7 (8, 9), k4, p3, k8, p3, k4, p4 (5, 6), p2tog; 34 (36, 38) sts.
- Rnd 8: P7 (8, 9), k4, p2, C3B, k4, C3F, p2, k4, p5 (6, 7).
- Rnd 9: P7 (8, 9), k4, p2, k10, p2, k4, p5 (6, 7).
- Rnd 10: P2tog, p5 (6, 7), C4F, p2, T3F, k4, T3B, p2, C4F, p5 (6, 7); 33 (35, 37) sts.
- Rnd 11: P6 (7, 8), k4, p3, k8, p3, k4, p5 (6, 7).
- Rnd 12: P5 (6, 7), C3B, C3F p2, T3F, k2, T3B, p2, C3B, C3F, p4 (5, 6).
- Rnd 13: P5 (6, 7), k6, p3, k6, p3, k6, p4 (5, 6).
- Rnd 14: P4 (5, 6), C3B, k2, C3F, p2, T3F, T3B, p2, C3B, k2, C3F, p1 (2, 3), p2tog; 32 (34, 36) sts.
- Rnd 15: P4 (5, 6), k8, p3, k4, p3, k8, p2 (3, 4).
- Rnd 16: P3 (4, 5), C3B, k4, C3F, p2, C4F, p2, C3B, k4, C3F, p1 (2, 3).
- Rnd 17: P3 (4, 5), k10, p2, k4, p2, k10, p1 (2, 3).
- Rnd 18: P3 (4, 5), T3F, k4, T3B, p2, k4, p2, T3F, k4, T3B, p1 (2, 3).
- Rnd 19: P2tog, p2 (3, 4), k8, p3, k4, p3, k8, p2 (3, 4); 31 (33, 35) sts.
- Rnd 20: P3 (4, 5), T3F, k2, T3B, p3, C4F, p3, T3F, k2, T3B, p2 (3, 4).
- Rnd 21: P4 (5, 6), k6, p4, k4, p4, k6, p3 (4, 5).
- Rnd 22: P4 (5, 6), T3F, T3B, p3, C3B, C3F, p3, T3F, T3B, p3 (4, 5).
- Rnd 23: P5 (6, 7), k4, p4, k6, p4, k4, p4 (5, 6).
- Rnd 24: P2tog, p3 (4, 5), C4F, p3, C3B, k2, C3F, p3, C4F, p4 (5, 6); 30 (32, 34) sts.
- Rnd 25: P4 (5, 6), k4, p3, k8, p3, k4, p4 (5, 6).
- Rnd 26: P4 (5, 6), k4, p2, C3B, k4, C3F, p2, k4, p4 (5, 6).
- Rnd 27: P4 (5, 6), k4, p2, k10, p2, k4, p4 (5, 6).
- Rnd 28: P4 (5, 6), C4F, p2, T3F, k4, T3B, p2, C4F, p4 (5, 6).
- Rnd 29: P4 (5, 6), k4, p3, k8, p3, k4, p4 (5, 6).
- Rnd 30: P4 (5, 6), k2tog, k2tog, p3, T3F, k2, T3B, p3, k2tog, k2tog, p4 (5, 6); 26 (28, 30) sts.
- Move onto section 3 to create the heel
Creating the heel: you should now have 26 (28, 30) sts on your needles
Knitting the heel flap:
- Slip 13 (14, 15) sts onto two double pointed needles each. The outer 13 (14, 15) of these sts will be used to knit the heel flap. They should be directly opposite to the patterned area of your sock. Slip 6 (7, 7) from the left side of the first DPN and slip 7 (7, 8) from the right side of the second DPN onto a third DPN. These are you heel flap sts.
- P to the end of your heel flap so you’re ready to work just the heel flap.
The next set of instructions will only be worked on the heel flap. The instep sts will just remain, unworked.
- Turn your work, sl1k, *[k1 sl1] * rep until 2 (1, 2) sts rem, k 2 (1, 2).
- Turn your work, sl1p, p to end of heel row.
- Repeat steps 3 and 4 until you have a total of 10 (12, 14) rows in your heel flap.
Turning the heel
- You should now be on the right side of your work (if not, p one more row)
- Sl1k, k7 (8, 9), k2tog, k1.
- Turn your work, sl1p, p5 (5, 6), p2tog, p1.
- Turn your work, sl1k, k6 (6, 7) k2tog, k1.
- Turn your work, sl1p, p7 (7, 8), p2tog, p1.
- Turn your work, sl1k, k6 (7, 8) k2tog; 8 (9, 10) sts.
Knit the gusset
- Pick up 6 (7, 8) sts along the heel flap, place a stitch marker.
- Work the pattern seen in the chart across the top of the sock (you should be at rnd 31), place a st marker. Pick up 6 (7, 8) sts along the other side of the heel flap
We are now knitting in the round again, you should have 33 (37, 41) sts total.
- P across the bottom of the sock, and up the side of the gusset, p2tog just before the first st marker, work foot chart across the top of the sock, and p2tog just after the second st marker.
- Continue the next row as usual with no decreases.
- Repeat steps 3 – 4 two (three, four) more times (decreasing a total of 6 (8, 10) sts); 27 (29, 31) sts.
- P next row, p2tog in the middle of the bottom of the foot; 26 (28, 30) sts.
- Complete between 17-27 more rounds, depending on the length of your foot. Continue to follow the chart across the top of the foot.
Decrease toe
- After completing the sole, split your sts onto two needles with 14 (15, 16) sts on the top needle, and 12 (13, 14) sts on the bottom needle (pay close attention to ensure that the sts split symmetrically into the front/patterned area and bottom of the sock).
- K across the top of the foot, when you come to the cables you have been working, k the two border stitches together (decreasing 2 sts on the top needle, giving you 12 (13, 14) sts on each needle).
- *K1, k2tog. K until 3 before the end of the needle, k2tog, k1. * repeat from * on second needle.
- K next round.
- Repeat steps 3-4 until 10 sts rem.
Kitchener stitch
- Cut a tail of yarn 2 feet long, and thread a tapestry needle
- (With the yarn coming out of the right side of the back needle) go through the first st on the front needle as if to k, and drop it off the needle
- Go through the next st as if to p (leave it on the needle)
- Go through the first st on the back needle as if to p, and drop it off the needle
- Go through the next stitch as if to k (leave it on the needle)
- Repeat steps 2-5 until you have one stitch rem.
Go through your last st as if to k and slid it off the needle. Pull on your yarn to get the desired tension.
Finishing
Sew in all ends.
Wear and enjoy!
About the Designer: Abbye Dahl

Abbye is a Vancouver based knitwear designer who loves playing with color and texture! She has been knitting for over 12 years, and designing for two.
Visit her website at abbyedahl.ca/knit.


Hi, I’ve had the pin to this pattern saved for years on Pinterest, but never got around to making these. I’m wondering if it would be possible to adjust this pattern to make a Christmas stocking? My knowledge of knitting is pretty basic, so I’m just not sure how to adjust it myself. Any tips help! Thank you!
i’m so glad you like it! it would make a gorgeous stocking!
given that your knowledge of knitting is pretty basic, i’d suggest increasing the size of the yarn and needles and then following the pattern.
i’d also suggest a basic ribbing at the top rather than the herringbone.
does that help?
It’s been awhile since I made a pair of socks and I have some bulky yarn that I’ve been trying to find a pattern for. Thank you so much for this pattern!! Now to work through all of my other WIPs before I start these.
I’m the wrong one to talk to about too many WIPs 🙂