


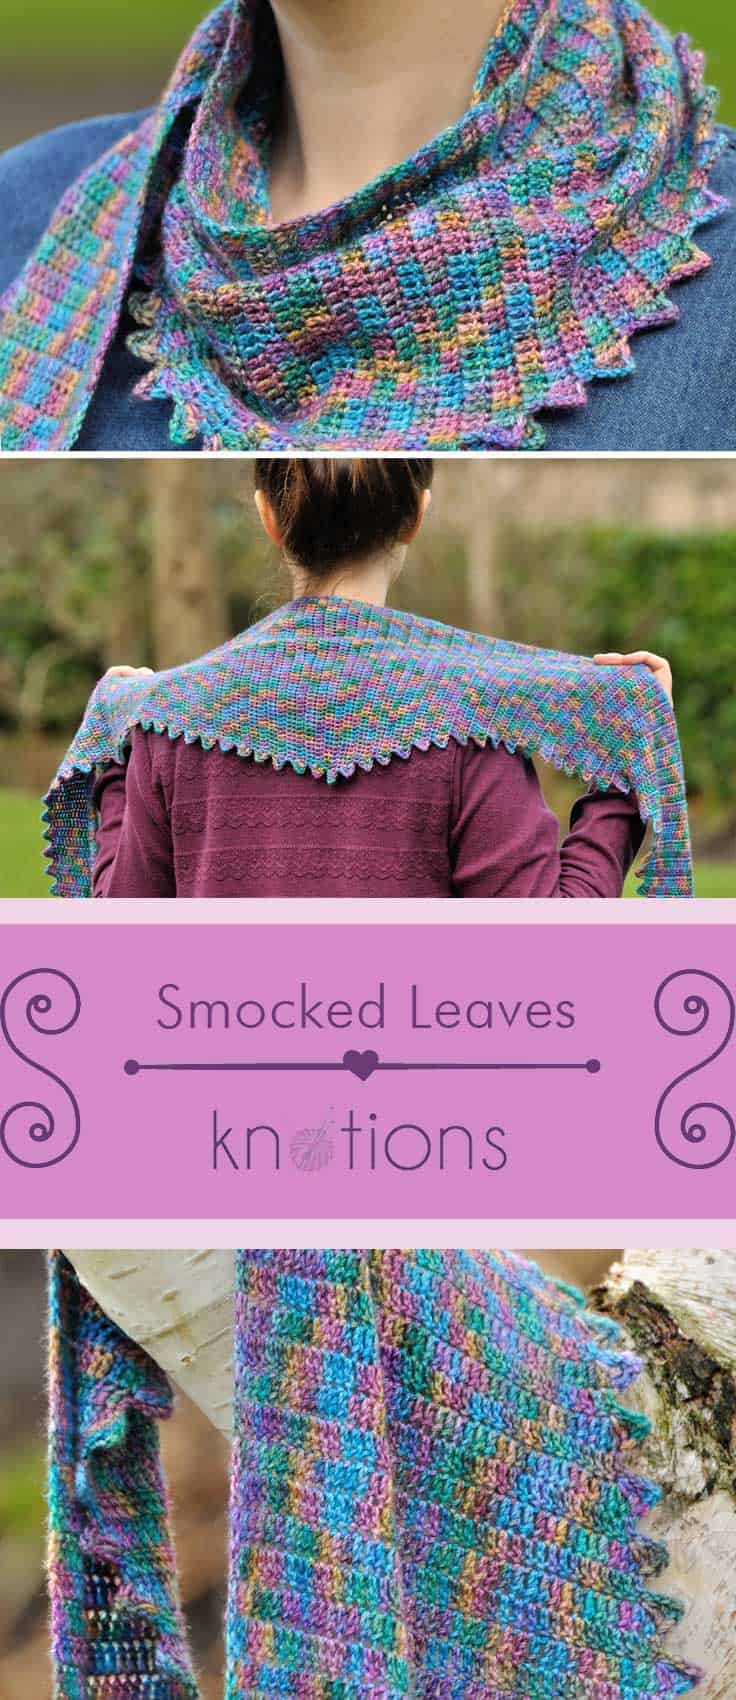
The main body of the shawl is worked in dc (US terms) with trebles added at the end of every second row to create the ridges which are reminiscent of the spine of a stegosaurus. I was inspired to choose this name as my daughter was learning about dinosaurs at school at the time I was creating it. I loved the strong graphic shape created by the plates on the spine of her favorite dinosaur.

Size
82.5 inches (209.5 cm) length x 8.75 inches (22 cm) depth

Yarn
Abercairn Yarn for Lagom Felt Studio (70% merino, 20% silk, 10% cashmere; 437 yards [400 meters]/105 grams); 1 skein in Enchanted Forest.
Hook
Size US F/6 (4 mm).
Notions
Scissors, darning needle.
Gauge
26 sts and 10 rows = 4” [10 cm] in dc after wet blocking.
Abbreviations
Please see our standard abbreviations.
Pattern Notes
The pattern increases by one stitch on every second row to create the long thin shape. It can be made with around 100g of any fingering weight yarn with a similar length and fiber composition to ensure good drape. To use up as much yarn from your special skein as possible either divide your yarn into two equal sized balls and work your increases until you have used up the first skein before decreasing, or wind your skein into one ball, weigh the unused yarn periodically as you make the shawl, and begin decreasing when you have used up just under half your skein.
Starting chains at the beginning of each row count as a stitch throughout. Turn at the end of each row.
Shawl Instructions
Make a magic ring.
Increasing pattern
Row 1(WS): Working into the magic ring, 3 ch, 1 dc; 2 sts.
Row 2: (RS): (4 ch, 2 tr, 2 dc) in same st, 1 dc; 6 sts.
Row 3: 3 ch, dc in each dc across; 3 sts.
Row 4 (Ridge Row): (4 ch, 2 tr, 2 dc) in same st, dc in each dc across; 7 sts.
Row 5: 3 ch, dc in each dc across; 4 sts.
Repeat rows 4-5 until you have used your first ball (if you have divided your skein in half) or until you have used just under half your yarn (if working from one ball).
Decreasing pattern
Row 1(RS – Ridge Row): (4 ch, 2 tr) in same st, dc in each dc across.
Row 2(WS): 3 ch, dc in each dc across.
Repeat rows 1-2 until 2 sts remain.
Finishing
Fasten off yarn and weave in ends. Block to given dimensions, making sure to pin out each ridge.
 About the Designer: Anna Hooker
 About the Designer: Anna Hooker
Anna lives with her husband and young daughters in Scotland. She is a keen crocheter who draws inspiration from around her to design items that are both beautiful and practical.
Find Anna on Ravelry as Anna Hooker (patterns) or lilyrosepetal (personal) and on Instagram as @thecrochetninja.


Hello! I’m trying do this pattern (my english is not good) and i have a question…
What it means, for example “; 6 sts” ?
Thank you in advance !
It tells you how many stitches you will have in that row, once you’re done crocheting it.
Thank you! I get it and I love the result! I leave an image.
Thanks for sharing this pattern! 🙂
you’re welcome! and i love the purple!
One more thing…if you repeat rows 4 and 5 all the way, then it’s 7 stitches, 4 stitches, 7 stitches, 4 stitches. How does that make it get wider?
It’s actually 7 sts, 4 sts, 8 sts, 5 sts, 9 sts, 6 sts, etc.
Remember, on the even rows you’re dc’ing in each dc across. That count increases by one with each ridge.
Wow! This pattern is very confusing! I thought I followed it exactly. I’ll rip out what I did and try again, but I don’t think I understand what to do. Thanks anyway.
It’s actually a pretty straightforward technique where it grows every second row. That’s even why we gave the stitch counts and also the schematic.
If something seems incorrect, I suggest that you should stop right away and ask someone else for assistance. Better than wasting all that effort.
And you should also read the entire pattern beforehand so you know what it’s trying to do.
I hate that you crocheted that entire tiny width because that’s not what’s in the design 🙁
This is what I’ve done so far. Is it right?
Thanks.
Unfortunately, no 🙁
The scarf should have gotten increasingly wider. You see how it said Row 3 had 3 sts and then Row 5 had 4 sts. Each set of rows should have been increasing a stitch. Looking at this though, you were making each row the same width.
I can’t figure out this pattern can you please help me?
Thank you,
Esther
Sure! What exactly is the issue?
It seems from the directions that you start from the bottom of the scarf with the “stegosaurus bumps” along the edge. I finished that part and now I don’t understand what to do next. Thanks!
ok. i’m going to ask a few more questions just to better understand where you’re at.
1. Did you split your yarn in half?
2. And, did you work until that half was done?
3. I believe, trying to interpret what you’re saying, is that you’ve done the Increasing Pattern, is that right?
4. And I don’t believe you’ve done the Decreasing Pattern yet. Is that correct?
Yes to all of your questions. Thanks.
Cool!
Then you’re actually just halfway there. If you look at the schematic, you’re right at the tip before the angle goes the other way.
So, now you work the Decreasing Pattern. You’re done with that half once you’re left with 2 stitches. At that point, you’re totally done!
Sorry but that doesn’t really help. How does one long strip of ridges become a triangle? How do you do the rest of the shawl? Hard for me to explain. I might just have to give up because I don’t really understand what to do. Wish there’s was a video tutorial!
Ok, you have one-half of the scarf at this point. The side with the bumps should be getting increasingly bigger.
Now, you have to do it the other way, so each set of rows has it go down one stitch in number.
It’s all one single scarf – you’ve just knit it to the halfway point.