We’ve given you several ways to add beads to knitting, and we go into the pros and cons of each:
- Beading by pre-stringing (this page)
- Beading with a crochet hook
- Beading with Superfloss
We suggest that you read all 3 (they each have their benefits) and even try each of them on a swatch.
We’ll be reviewing the pre-stringing method in this tutorial.
Getting prepared
I like to dump my beads into a small bowl with a lip that’s a good couple of inches tall. This keeps the beads from running all over the place, but also allows me to take a look at them.
Here’s the one I use.

Make sure that your yarn will fit through the center of the bead.
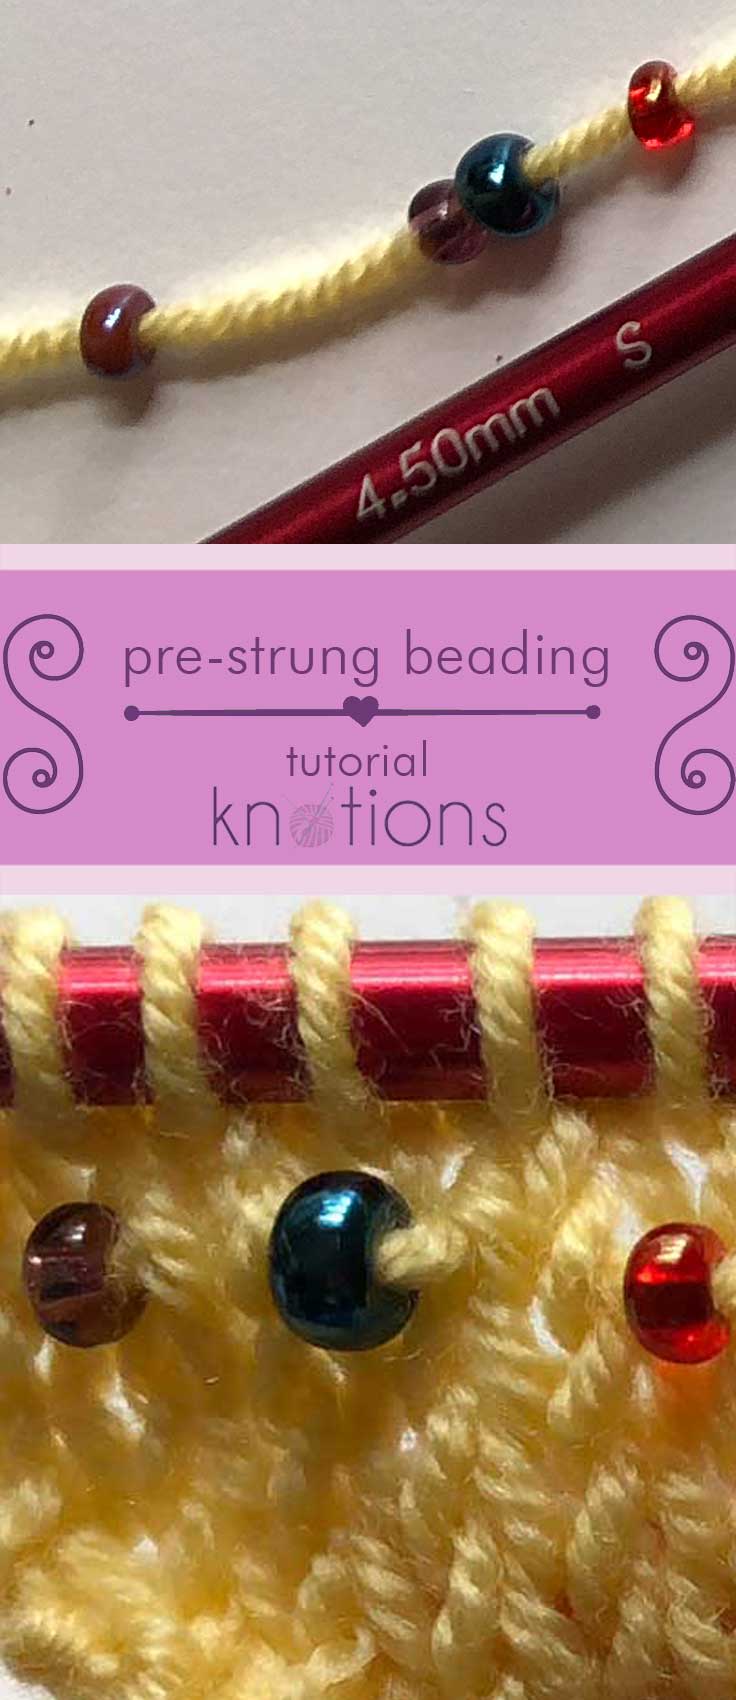
Using a thin sewing needle (one thin-enough to fit through the hole of the bead) or dental threader, thread the needle/threader with the yarn and then string as many beads as your pattern instructs. I’ve also been known to use a crochet hook in a pinch, but use a needle/threader if you have more than a few to do (truthfully, I did use a crochet hook for this tutorial because I have NO IDEA where my beading needle is – but it’ll show up when I’m feverishly looking for something else, so have no fear).
When you’re done, it will look something like this:

Keep in mind that the beads will be sliding down the yarn as you knit with it – and this action can be both annoying for the knitter and stressful on the yarn. So, make sure your yarn can handle this added stress.
Also, make sure you string enough beads because it’s very very difficult to add more after the fact. I have successfully added more, but trust me on this and just string some extra. If you still have some remaining when you’re done, you can either cut the yarn and slide them off, slide them to the end if your end is close or even cut the beads off (if you don’t care about retaining the extras).
Once I’m done, I do return what’s left of the beads to its original container – so be sure to keep that as well.
Work up until the point where you need to add a bead.
Step 1
With yarn IN FRONT, slide the bead up to stitch it needs to decorate.

Step 2
Slip that stitch purlwise while keeping the yarn in the front.

Step 3
Work the next stitch.
Note that I hold onto the bead with the nail of my right hand. This works for me and the way I knit, but the important thing is that you don’t allow the bead to migrate down and into that stitch you’re working.
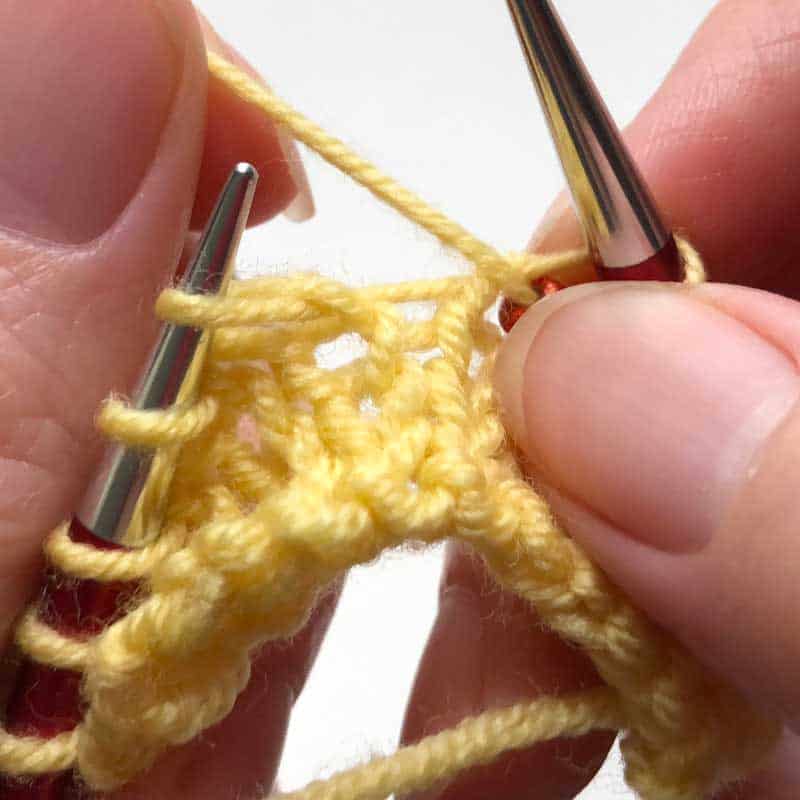
It’s this final step of working the next stitch that anchors the bead in place.
Here’s how it looks after working several stitches this way.

Pros and Cons
Pros of Beading by Pre-Stringing
- You load the beads once and then you’re done.
- Each bead is on the yarn (once it’s been loaded), so you know the bead will fit.
- It’s easy to travel with it, because the beads are all on the yarn.
Cons of Beading by Pre-Stringing
- You have to pre-string all the beads at once.
- Given this, the yarn can get beaten up or weakened by the constant sliding down of the beads that you haven’t used.
- You can’t change up the bead that’s used for a particular place once you’re there (because you’ve already pre-strung all the beads).
Practice makes perfect
As always, I suggest trying this first on a small swatch. This will give you the chance to familiarize yourself and get comfortable with handling the Superfloss.
My personal preferred method of knitting with beads
Given all the pros and cons, I still prefer using a crochet hook to add beads. But, if a lot of my beads were more organic (read – funky-shaped holes), I’d go to the Superfloss method.
About the Instructor: Jody Richards
 Jody loves pouring over stitch dictionaries and trying out new stitches. And while she likes all things crafting (well ok, except that one thing), yarn crafts are her true love (and she has the stash to prove it).
She’s a serial starter-of-projects and has a serious problem with finishing things without a deadline.
And don’t get her talking about hand-dyed yarns. You’ve been warned.
This was a very good tutorial. Simple and straight forward. Thank you for this simple and intuitive tutorial. 🙂
i’m so glad you liked it!
and thanks for leaving your comment 🙂