 Aquiloni cowl is worked using multidirectional knitting, so to obtain a stunning colorwork without having to carry more than one color at a time.
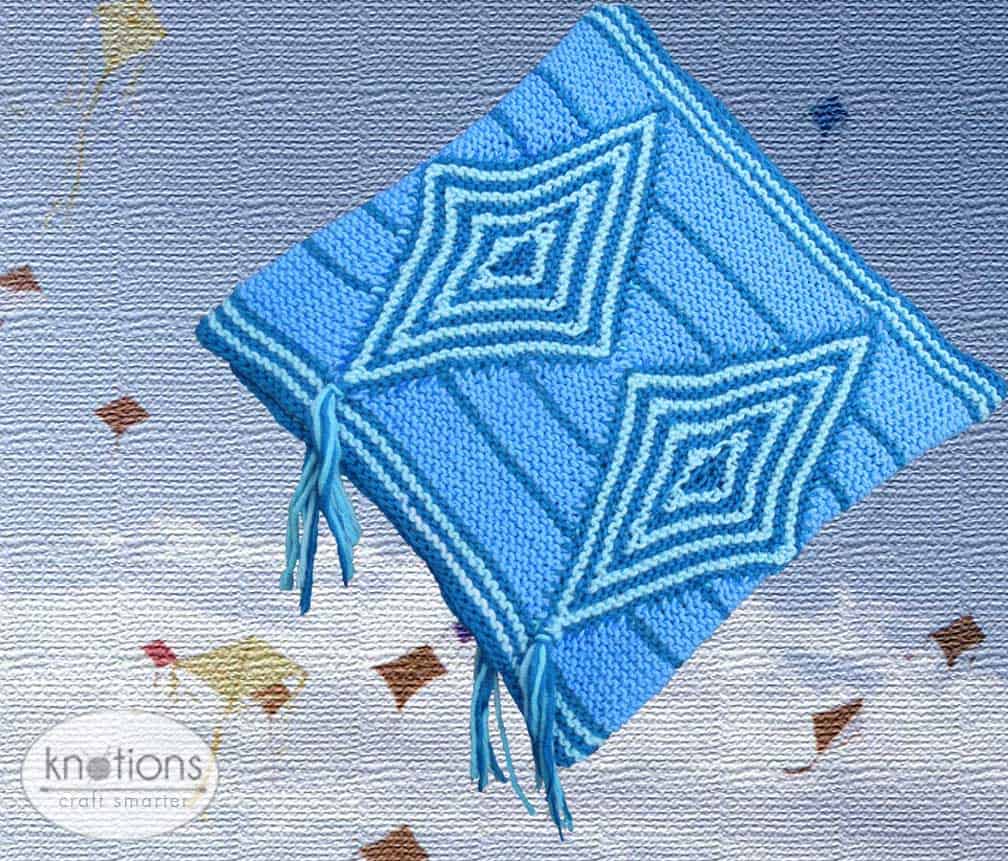
The rhomboid shapes remind me of kites (aquiloni) on a summer day. This is a perfect project for the end of the summer and first fall: bright, colorful and small enough to be carried around and knitted everywhere. And when you’ve finished, you have something to wear for the first chilly evenings that will remind you of a bright summer day.
Size
10×19.5 inches (25×50 cm)
Size is easily customizable, either using a different yarn weight and needle size or working more repeats.
Yarn
Rowan Baby Merino Silk DK 66% Superwash wool, 34% Silk 148 yds/135 m (50 g)
Color:1 ball Iceburg 699 for MC
1 ball Bluebird 684 for CC1
1 ball Cloud 693 for CC2
Needles
Size US 4 (3.5 mm) 24” circular.
Notions
1 marker; tapestry needle, crochet hook to add fringe (optional).
Gauge
18 sts and 46 rows = 4” [10 cm] in garter st after blocking.


Schematic
 Abbreviations

Please see our standard abbreviations.
kyok k1, yo, k1 in the same stitch (2 sts increased)
Pattern Notes
This pattern is worked in modules shaped with increases, decreases and short rows to obtain their “kite-like” shape. Modules are joined together while working.
Cowl
Module/kite
Make 2 modules
Using a provisional CO and CC1, CO 25 sts, PM, take another scrap piece of yarn and the CC1 you just cast on and CO 26 sts with this second strand.

K to 2 sts before end, w& t. {see our tutorial on how to work short rows}
Decreases
Row 1: Change to CC2, k to 1 bef st M, sl1, RM, k2tog, psso, slip st back to left needle, PM, sl back to right needle, k to 2 sts bef end, w&t.
Row 2: K to 2 sts bef last turn, w&t.
Row 3: Change to CC1, k to 1 st bef M, sl1, RM, k2tog, psso, slip st back to left needle, PM, sl back to right needle, k to 2 bef end, w&t.
Row 4: K to 2 bef last turn, w&t.

Repeat rows 1-4 twice more, then work rows 1-2 once more. (14 rows total)
Center
Row 1: With CC1, sl1, RM, k2tog, psso, slip st back to left needle, PM, sl back to right needle, turn (do not wrap)
Row 2: K3, turn (do not wrap).
Row 3: K1, RM, kyok, sl 2 sts to left needle, PM, sl 2 sts back to right needle, k1, turn (do not wrap).
Row 4: K5, turn (do not wrap).

Increases
Row 1: Change to CC2, k to M, RM, kyok, sl 2 sts to left needle, PM, sl 2 sts back to right needle, k3, w&t.
Row 2: K7, w&t.
Row 3: Change to CC1, k to M, RM, kyok, sl 2 sts to left needle, PM, sl 2 sts back to right needle, k to first w, pick up and k the w, k to the second w, pick up and k the w, w&t.
Row 4: K to first w, pick up and k the w, k to the second w, pick up and k the w, w&t.
Row 5: Change to CC2, k to M, RM, kyok, sl 2 sts to left needle, PM, sl 2 sts back to right needle, k to first w, pick up and k the w, k to the second w, pick up and k the w, w&t.
Row 6: K to first w, pick up and k the w, k to the second w, pick up and k the w, w&t.

Repeat rows 3-6 twice again, then change to CC1 and k 2 rows.
Put the first 25 live sts on a stitch holder, then the other 26 sts on another holder. Do not BO stitches.
Break working yarn, intentionally leaving yarn ends 3-4” long
Background
Put CC1 sts back on needle from one module, using one of the two holders with 26 sts and starting from the outer edge down to the center, then put back on needle CC1 sts for the other module,also using one of the two holders with 26 sts, this time starting from center up to the point. Keep both modules with RS facing.
Slip the first 27 sts from left hand needle to right hand needle. The background is worked starting from the center out.

Background (one side) Row 1: With MC, k2 tog, k1, turn the work.
Row 2: K3, turn the work.
Row 3: K to 1 st before the CC1 sts, k2tog (you’ll be working 1 CC1 st and 1 MC st), turn the work.
Row 4: K to 1 st before the CC1 sts, k2tog (you’ll be working 1 CC1 st and 1 MC st), turn the work.
Row 5: K to the CC1 sts, k1, turn the work.
Row 6: k to the CC1 sts, k1, turn the work.

Repeat Rows 3-6 twice again, then repeat rows 3-4 (9 “working” sts on needle; ).16 rows total)
Change to CC1 and work rows 5-6 once (11 “working” sts on needle; 18 rows total).
Change to MC and work Rows 3-6 a total of 3 times (17 “working” sts on needle; 30 rows total).
Change to CC1 and work rows 5-6 once (19 “working” sts on needle). Break CC1 yarn.
Change to MC and work Rows 3-6 a total of 3 times, then repeat rows 1-2 twice (25 “working” sts). Leave sts on a holder, break yarn.
Now work the background between the two modules, working from the center out in the other direction.

Put back on needle CC1 sts from one module, using the holder with the 25 sts on the other side of the background just worked, starting from the point toward the center. Pick up the center st worked when knitting the other side of the background, then return the CC1 sts from the other module, using the holder with 25 sts, starting from the center out to the point, keeping both modules with RS facing. Slip the first 26 sts from left hand needle to right hand needle.
Work background (one side) again. Note: you’ll be working the background on the opposite side.
Work another module/kite, and another background section between this new module and one of the first two, then work the last module and another background section between the new module and the first three.
Finally, work the last background section on the other side of the last module with the first module to join the cowl in the round. You now have a tube made of 100 sts on each side.
Border
Put back on needle the 100 sts from the 4 holders on one side of the cowl back on needle and join to work in the round. If you are working on the side where there are the longer yarn ends, leave them on the outside part of knitting (knit under them). Using CC1, work 10 rows in garter stitch, alternating between CC1 and CC2, starting and ending with CC1 and changing color every other row. BO all sts. Repeat border on the other side of the tube.
Finishing
Cut a 10 cm (4”) stranding of yarn from both CC1 and CC2 and add a fringe to the yarn ends (at the bottom point of each “kite”) using a crochet hook. Weave in ends.
Wash the piece and let it dry flat.
 About the Designer – Paola Albergamo
 About the Designer – Paola Albergamo
Paola Albergamo is a computer programmer who loves to create software algorithm and knitting patterns. And thinks they are both interesting in the same way. Take a look at her Ravelry designer page.


Leave a Reply