
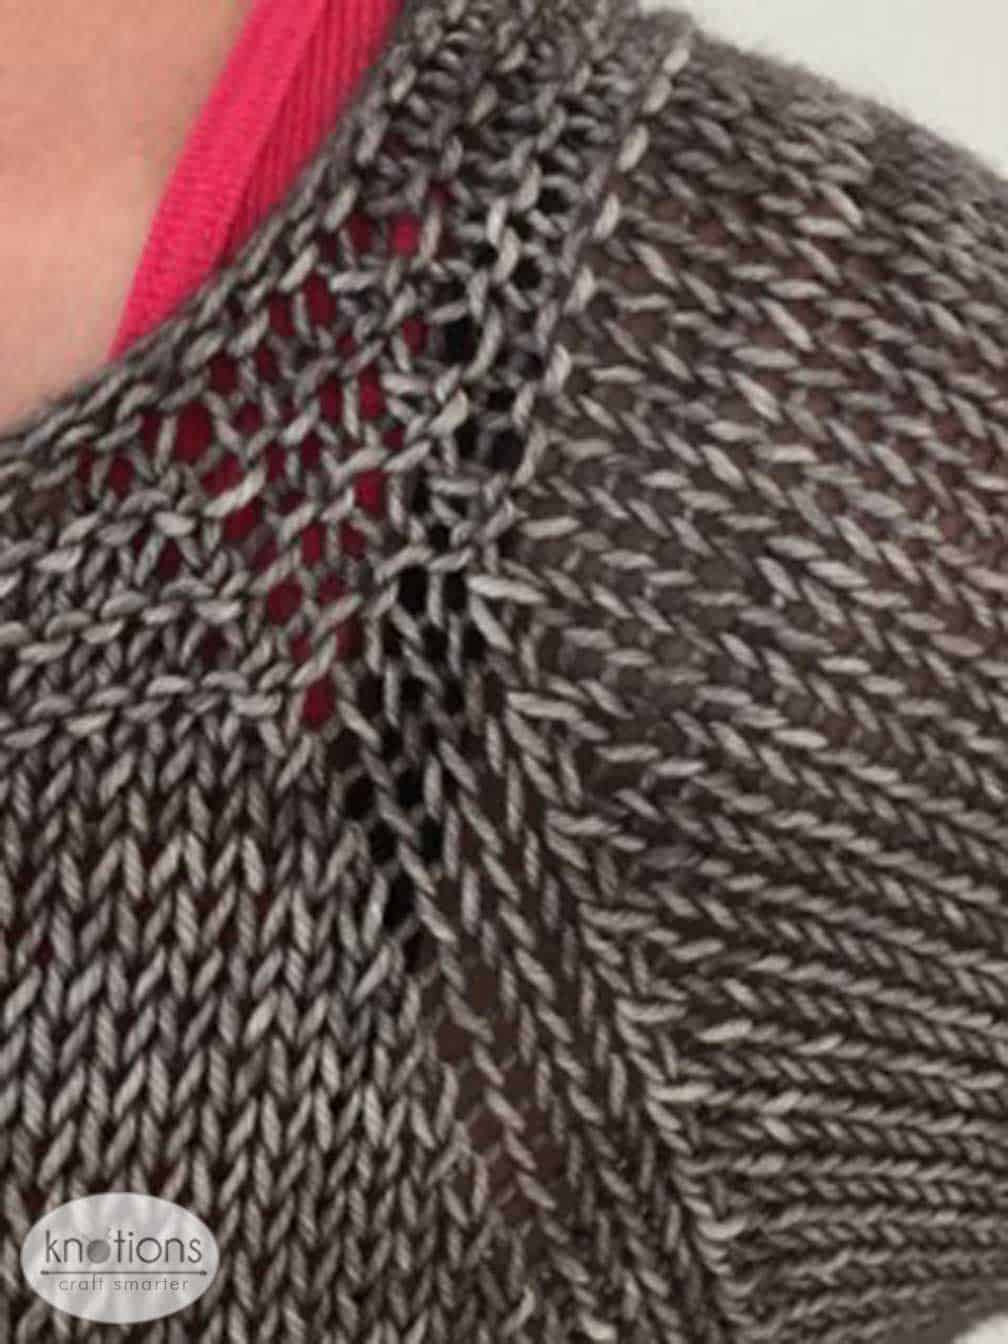
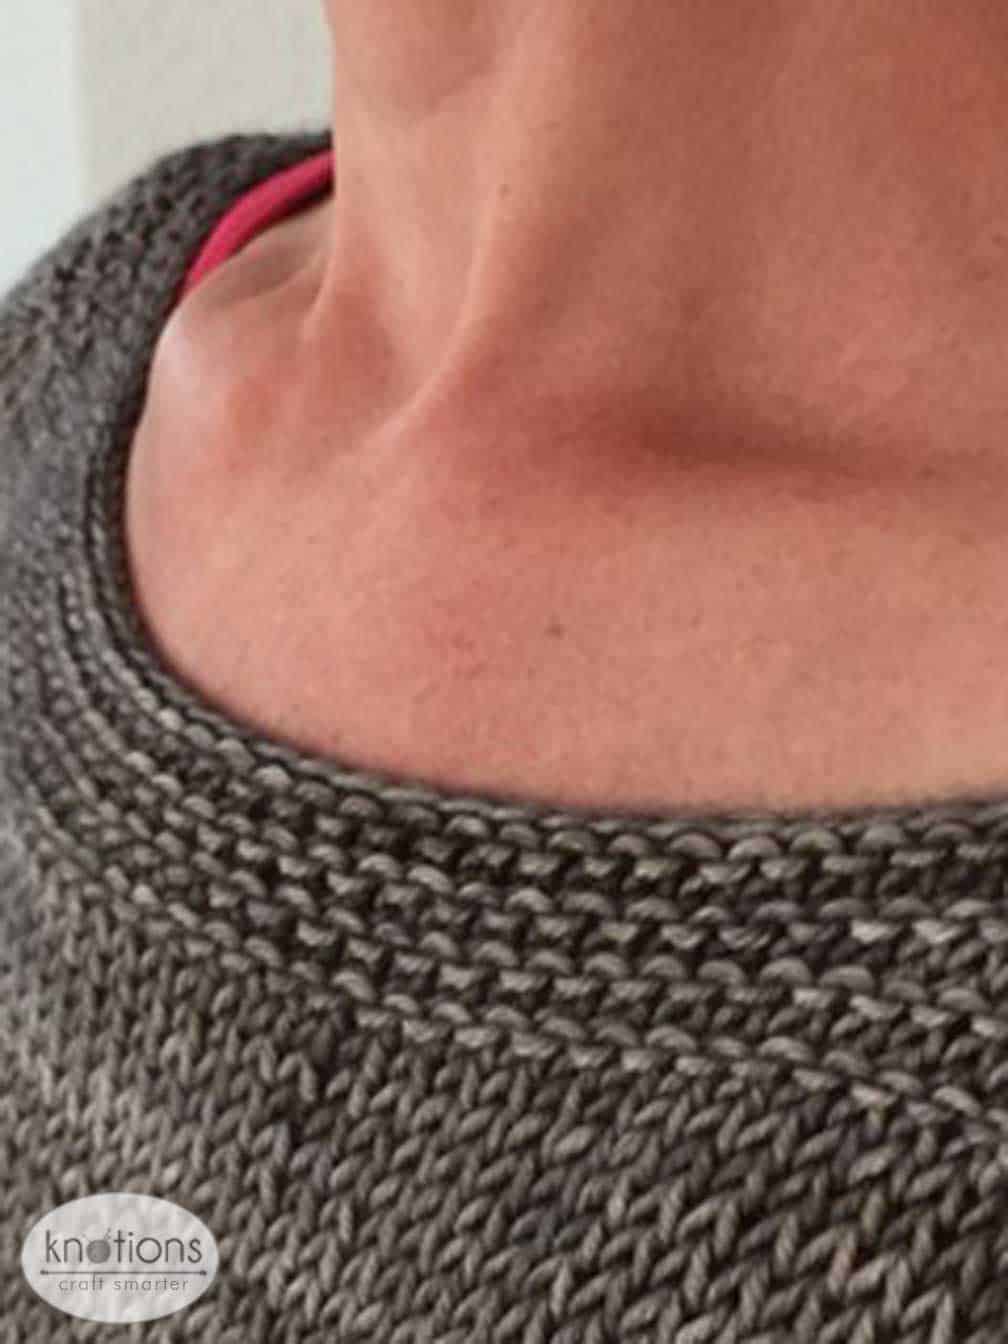
Center Street is a worsted weight, oversized boatneck pullover. It is knit in the round, bottom up with raglan shaping and a simple, intuitive lace panel up the center back.


Needles
we’ve updated the metric size of the needles because it wasn’t correct.
size 8 (5 mm) circular needles at least 32 inches long and DPNs (or size needed to obtain gauge)
Yarn
Western Sky Knits Magnolia Worsted (80-10-10 SW Merino, Cashmere, Nylon) in the barn wood colorway, or similar worsted weight yarn. 800- 1200 yards needed.
Notions
stitch markers
stitch holder or waste yarn
tapestry needle to weave in ends
Gauge (after blocking)
17 stitches x 22 rows per 4 inches on size 8 needles
Measurements
Finished Chest Measurement: 35 (38, 42, 46, 50, 54)
*Note: sweater is designed to be worn with several inches of positive ease, so knitter should work size 3-4 inches larger than actual bust measurement.

Abbreviations
Please see our standard abbreviations.
Charts
First Repeat

Remaining Repeats

Pattern
Body
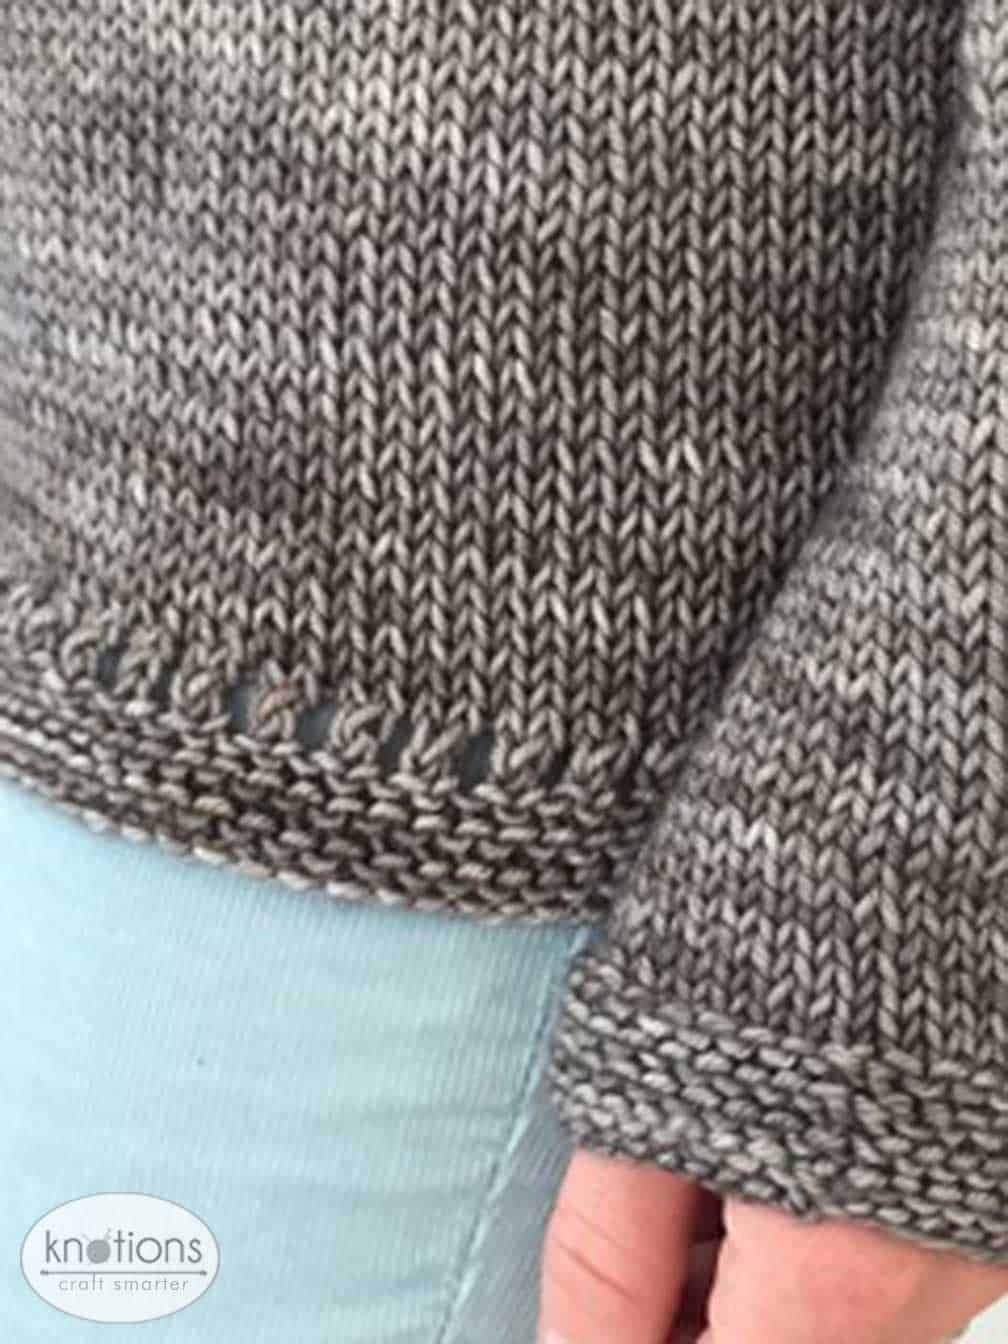
CO 74 (80, 88, 98, 106, 114) sts for front.
Row 1(WS): Knit to end.
Row 2 (RS): Knit to end.
Repeat Rows 1 and 2, three more times for a total of 4 garter ridges
Row 7: K1, *(yo, k2tog), repeat from * to 1 st rem, k1.
Row 8: Purl to end.
Break yarn and set aside.
CO 74 (80, 88, 98, 106, 114) sts for sweater back.
Row 1(WS): Knit to end.
Row 2 (RS): Knit to end.
Repeat Rows 1 and 2, four more times for a total of 5 garter ridges
Row 7: K1, *(yo, k2tog), repeat from * 1 st rem, k1.
Row 8: Purl to end.
Join Front to Back
Rnd 9: K16 (19, 23, 28, 32, 36), PM, work Row 1 of First Repeat Chart, PM, k16 (19, 23, 28, 32, 36) to end, PM (to indicate side), knit across front body sts (so the front and back are joined), PM (to indicate beginning of round), joining two sections in the round.
Continue working body of sweater and switch to Remaining Repeats Chart after the first chart is completed. Work until the body measures 15 (15, 16, 16, 17, 17) inches, or the distance from your underarm to desired length. On the next row, knit in pattern to 3 sts before side marker, BO 6 sts, knit to 3 sts bef BORM, BO 6 sts removing markers as you come to them. Leave yarn attached and sweater on needles, set aside.
Sleeves
CO 36 (40, 44, 50, 56, 64) sts. PM (to indicate beginning of round) and join in the round
Rnd 1: Purl to end
Rnd 2: Knit to end
Repeat rows 1 and 2, four more times for a total of 5 garter ridges. Note that garter stitch in the round is one round of knits followed by one round of purls.
Knit all stitches until sleeve is 4 inches from CO edge then work increase row.
Increase Row: Knit 1, M1, knit to 2 sts from end, M1, K1
Repeat Increase Row every 10th row 5 additional times, resulting in 48 (52, 56, 62, 68, 76) sleeve stitches. Then knit until sleeve measures 17 (17, 17.5, 18, 18.5, 18.5) inches. Cut yarn, put stitches on holder and set aside.
Repeat for second sleeve.
The sleeves are written to be slightly wider at the cuff than a traditional tapered sleeve. If you prefer a more tapered look, you can easily alter the pattern by casting on fewer stitches and starting the sleeve increase rows sooner to finish sleeve with the same number of stitches as the pattern instructions.
Attaching Sleeves to Body
Explanation added on December 24, 2017
SM, knit across 42 (46, 50, 56, 62, 70) sleeve stitches with needles attached to the sweater body (place the remaining 6 sleeve sts on a holder for the underarm – these correspond with the 6 sts you held for the front and back), PM, knit 68 (74, 82, 92, 100, 108) back stitches in pattern, PM, knit 42 (46, 50, 56, 62, 70) second sleeve stitches (place the remaining 6 sleeve sts on a holder for the underarm – these correspond with the 6 sts you held for the front and back), PM, knit 68 (74, 82, 92, 100, 108) front stitches to BORM. This should result in 220 (240, 264, 296, 324, 356) sts on the needle.
It is helpful to use a different color or style of stitch marker for the raglan decreases than you have used to mark the lace panel.
Knit Plain
Knit even in pattern for 1 inch, slipping markers as you come to them.
Raglan Decreases
Rnd 1: SM, k1, k2tog, *(knit to 3 sts bef m, ssk, k1, SM, k1, k2tog), repeat from * 2 more times, then knit to 3 sts bef m, ssk, k1; 8 sts dec’d.
Rnd 2: Knit in established pattern to end.
Repeat rnds 1 & 2, an additional 13 (14, 16, 18, 20, 22) times; 108 (120, 128, 144, 156, 172) sts rem. On the final round, remove markers on either side of back lace panel.
It does not matter which row of the chart you finish on.
Collar
Rnd 1: Purl all stitches slipping markers as you come to them.
Rnd 2: SM, k1, k2tog, (*knit to 3 sts bef m, ssk, k1, SM, k1, k2tog), repeat from * 2 more times, then knit to 3 sts bef m, ssk, k1; 8 sts dec’d.
Repeat Rnds 1&2, twice more; 84 (96, 104, 120, 132, 148) sts rem. Stop knitting the last rnd, one stitch before BORM, wrap that stitch and turn your work.
Knit across back collar to 1 stitch bef first raglan m, W&T.
Row 9: Purl all sts to BORM, turn.
Row 10: Bind off all stitches knitwise.
Finishing
Soak and block sweater. Seam underarm stitches, and weave in all ends, then wear and enjoy!
 About the Designer: Candon Leopold
 About the Designer: Candon Leopold
Candon Leopold is a mother, gardener, raiser of chickens, runner, and, of course, a knitter, spinner, weaver, and general lover of all things fibery.


Hi, I’m a little confused by the joining the body and sleeves instructions. Pattern says to hold 6 sleeves stitches that then correspond with stitches held for front and back for under arms but the pattern advises you bind off these stitches not hold them. Am I reading it wrong somewhere? Thanks
You just affix the 6 sleeve stitches to the bound off front/back stitches. Either way could really work.
Does that make sense?
Yes thank you. Is there any need to actually keep the sleeve stitches live or can they just be bound off and sewn together?
I just re-read it and I don’t see any reason why not.
The only thing I’ll say is that technically, that section will be 1-2 rows less (depending on how you sew). It likely won’t matter, but if you’re concerned, you could hold it together with a removable st mkr before sewing it so you can try it on. If it feels a bit taut, you might want to add a bit before sewing it together.
But, it’s highly likely that you’ll be just fine as is. I just wanted to be very specific in case that makes a difference for you.
I love this sweater and would like to make it. I’m short, just under 5′ tall and not sure how to adapt the pattern or adjust for length and not ruin the lines. Any suggestions?? Thanks!!
hi Bonnie!
what size (width-wise) are you planning to make? i have an idea but this is a definite factor.
thanks!
35″ width. The length of the last sweater to sleeve is 13 3/4 and the length from the back of the neck is 21″ Thanks for your help.
ok i do have an idea that i need to work thru, but i’m heads down right now on getting this Saturday’s issue ready for launch. can i ask you to wait a few days? i know what it’s like to want to CO *right now* though, so let me know?
btw, my idea is changing up the chart to shorten it a bit. but i need to work thru this to see if i can get it right.
I’m happy to wait, I might use the time to finish other projects. Thanks,
thanks for your patience!