
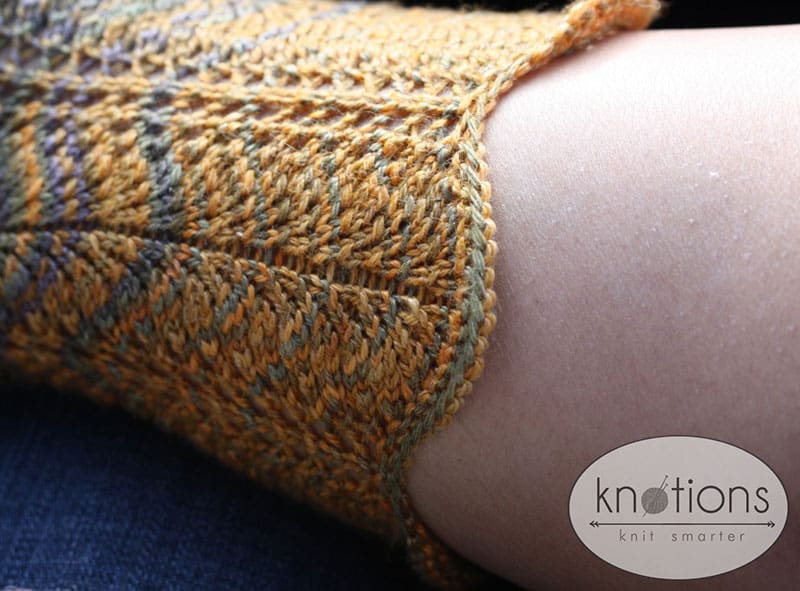
For this design, I broke with my toe-up tradition and played with the sock’s construction elements. Its shape most closely resembles the “Sky” architecture from Cat Bordhi’s New Pathways for Sock Knitters: Book One, with a few tweaks to keep you guessing. Feather and fan gets a boost with widening repeats that form the arch expansion, then taper away to stockinette to minimize shaping distortion on the foot. Do give it a good steam block before wearing, as this architectural interest may look a bit scrunchy off the needles.
The pattern is written with a traditional slipped-stitch heel. For a sexy sandal sock, continue the leg pattern on the back needle until the end of the arch expansion.
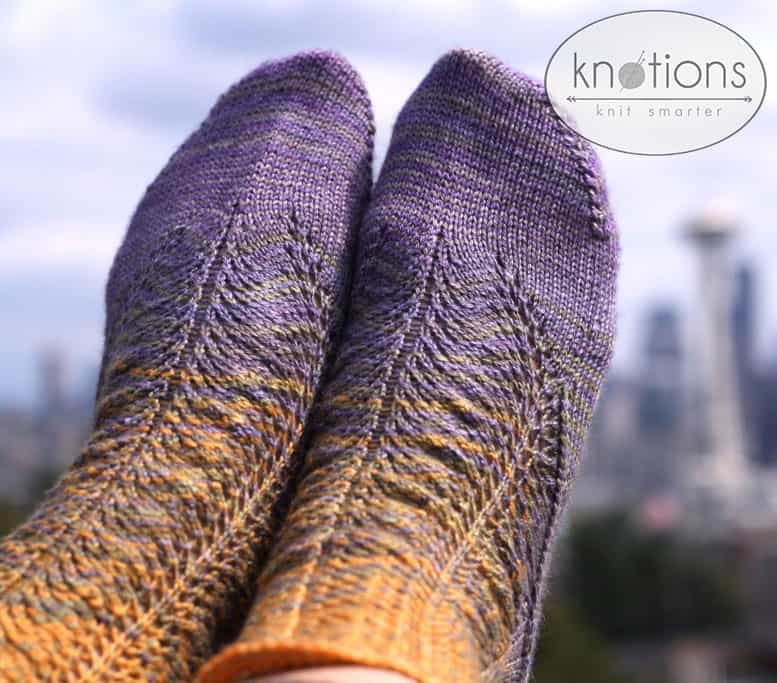
In tribute to their sky architecture, Cristi Brockway photographed the socks shown at Kerry Park, with views of the Seattle skyline.


Sizes
One Size
Length: to fit (sock shown measures 9 inches)
Circumference around leg: 8 inches, stretches to 10 inches
Circumference around foot: 7.5 inches, stretches to 9 inches
(All measurements taken after blocking)
Yarn
The Unique Sheep Tinsel Toes (50% merino, 50% tencel); 367 yards [336 meters]/100 grams); Color: Andrea Gradiance; 1 “sock set” of 4 x 25 g skeins
Needles
2 US#1 (2.25 mm) circular needles, 20 inches or longer
Gauge
32 sts and 48 rows = 4″ in St st
Notions
Tapestry needle
Pattern Notes
The Unique Sheep’s Gradiance technique of yarn dyeing provides sets of four mini skeins in gradually shifting shades. Information on using the gradiance colorways for socks can be found here. If you opt for a non Gradiance-dyed yarn, simply disregard the color change instructions throughout the pattern.
These socks are worked cuff-down on two circular needles. If you are unfamiliar with this technique, instructions may be found here. If you prefer, the socks may be worked using the “Magic Loop” technique, or on double-pointed needles.
The directional pattern is not overly stretchy, necessitating more stitches than may be your usual “sock number”. Swatch generously and try on the sock periodically to ensure it fits over your ankle. Adjust sizing by going down a needle size if needed.
Throughout this pattern, the first needle of the round (containing the instep stitches) will be referred to as Needle 1; the second needle (containing the sole stitches) will be Needle 2.
Charts


Socks
Cuff
Using the long tail cast on method and skein #1, CO 77 sts. Divide sts onto 2 needles, with 39 sts on Needle 1 and 38 sts on Needle 2. Being careful not to twist edge, sl 1 st from beg of Needle 1 to end of Needle 2. 38 sts on Needle 1, 39 sts on Needle 2.
Rnd 1: On Needle 1, k. On Needle 2, k to last 2 sts, ssk to close gap; 76 sts total.
Rnd 2: P all sts
Rnd 3: K all sts
Leg
Rnd 1: [(k2tog) 3 times, k1, (yo, k1) 6 times, (ssk) 3 times] to end
Rnds 2-3: K all sts
Repeat leg patt rnds 8 times more. Work from beg measures approx 3.25” from peak of CO edge.
Using skein #2, work Rnds 1-2
Using skein #1, work Rnd 3, then Rnds 1-3
Using skein #2, work Rnds 1-3, then Rnd 1
Using skein #1, work Rnds 2-3 and break skein #1
Work from beg measures approx 4.25” from peak of CO edge.
Arch Expansion Rnds
Rnds 1-12: Work arch expansion chart on Needle 1. Continue leg patt as est on Needle 2.
Rnds 13-50: Continue to work arch expansion chart on Needle 1. At the same time, work heel st on Needle 2 as follows, and work color transition as below:
Odd rnds 13-49: Sl1, k1 to end
Even rnds 14-50: K all sts
Rnds 31-32: Work in skein #3
Rnds 33-36: Work in skein #2
Rnds 37-40: Work in skein #3
Rnds 41-42: Work in skein #2 and break skein #2
Rnds 43-50: Work in skein #3
74 sts on needle 1 and 38 sts on needle 2 after all arch expansion rnd are worked
Redistribute Sts for Heel
K first 18 sts from Needle 1 onto Needle 2. K 38 sts on Needle 1. Sl rem 18 sts from Needle 1 onto Needle 2. Heel turn and bottom flap are worked flat over 74 sts on Needle 2.
Heel turn
Read instructions before working heel turn. In contrast to traditional patterns, sts are NOT decreased away while turning heel. As well, while some sts are wrapped, they are NOT later worked tog with their wraps, which are left intact.
Setup row 1 (RS): K20, [sl1, k1] 12 times, w&t
Setup row 2 (WS): P14, w&t.
Row 1 (RS): [Sl1, k1] to wrapped st, sl wrapped st, w&t
Row 2 (WS): P to wrapped st, p wrapped st, w&t
Row 3 (RS): [K1, sl1] to wrapped st, k wrapped st, w&t
Row 4 (WS): Same as Row 2
Rep heel turn rows 1-4 three times more.
Row 17 (RS): [Sl1, k1] to wrapped st, sl wrapped st, k1, DO NOT WRAP. Turn.
Row 18 (WS): Sl1, p to wrapped st, p wrapped st, p1, DO NOT WRAP. Turn.
Center 34 sts on Needle 2 are now shaped in heel st, with 20 sts unworked on each side.
Bottom Flap
Row 1 (RS): Sl1, k32, ssk, turn.
Row 2 (WS): Sl1, p32, p2tog, turn.
Rep bottom flap rows 1-2 eighteen times more. 36 sts on Needle 2 (1 st unworked on each side of bottom flap)
Transition to foot (return to working in the rnd)
On Needle 2, sl1, k32, ssk. Do not turn.
Using skein #4, on Needle 1, work foot rnd 1. I could definitely have this wrong, but I think we ended on Rnd 2 of the st patt, but the foot chart starts on Rnd 1 again. If I’m right, I think we should have them work a plain rnd first. On Needle 2, k2tog, k to end of needle. 72 sts total: 38 sts on Needle 1, 34 sts on Needle 2.
Foot
Beg with Rnd 2, work foot chart on Needle 1 and St st on Needle 2. At the same time, work color transition as follows:
Rnd 2: continue in skein #4
Rnds 3-6: work in skein #3
Rnds 7-10: work in skein #4
Rnds 11-12: work in skein #3 and break skein #3
Work to end of foot chart. At the conclusion of foot chart, you will have 68 sts total, 34 sts on each needle. Continue in St st on both needles until foot measures 2” short of desired length. Depending on your foot length, you may require very few rounds of St st to complete the foot.
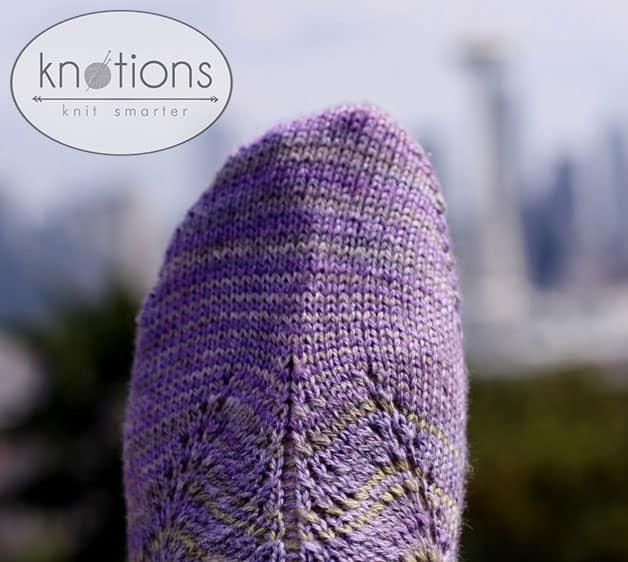
Toe
Short-row toe is worked over 34 sts of Needle 1. See our tutorial on knitting short rows.
Row 1 (RS): k33, w&t
Row 2 (WS): k32, w&t
Rows 3-22: continue in this manner, working each row 1 st shorter than the last. 12 sts remain unwrapped in center, with 11 sts wrapped on each side.
Row 23 (RS): K to wrapped st, k next st tog with its wrap, w&t
Row 24 (WS): P to wrapped st, p next st tog with its wrap, w&t
Row 25 (RS): K to double wrapped st, k it tog with its wraps, w&t.
Row 26 (WS): P to double wrapped st, p it tog with its wraps, w&t.
Rows 27-44: Repeat rows 25 and 26, working each row 1 st longer than the last, and omitting the wrap at the end of Row 44. Turn.
Row 45: sl1, k to double wrapped st, k it tog with its wraps.
Break yarn, leaving a tail of at least 4 times the width of the open surface. Graft toe sts to sole sts on sock’s bottom surface.
Finishing
Weave in ends. Block with a warm iron under a damp towel.
About the Designer: Deb Barnhill
 This is Deb’s second pattern in Knotions. Her designs have also appeared in Knitty.com, Alpacas Magazine and the Interweave title Knitting Socks with Handpainted Yarns. She recently had the experience of a lifetime teaching at Sock Summit in Portland Oregon. She knits like crazy in Nova Scotia for her grateful daughters and long-suffering husband.
Pattern and images © 2009 Deb Barnhill. Contact Deb.


Leave a Reply