 In this cardigan you can Swing baby Swing!
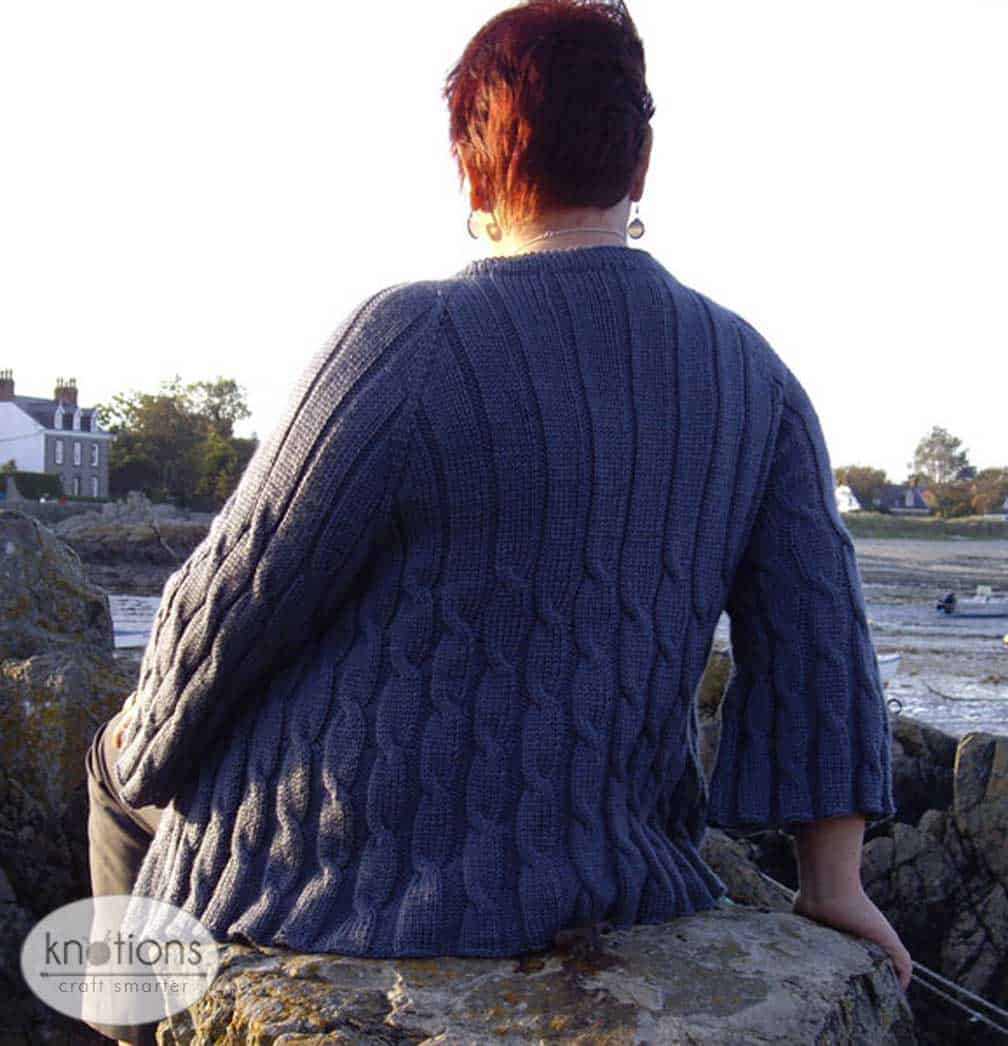
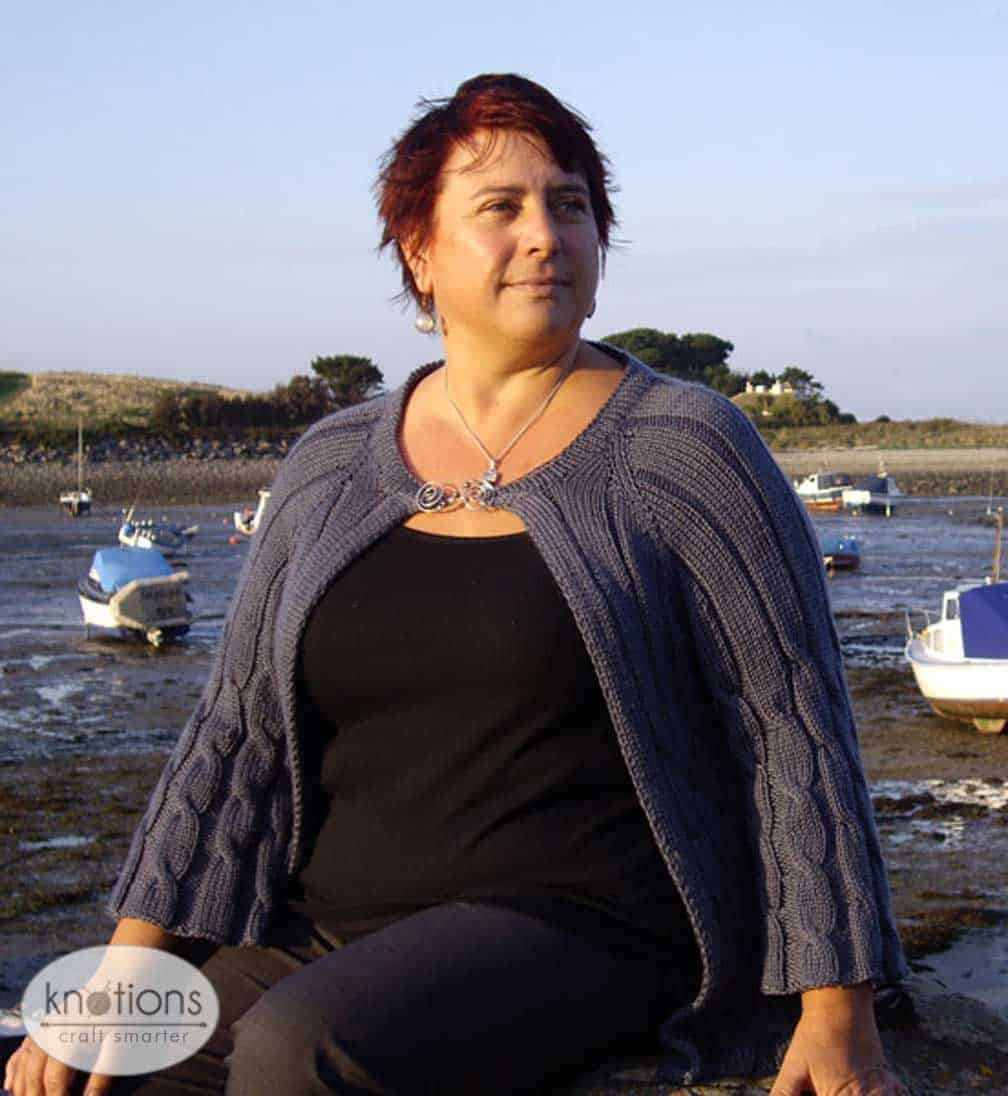
Top down, edge to edge, raglan sleeved cardigan with an A-line silhouette and flared sleeves, fastened with a single button or clasp at the neck. Perfect for layering, this cardigan is knitted in a merino tencel blend to give it drape and the increases are cleverly hidden between the cables.
This design is easily customized — make it shorter, make it longer, three quarter length sleeves, your choices are endless and because it is top down you can try it on as you go.


Sizes
Finished Bust Size 34 (38, 42, 46, 50, 54, 56) inches to fit bust 32 (36, 40, 44, 48, 52, 56) inches. 2” positive ease recommended.
Shown in size 42”
Yarn
Valley Yarns Colrain (50% merino, 50% Tencel; 109 yards [100 m] / 50 g): Color Name: Steel (MC), 9 (10, 11, 13, 14, 15, 17) balls
Needles
US#8 (5 mm): 24” and 36” circular (you may use DPN for the sleeves if you prefer, but you will need a 36” circular or longer to accommodate the stitches from the yoke.
Gauge
16 sts and 22 rows = 4” in st st after wet blocking.
18 st and 22 rows = 4” in cabled rib
Notions
Removable markers; waste yarn; cable needle; tapestry needle; 1 large button or fastening of choice.
Chart

Abbreviations
Please see our standard list of abbreviations.
M1p: Pick up the bar between the first and second stitches in the purl section between cables and purl into the back of the stitch
C6F: Slip 3 st onto a cable needle and hold at the front of work, k3, knit the 3 st from the cable needle.
Pattern Notes
This pattern is worked in the round from the top down. Care needs to be taken to ensure that as the increases are made that they are incorporated into the 6 x 2 rib pattern.
The increases for the swing body are made using a lifted increase. See our tutorial on how to knit a lifted increase.
Pattern
Yoke
CO 48 (54,62,70,78,86.94) sts.
Set up row (RS)
1st size: P1, pm ,p2 ,k6, p2, pm,*p2,k6, *rep 3 times,
p2, pm, p2, k6, p2, pm, p1.
2nd size: K1,pm,k1,p2,k6,p2,k1,pm,k1,*p2,k6, * rep 3 times, p2,k1,pm,k1,p2,k6,p2,k1,pm,k1.
3rd size: K1,pm, k1, p2, k6, p2, k1, pm, k1,*p2,k6, * rep 4 times,
p2,k1,pm,k1,p2,k6,p2,k1,pm,k1.
4th size: K1,pm,k1,p2,k6,p2,k1,pm,k1,*p2,k6, * rep 5 times, p2,k1,pm,k1,p2,k6,p2,k1,pm,k1.
5th size: K2, pm, k2, p2, k6, p2, k2, pm,k2, *p2,k6, * rep 5 times,
P2, k2, pm, k2, p2, k6, p2, k2, pm, k2.
6th size: : K2,pm,k2,p2,k6,p2,k2,pm,k2,*p2,k6, * rep 6 times, p2,k2,pm,k2,p2,k6,p2,k2,pm,k2.
7th size: K2,pm,k2,p2,k6,p2,k2,pm,k2,*p2,k6, * rep 7 times, p2,k2,pm,k2,p2,k6,p2,k2,pm,k2.
Row 1(WS): Work across the row keeping in patt as set up in the previous row.
Row 2: Work across the row in pat, increasing a st by knitting into the back and front of the st on the sts immediately before and after the 4 markers (8 stitches in all) – these are the raglan increases.
Repeat these two rows a further 5 (5, 5, 7, 7, 7, 9) times incorporating the increases into the 6 x 2 rib pattern as they occur.
CO 18 (17, 21, 23, 26, 25, 27) sts at the beginning of the next 2 rows.
Next RS Row: K5, sl1, pm, k6,work in 6 x 2 rib across right front up to raglan increase. Continue across the row, making the raglan increases as in previous rows. After the last marker, continue across left front, incorporating the cast on sts into the 6 x 2 rib until 12 sts rem, k6, pm, sl1, k5.
Next and all following WS Rows: P6, sm, p6, work in patt as set until 12 sts rem, p6, sm, p6.
Continue raglan increases on each RS row a further 15, (16, 20, 19, 20, 22, 22) times – 23, [24, 28, 29, 30, 32, 34] increases in all; 268 (280, 328, 348, 370, 392, 420) sts.
Divide for Sleeves
Continuing in 6 x 2 rib pattern:
* Work to raglan m, remove m, place sts between it and next m on waste yarn (sleeve), CO 8 (12, 8, 8, 12, 12, 12) sts, remove m, rep from * once more, work to end of row.
Body
All Sizes
Next Row (RS): K5, sl1, k6, work across all stitches in pattern until last 12 sts rem, k6, sl1, k5.
Work in patt as set for 8 rows.
Keeping the edge patt as set, change from 6 x 2 rib to the cable chart
Work 16 rows without shaping – please note you may have a half pattern at the end of your work depending on the size you are working.
1st increase row: Increase one st in each purl section between the cables as follows: p1, m1p, p1. Repeat across the entire row.
Work in patt for 15 rows (there will be 3 sts in each purl section).
2nd increase row: Increase one st in each purl section between the cables as follows p1, m1p, p2. Repeat across the entire row.
Work in patt for 15 rows, (there will be 4 sts in each purl section)
3rd increase row: Increase one st in each purl section between the cables as follows p1, m1p, p3. Repeat across the entire row.
Work without further increases (there will be 5 sts in each purl section) , until work measures 14 (14.5, 15.5, 16, 16.5, 17, 17.5)” from the under arm, finishing with a WS row. BO in patt.
Sleeves (work 2)
Place sts from a sleeve on a circular needle or dpns, pick up 8,(12, 12,10, 6,18,14) sts along the CO edge beneath the underarm. Working in the rnd, work in 6 x 2 rib for 8 rnds, change to cable chart and work 16 rnds without shaping.
1st increase row: Increase one st in each purl section between the cables as follows: p1, m1p, p1. Repeat across the entire row.
Work in patt for 15 rows (there will be 3 sts in each purl section).
2nd increase row: Increase one st in each purl section between the cables as follows p1, m1p, p2. Repeat across the entire row.
Work in patt for 15 rows, (there will be 4 sts in each purl section)
3rd increase row: Increase one st in each purl section between the cables as follows p1, m1p, p3. Repeat across the entire row.
Work without further increases (there will be 5 sts in each purl section) , until work measures 15.5 (16.75, 17.75, 19, 20.25, 20.5, 21)” from CO edge . BO in patt.
Finishing
Block garment using your preferred method, turn the front facings under and slip stitch into place. Sew in any ends.
Neck Edging
Starting at the right front pick up 22 (21,25,29,32,31,35) sts across front, 10 (12,12,12,14,14,14) sts across right sleeve, 26 (28,36,44,46,54,62) sts across back, 10 (12,12,12,14,14,14) sts across left sleeve and 22 (21,25,29,32,31,35]) sts across left front.
Work 6 rows st st, work a purl row ridge, work a further 6 rows st st and BO all sts. Fold down collar and slip stitch into place.
If you wish to use a button to fasten the cardigan use yarn to create several loops and cover these with detached buttonhole stitch, or use a crocheted chain loop.
Schematic

About the Designer: Janine LeCras
 Janine Le Cras, lives works and windsurfs on the small island of Guernsey in the middle of the English Channel. When she is not knitting, spinning or designing she can usually be found on her favorite beach sailing over the waves.
She can also be found at her blog and on Ravelry under the user name Guernseygal.
Pattern and images © 2009 Janine LeCras.


Leave a Reply