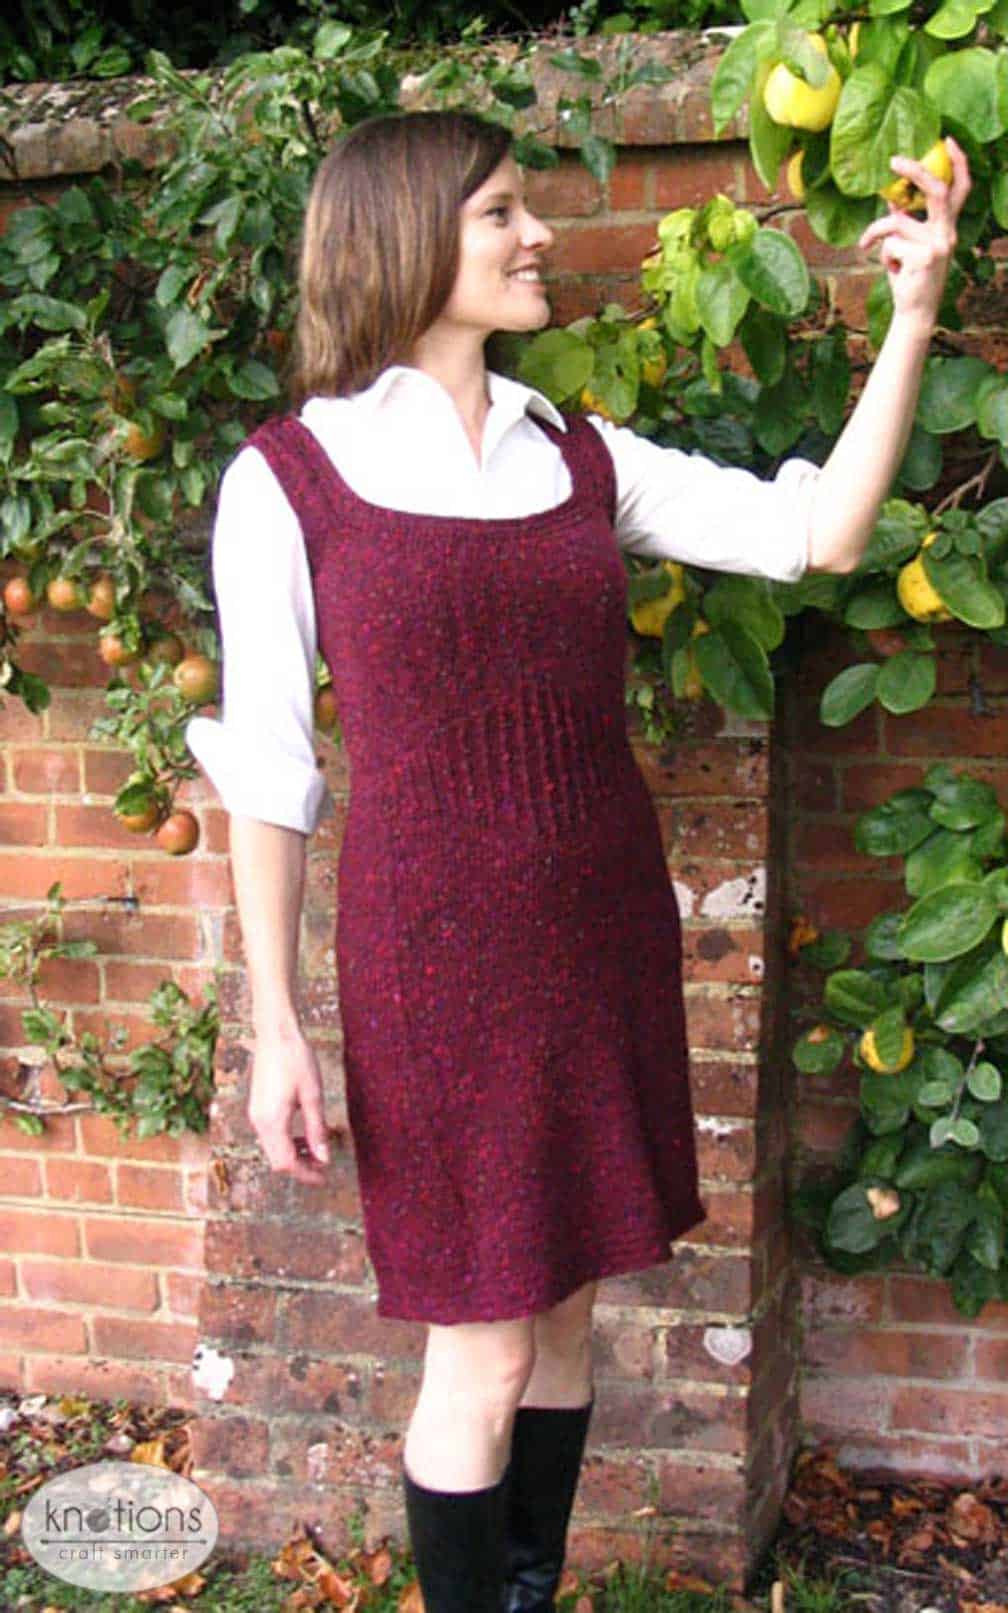
 An easy-to-wear cold weather layering piece, this dress is packed with details that make it a flattering fit: slipped stitch vertical “seams”; a ribbed waist to give or enhance an hourglass shape; bust and back hip darts for shaping; and herringbone edges for interest. This dress is knit in the round up to the armholes and edgings are picked up and knit, so there’s practically no seaming on this one. You can also replace the herringbone edges with simpler rib or seed stitch borders.
The tweed yarn gives this a wonderfully wintery, classic feel. Substitutes include Debbie Bliss Donegal Tweed Aran, Kilcarra Aran Tweed, Tahki Donegal Tweed, as well as Rowan’s Yorkshire Tweed Aran or Scottish Tweed Aran. Other aran weight yarns would work as well.
errata posted on May 24, 2018


Sizes
Finished Bust Size 32 (35.5, 40, 43.5, 48, 53.8, 56)” to fit bust 31 (35, 39, 43, 47, 51, 55)”
Zero to 1.5” positive ease recommended.
Shown in size 35.5” with zero ease
Yarn
Commodum Aran Tweed (100% wool; 440 yards [400 meters]/250 grams): Color 4644, 880 (1,000, 1,150, 1,250, 1,400, 1,500, 1,600) yards These yarn estimates are for a skirt length of 25”. If you want a longer skirt, plan on more yarn.
Editor’s Note – The Commodum Aran is put up in very large hanks. The designer has provided yardage estimates in lieu of number of hanks to help you substitute.
Needles
US#4 (3.5 mm): 24” circular
US#10 (6.0 mm): 36” and 12” circular (a set of DPN may be used in place of the 12”
Editor’s Note – The designer notes that she tends to knit a bit loosely. Your needle size may different than the size she used to obtain gauge.
Gauge
18 sts and 26 rows = 4” in st st after wet blocking, using smaller size needles.
Notions
Stitch markers in several colors; stitch holders; tapestry needle.
Pattern Notes
View our Standard Abbreviations. This pattern is worked in the round from the hem up. Waist and hip shaping is done with darts of paired increases/decreases.
At the hip/waist/bust, there is a lot of shaping happening at once. Don’t worry- you won’t get confused if you use several different kinds of markers. I recommend removable/lockable ones in different colors.
Paired Decreases
K2tog for right-leaning decreases; ssk for left leaning decreases.
Paired Increases
M1R (make 1 right): pick up bar bet sts with left needle from back to front; knit into the front of the st
M1L (make 1 left): pick up bar bet sts with left needle from front to back; knit into the back of the st
The hem and edges are worked back and forth in herringbone st. This makes a very dense fabric and is easy to work too tightly. Keep tension loose.
Herringbone Stitch
RS: k2tog tbl, dropping only first st off needle, *k2tog tbl (the remaining st from the first k2tog and the next st on the needle), dropping only the first st off needle, repeat from *, ktbl
WS: p2tog, dropping only first st off needle, *p2tog (the remaining st from the first p2tog and the next st on the needle), dropping only the first st off needle, repeat from *, p1.
Repeat these rows as needed.
Chart

Pattern
Before starting pattern, decide how long you want the skirt to be. Measure from your waist to the point where you want the hem to hit. This is your skirt length. This skirt is designed to be around knee length. If you want it much shorter/longer, then the skirt decreases will need to be spaced more closely/further apart.
Dress
With larger needles, CO 198 (214, 234, 250, 270, 286, 306) sts. Work in herringbone st until piece measures 1.5” from CO. On next RS row. work one more row in herringbone st (loosely). Instead of ktbl for the last st, join to work in rnd by k2tog of the first and last st. Place marker for beg of rnd. Switch to smaller needles for stockinette portion of dress.
K25 (27, 29, 31, 34, 36, 38) sts, pm (left front), k49 (53, 59, 63, 67, 71, 77) sts, pm (right front), k50 (54, 58, 62, 68, 72, 76) sts, pm (right back), k48 (52, 58, 62, 66, 70, 76) sts, pm (left back), k remaining 25 (27, 29, 31, 34, 36, 38) sts to end of rnd. These four markers are where you will put the slipped st lines and where you will make dec on the skirt.
Rnd 1:*K to marker, sl m, sl1p, k to one st before marker, sl1p, sl m, repeat from * to end of rnd.
Rnd 2: K all sts.
Repeat these two rnds until piece measures your chosen skirt length minus 19”. For instance, the skirt shown has a skirt length of 22”, so these two rnds were knit until the work measured 3”.
Skirt Decreases
Remember to keep slipping the four slipped sts every other row!
On next rnd, work dec rnd: *K to 2 sts before marker, ssk, sl m, sl1p or k, k to one st before marker, sl1p or k, sl m, k2tog, repeat from * once more, k to end of rnd.
Work decrease rnd every 7th rnd 9 more times (for a total of 10 dec rnds): 157 (173, 193, 209, 229, 245, 265) sts rem. Work six rows in patt (no decs).
Hip and Waist Shaping
Read this next section through first – you will be doing several things at once.
The front of your skirt is the first 79 (87, 97, 105, 115, 123, 133) sts after the beg of rnd marker. It contains one more st than the back half of the skirt. Place markers on either side of the center 57 sts of the skirt front. You will work the diamond waist shaping detail (see chart) over these 57 sts.
As you do the shaping, keep slipping the four slipped sts every other row.
Work hip darts at the back of the skirt as follows:
Work to 2 sts before right back marker, ssk, sl m, sl1p or k, k2tog, knit to 3 sts before marker, ssk, sl1p or k, slm, k2tog, knit rest of sts in rnd.
Work back hip darts every 7th row for a total of 7 times
At the same time, cont dec on front of skirt as set, every 7th rnd, for another 7 dec rnds (total of 17 dec rnds on front of skirt). These dec will “eat into” the 57 sts you have set aside for the diamond rib chart. Simply move the st markers outward so that you always have 57 sts bet them.
After the 5th front of skirt dec rnd start row 1 of the ribbed diamond waist chart (as a check for your row gauge, this should be roughly around 3” shorter than your desired skirt length).
Cont in pattern as set, working the back hip darts, the front waist dec and the diamond rib chart. When you have finished the hip darts and waist dec, stop working the slipped st lines. Everything else from now on, except the ribbed diamond waist, will be in plain st st. Remove the 4 st markers marking the slipped st lines. Leave the beg of rnd and ribbed diamond markers. 115 (131, 151, 167, 187, 203, 223) sts.
Work in pattern as set until you finish the rnd 31 of ribbed diamond chart. In this next section of shaping, keep knitting the ribbed diamond pattern until the chart is finished.
On next rnd, remove beg of rnd marker, k4, pm A (this is your new beg of rnd marker), work 14 (16, 19, 21, 23, 25, 28) sts, pm B, work 29 (33, 37, 41, 47, 51, 55) sts in pattern, pm B, work 14 (16, 19, 21, 23, 25, 28) sts, pm A, work remaining 58 (66, 76, 84, 94, 102, 112) sts of rnd. The A markers are your side “seams” and the B markers are where you will put the bust darts.
Bust Darts and Side Increases
Side Inc Rnd: before you slip the beg of rnd marker, m1L, sl m, work to next A marker, sl m, m1R, k to end of rnd.
Bust dart Inc: work in pattern to first B marker, m1R, sl m, k1, m1L, work in pattern to one st before next B marker, m1R, k1, sl m, m1L, work in pattern to end of rnd.
Work bust dart inc rnd every 5th rnd 5 times total.
Work side inc every 7th rnd 5 times total.
When these inc are finished, you have 145 (161, 181, 197, 217, 233, 253) sts total: 77 (85, 95, 103, 113, 121, 131) sts for front; 68 (76, 86, 94, 104, 112, 122) sts for back.
Work in st st until piece measures 7.25 (7.75, 8, 8, 8, 8.25, 8.25)” from center of ribbed diamond.
On next rnd, k27 (31, 36, 40, 45, 49, 54), [k2tog, k1] 7 times, k2tog, k remaining 27 (31, 36, 40, 45, 49, 54) sts to marker.
Back Armhole Shaping
You will now start the armhole shaping by working short rows for the back- you’ll be working between the two markers just for the back.
RS: K to 4 (4, 5, 5, 5, 6, 7) sts before marker, w+t
WS: P to 4 (4, 5, 5, 5, 6, 7) sts before marker, w+t
RS: K to 7 (7, 8, 8, 8, 10, 11) sts before marker, w+t
WS: P to 7 (7, 8, 8, 8, 10, 11) sts before marker, w+t
RS: K to 9 (9, 11, 11, 11, 13, 15) sts before marker, w+t
WS: P to 9 (9, 11, 11, 11, 13, 15) sts before marker, w+t
RS: K to – (10, 13, 13, 14, 16, 18) sts before marker, w+t
WS: P to – (10, 13, 13, 14, 16, 18) sts before marker, w+t
RS: K to – (-, -, 14, 15, 18, 20) sts before marker, w+t
WS: P to – (-, -, 14, 15, 18, 20) sts before marker, w+t
RS: K across all sts between back markers, picking up and knitting wraps with their sts
WS: BO 9 (10, 13, 14, 15, 18, 20) sts, p across to end, purling the wraps with their sts
RS: BO 9 (10, 13, 14, 15, 18, 20) sts, work to end: total 50 (56, 60, 66, 74, 76, 82) sts rem for back.
Cont in st st until piece measures 5 (5.5, 6, 6.25, 6.5, 6.5, 6.75)” from armhole BO, ending with a WS row.
Right Shoulder
Next Row (RS): K 17 (20, 22, 24, 28, 28, 31) sts, w+t.
All WS rows: p to end.
RS: k 9 (11, 13, 14, 17, 17, 19) sts, w+t.
RS: k 7 (7, 9, 9, 11, 11, 13) sts, w+t.
RS: k 5 (5, 7, 7, 9, 9, 11) sts, w+t.
RS: k 33 (36, 38, 42, 46, 48, 51) sts, picking up and knitting wraps with their sts, turn.
WS: BO 28 (31, 31, 35, 37, 39, 40) sts, leaving 5 (5, 7, 7, 9, 9, 11) shoulder sts. Work shoulder in st st until piece measures 7 (7.5, 8, 8.25, 8.5, 8.5, 8.75)” from armhole BO. Break yarn and put sts on holder.
Left Shoulder
You have 17 (20, 22, 24, 28, 28, 31) live sts for the left shoulder. On the RS, sl 8 (9, 9, 10, 11, 11, 12) sts purlwise to LH needle, attach new yarn and k all 9 (11, 13, 14, 17, 17, 19) sts to end.
WS: p 7 (7, 9, 9, 11, 11, 13) sts, w+t
RS: k to end.
WS: p 5 (5, 7, 7, 9, 9, 11) sts, w+t.
RS: k to end.
WS: p all 17 (20, 22, 24, 28, 28, 31) sts, picking up wraps and purling them with their sts.
RS: BO 12 (15, 15, 17, 19, 19, 20) sts, leaving 5 (5, 7, 7, 9, 9, 11) shoulder sts. Work these in st st until piece measures 7 (7.5, 8, 8.25, 8.5, 8.5, 8.75)” from armhole BO. Break yarn and put sts on holder.
Front armhole and scoop neck shaping: Put a st marker at the center of the front sts: 34 (38, 43, 47, 52, 56, 61) sts on the left front, and 35 (39, 44, 48, 53, 57, 62) sts on the right front.
Left Front
RS: Attach yarn and k to 8 (8, 8, 7, 7, 8, 8) sts before center marker, w+t.
WS: p to last 4 (4, 5, 5, 5, 6, 7) sts, w+t.
RS: k to 16 (17, 17, 17, 18, 19, 20) sts before center marker, w+t.
WS: p to last 7 (7, 8, 8, 8, 10, 11) sts, w+t.
RS: k to 18 (21, 21, 22, 24, 25, 26) sts before center marker, w+t.
WS: p to last 9 (9, 11, 11, 11, 13, 15) sts, w+t.
RS: k to 20 (23, 23, 24, 26, 27, 28) sts before center marker, w+t.
For 32″ size
WS: p to end, picking up wraps and purling them with their sts.
RS: BO 9 sts, k to center marker, picking up wraps and knitting them with their sts.
WS: BO 20 sts, work to end.
For all other sizes
WS: p to last – (10, 13, 13, 14, 16, 18) sts, w+t.
RS: k to – (-, -, 26, 28, 29, 30) sts before center marker, w+t.
WS: p to last – (-, -, 14, 15, 18, 20) sts, w+t.
RS: k to center marker, picking up wraps and knitting them with their sts.
WS: BO – (23, 23, 26, 28, 29, 30) sts, p to end, picking up and purling wraps with their sts.
RS: BO – (10, 13, 14, 15, 18, 20) sts, k to end.
All Sizes
You have 5 (5, 7, 7, 9, 9, 11) shoulder sts. Continue in st st until piece measures 7 (7.5, 8, 8.25, 8.5, 8.5, 8.75)” from armhole BO. Break yarn and put sts on holder.
Right Front
RS: sl 9 (9, 9, 8, 8, 9, 9) sts purlwise to LH needle. Attach yarn and k to last 4 (4, 5, 5, 5, 6, 7) sts, w+t.
WS: p to 17 (18, 18, 18, 19, 20, 21) sts before center marker, w+t.
RS: k to last 7 (7, 8, 8, 8, 10, 11) sts, w+t.
WS: p to 19 (22, 22, 23, 25, 26, 27) sts before center marker, w+t.
RS: k to last 9 (9, 11, 11, 11, 13, 15) sts, w+t.
WS: p to 21 (24, 24, 25, 27, 28, 29) sts before center marker, w+t.
For 32″ size
RS: k to end, picking up wraps and knitting them with their sts.
WS: BO 9 sts, work to end, picking up wraps and knitting them with their sts.
RS: BO 21 sts, work to end.
For all other sizes
RS: k to last – (10, 13, 13, 14, 16, 18) sts, w+t.
WS: p to – (-, -, 27, 29, 30, 31) sts before center marker, w+t.
RS: k to last – (-, -, 14, 15, 18, 20) sts, w+t.
WS: p to center marker, purling the wraps with their sts.
RS: BO – (24, 24, 27, 29, 30, 31) sts, k to end, knitting the wraps with their sts.
WS: BO – (10, 13, 14, 15, 18, 20) sts, p to end.
For all sizes
You have 5 (5, 7, 7, 9, 9, 11) shoulder sts. Continue in st st until piece measures 7 (7.5, 8, 8.25, 8.5, 8.5, 8.75)” from armhole BO. Break yarn and put sts on holder.
Attach front and back of dress at the shoulders with 3-needle BO.
Using larger needles and starting at the underarm, pick up sts for the herringbone borders: pick up 1 st for each bound-off underarm st, and 3 sts for every 4 sts on the vertical armshole edges. Work back and forth in herringbone st for 3 rows. Work next row in pattern with smaller needles. BO firmly- I find that using a crochet hook to slip the outer st over the inner works well. Do the same for the other armhole.
Starting at the center back neck, pick up sts for the neckband the same way as for the armhole. Work in herringbone st until border measures 1”. Work one more row in the smaller needles. BO firmly.
Finishing
Seam herringbone bands at the bottom hem, underarm and back neck. Weave in ends.
Wash and block to measurements.
Schematic

About the Designer: Lien Ngo
 Lien is an American living near London with her English husband. Her day job as a scientist keeps her in yarn.
Pattern and images © 2008 Lien Ngo.


Hello! Loving this dress so far. I have a question about the hip and waist shaping. It says, in the front section, to mark 55st to work the chart on, but the chart is 57st wide. Is the 55st a typo? Thanks.
Awesome! I’m so glad you like it!
I think it *is* a typo! We published this design 10 years ago so things are a little rusty, but I believe you are correct.
I’m going to make a note to look at it once more on Thursday and if that still looks right, I’ll update that with an errata.
Thanks!
Great, thank you! I wasn’t sure if I was misunderstanding something. I will hold off until Thursday just in case. Thanks for your speedy reply, and the pattern of course!
Absolutely! I even searched Ravelry to see if any of the projects noted the error and they didn’t, which is making me doubt myself – so I really want to take a second read-through.
Thanks for your patience on this!
I believe it *is* a typo and I’ve posted an errata and changed it to 57 sts. THANK YOU for letting me know about this.
Let me know how it goes?
Hello,
LOVE this dress. If only I had time to knit it! I’m hoping I will some day. I myself am a biologist, wife and mom. Not much time to knit yet.
Thanks for the design!
You’re welcome! Glad you like it 🙂