

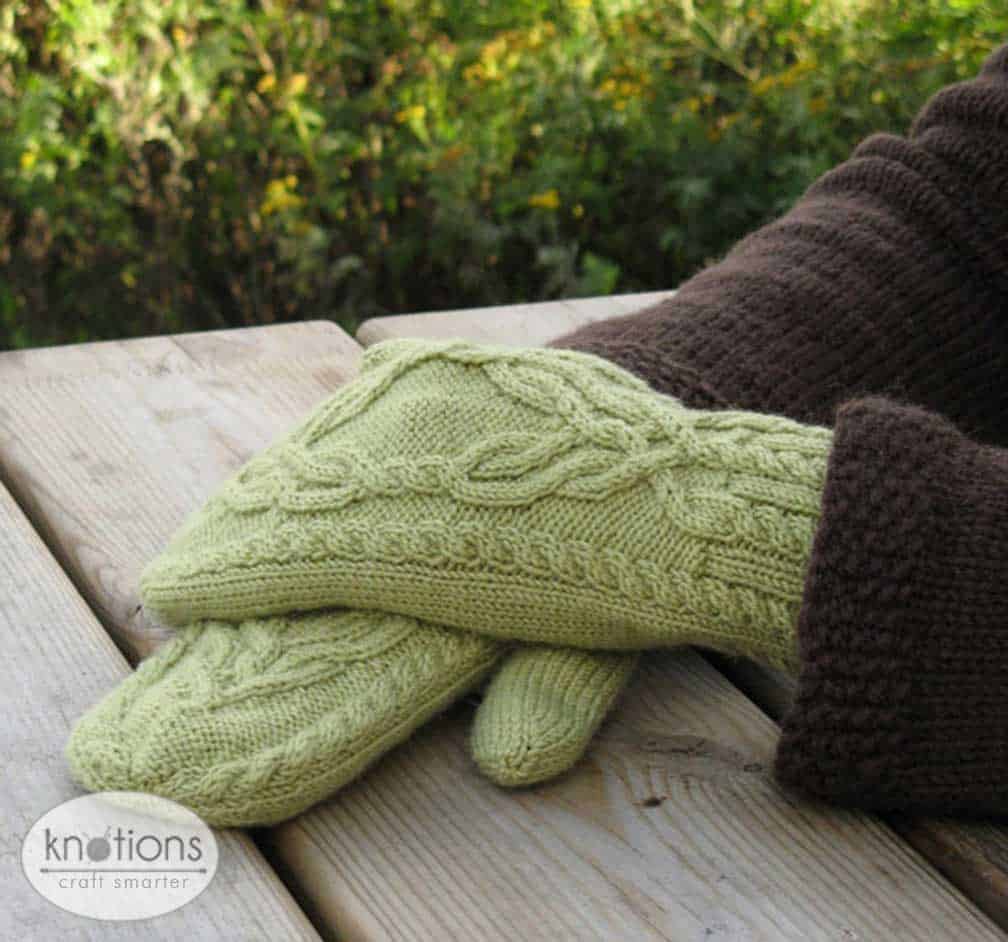
Mirror, mirror on the wall, who is the fairest of them all? The cable-framed medallion on these mittens brings to mind an antique mirror frame. The fine yarn makes the cable motif delicate and beautiful, and the mittens will truly fit like a glove. Both the cabled ribbing and the motif are mirrored for left and right mitten for the symmetrically minded, but you can just as well only change the thumb placement and otherwise work the mittens exactly alike.
Worked in sport weight wool, these mittens are perfect for keeping your hands warm when it’s chilly but still not cold enough to take out the polar gear.


Sizes
Woman’s medium
Finished measurements of mittens shown: length from wrist to fingertips approx 11” , hand circumference approx 7.5”
Yarn
Online Linie 155 Supercool (100% Merino wool; 158 yards [145 meters] / 50 grams): Color 130 Light green, 2 balls
Recommended yarn is a tightly plied elastic merino. Try substituting with Lorna’s Laces Shepherd Sport, or a merino sock yarn like Colinette Jitterbug.
Needles
US#3 (3.25 mm): set of 5 DPN
Gauge
27 sts and 42 rnds = 4” in St st in the round after blocking
Tutorials
Notions
Cable needle; markers; stitch holders; tapestry needle
Abbreviations
Please see our standard list of abbreviations.
Pattern Notes
Take care to check your row gauge, as the length of the mitten will be determined by the height of the cable motif.
Chart – Right Ribbing

Chart – Right Mitten

Chart – Left Ribbing

Chart – Left Mitten

Legend

Pattern
Left Mitten
CO 64 sts and divide on double-pointed needles as foll: 14 sts each on needles 1 and 2 for palm side of hand, 18 sts each on needles 3 and 4 for back of hand. Join for knitting in the round taking care not to twist. Work left cabled rib according to chart until work measures 3”.
On next rnd, begin palm and back of hand. On needles 1 and 2, p1, k until 1 st rem on needle 2, p1. On needles 3 and 4 begin left mirror cable pattern according to chart. Chart shows all rounds of back of hand.
Work 5 more rnds as est. On next rnd begin thumb gusset as foll: Work as est until 5 sts rem on needle 2. Place marker. M1, k3, m1, place marker. Work to end of rnd as est. Work 2 rounds without further increases. Work 2nd gusset increase rnd: Work to marker, sm, m1, k to 2nd marker, m1, sm, work to end of rnd as est. Rep increase rnd every 3rd rnd, always working the 2 rnds between increases as est, knitting the increased stitches. When there are 19 sts between gusset markers, work 2 additional rounds without increases. On next round work to marker, transfer 19 gusset sts on scrap yarn or stitch holder, leaving markers on working needles. Cast on 5 sts above thumb hole, between the markers, using the backward loop cast-on and work to end of rnd; 66 sts. Work 1 rnd without further shaping. On next rnd work to marker, rm, ssk, k1, k2tog, rm, work to end of round; 64 sts. Cont in patt as est.
Decreases for the top of the mitten begin on needles 3 and 4 on rnd 60 as charted. Note that chart shows all decreases on these two needles, and the written instructions only apply to needles 1 and 2! When you have completed Rnd 67 according to chart, there are 14 sts on needles 1 and 2 and 13 sts on needles 3 and 4.
On Rnd 68, start working decreases on needles 1 and 2 as foll: P1, *ssk, k6* twice, k2tog, k6, k2tog, p1, work to end of round according to chart; 12 sts on each needle. Work 4 rnds as established without further decreases on needles 1 and 2.
Rnd 73: P1, ssk, k5, ssk, k4, k2tog, k5, k2tog, p1, work to end of rnd according to chart; 10 sts on each needle. Work 1 round as est without further decreases on needles 1 and 2.
Rnd 75: P1, ssk, k4, ssk, k2, k2tog, k4, k2tog, p1, work to end of round according to chart; 8 sts on each needle. Work 1 rnd as est without further decreases on needles 1 and 2.
Rnd 77: P1, ssk three times, k2tog four times, work to end of round according to chart.
Rnd 78: P1, ssk, k1, k2tog twice, p1, work to end of round according to chart; 12 sts rem. K next round. Break yarn, thread through all sts and draw to close.
Thumb is worked with stitches divided on 3 DPN. Join yarn. Pick up and knit the sts on holder and an additional 8 sts above the thumb hole. Divide stitches evenly on 3 DPN; 9 sts on each needle. K18, ssk, k5, k2tog; 25 sts rem. K 1 round. K18, ssk, k3, k2tog; 23 sts rem. K 1 round. K 18, ssk, k1, k2tog; 21 sts rem. Redistribute stitches evenly on needles, 7 sts on each needle. Work stockinette stitch in the round without further increases until you reach a point approximately 1/4” less than the desired thumb length. On mittens pictured, full thumb length is approx 2.75”. *K2tog, work to end of needle* until 6 sts rem. Break yarn, thread through all sts and draw to close.
Right Mitten
Right mitten is worked like left mitten, but using right cabled rib chart for wrist and right mirror cable chart for back of hand.
Begin thumb gusset on same round as on left mitten, but place it as follows: P1, k1, pm, m1, k3, m1, pm, work to end of round as patterns as established. Work gusset between markers as on left mitten.
Work the rest of the mitten as described on instructions for left mitten, but following right mirror chart.
Finishing
Weave in ends. Soak mittens in warm water. Gently press away excess water and lay flat to dry,

About the Designer: Kristel Nyberg
Kristel Nyberg keeps her fingers warm in chilly Finland by knitting as fast as is possible while taking care of two children and a cat. Her
other hobbies include hoarding yarn and then knitting some more.
If you read Finnish, her blog can be found at , but to read about her knitting in English you should head to Ravelry, where her username is Kristel.
Pattern and images © 2008 Kristel Nyberg.


Do you, by chance, have a written pattern, rather than a chart? If not would you, for example when it comes to row 6, stitches 9-12, hold 2 stitches in front, then knit 2, purl 2?
I’m sorry – we don’t have written for a cable chart.
But, for Row 6, stitches 9-12
Sl2 sts onto cable needle and hold to front (it’ll be 2 knit sts), p2, k2 from cable needle.
ps – your question made me realize there was no legend so I’m uploading that now. Sorry about that!
Hi, I found this pattern very confusing to read. Is it possible for you to break it down a bit more (ex: row 1: p2 k2 until end of row)? I do not know how to read a chart and I’m finding it very difficult to find another format for this pattern. I really want to knit these but he lack of description is quite confusing.
Thank you.
I’m not sure what you mean by breaking it down a bit more. Are you looking for written directions for the entire chart? Or something simpler?
I love your pattern but am not familiar with your chart is their a key that tells what stitch the dark,light and vertical and horizontal lines mean? I would be happy to purchase the pattern with additional instructions
The pattern is free – I appreciate your offer but it’s free 🙂
Let me see if the designer made a legend.